

原图:

这类手写字体大家可以在我们的素材站下到:
素材站: http://www.wzfzl.com.cn/
素材站的中文字体下载地址: http://www.wzfzl.com.cn/html/font/cn/
制作教程!
打开原图,删除白色部分
1.
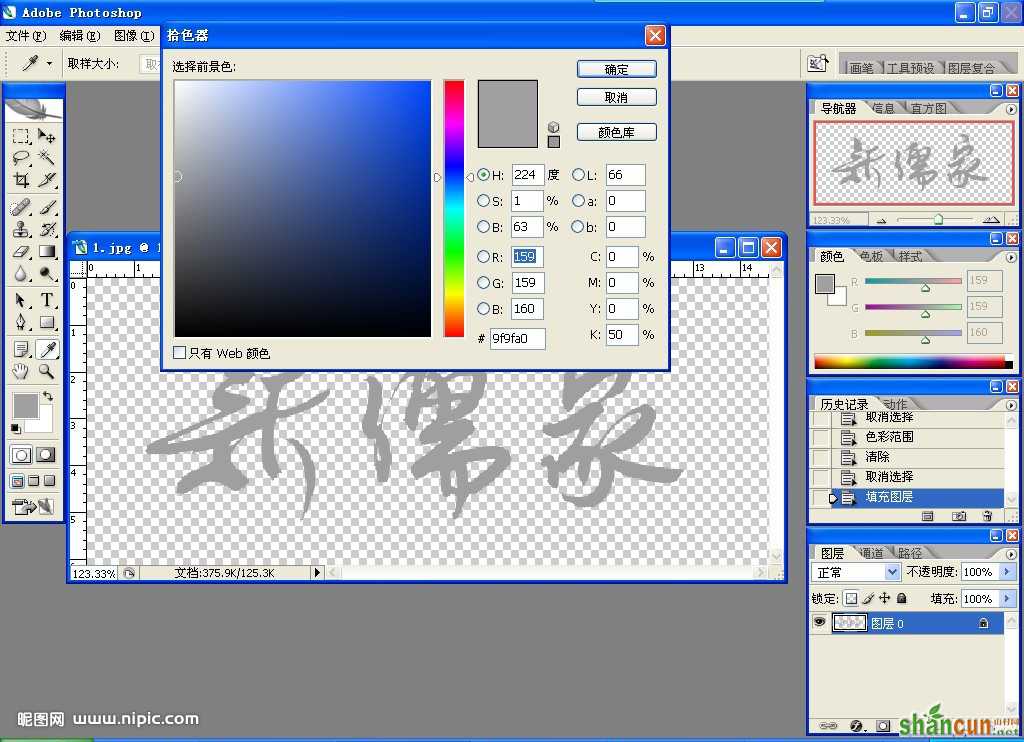
打开原图,删除白色部分,然后再给文字填充灰如图1
2.
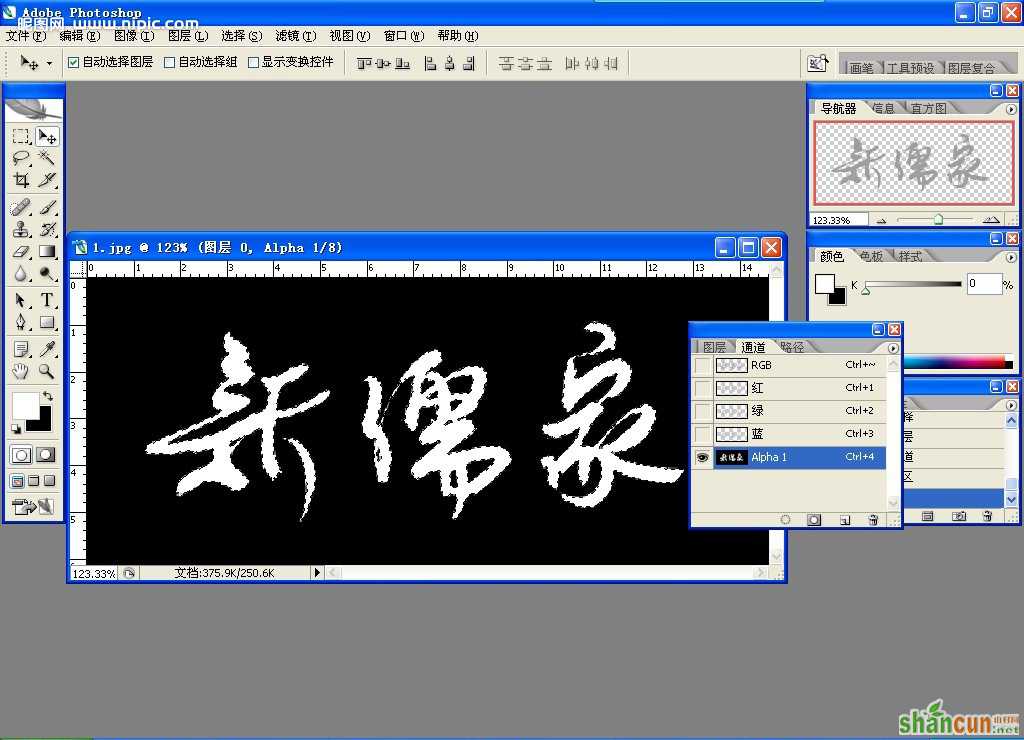
先在图层面版里按ctrl键选取文字,新建一个Alpha通道,在通道里把字体填充白色如图2
3.
先择通道面版Alpha通道,再菜单命令, 滤镜,模糊 高斯模糊,先择半径为5.0如图3
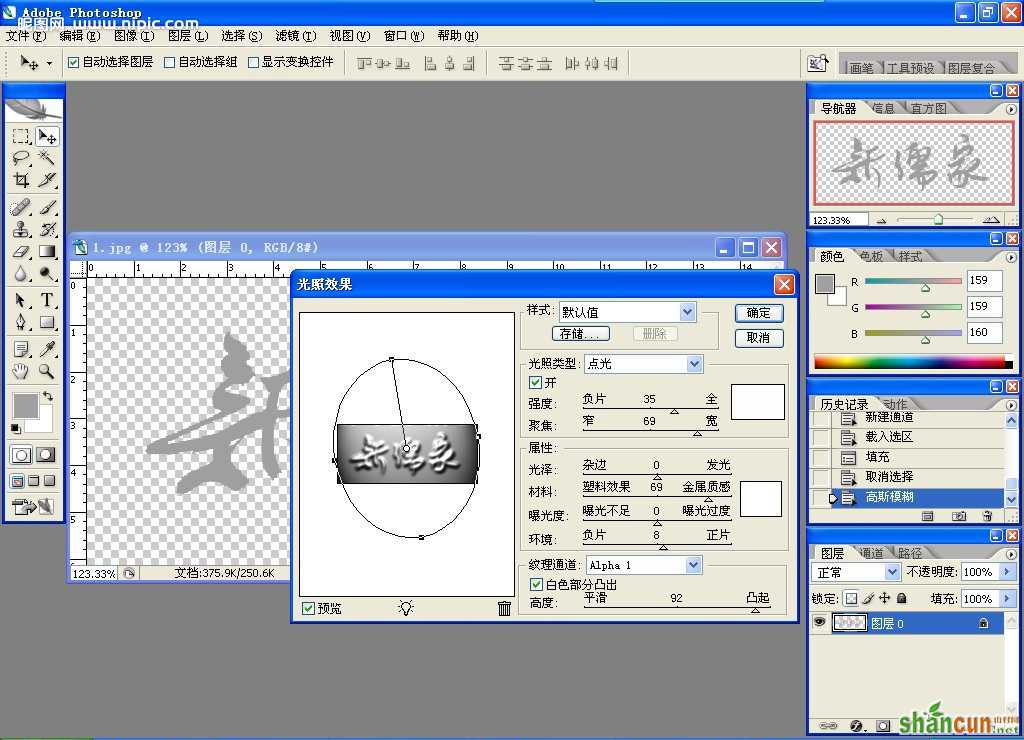
4.
先择图层面版,再菜单命令, 滤镜,渲染,光照效果,在(纹理通道)中先择Alpha通道,在下边高度和凹起右移动滑块达到90以上就可以,如图4
5.
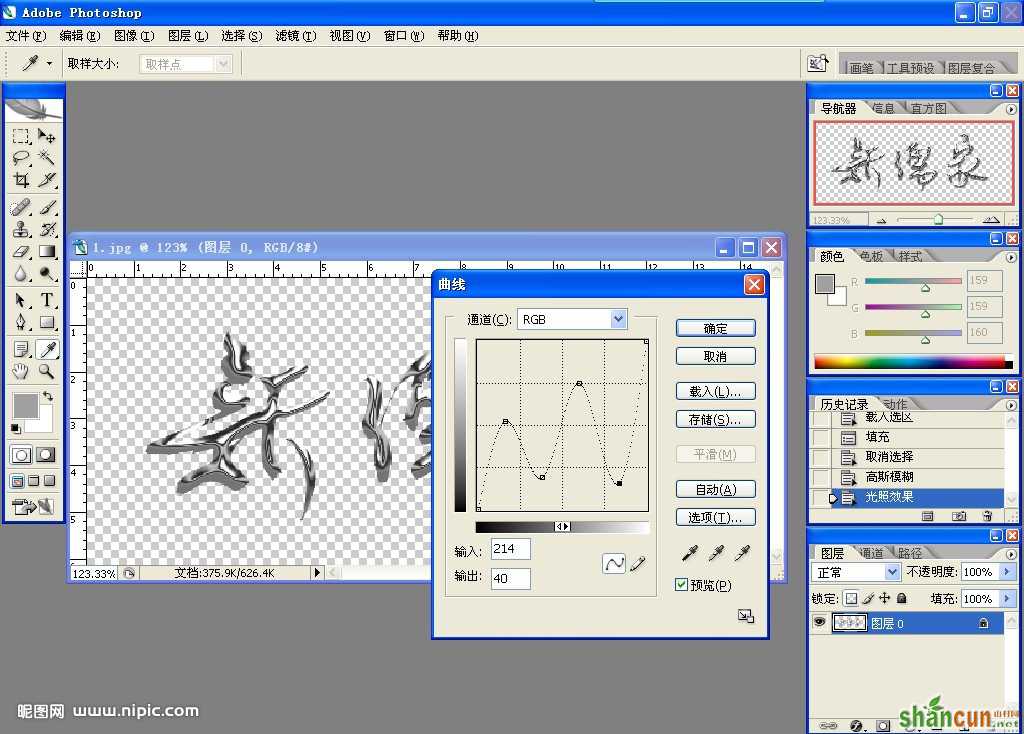
再按ctrl+m键进行曲线调整,如图5
6.
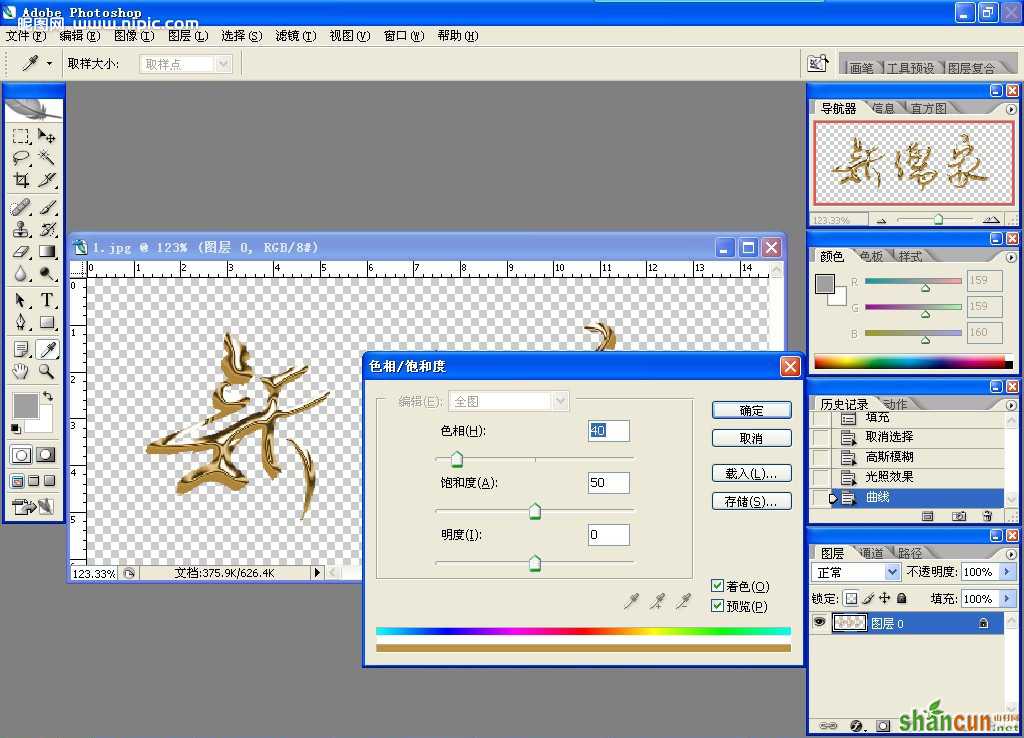
最后ctrl+u进行色像/饱和度调整,选择着色,参数如图6
完成了
看最终效果:

注:更多精彩教程请关注山村photoshop教程栏目,山村PS群:182958314欢迎你的加入


