
教程:
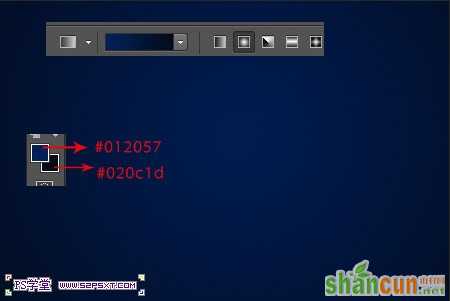
1.新建900*600px大小的文档,拉颜色#012057到#020c1d的径向渐变
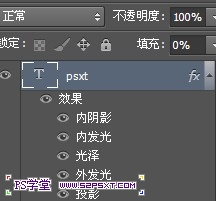
2.我们打上PS学堂的“PSXT”,这里字体我选择的是Friday13:

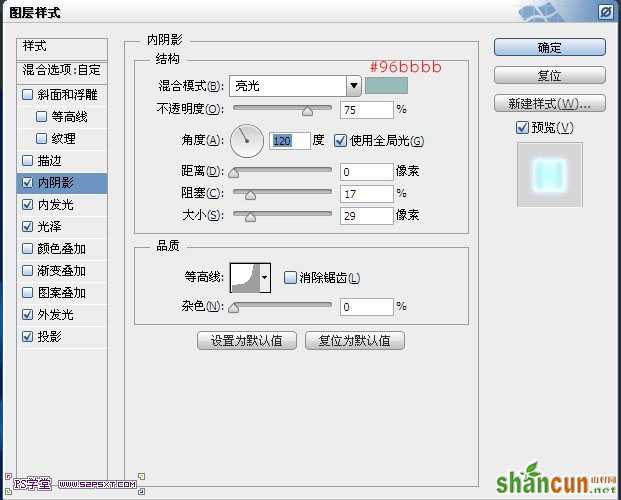
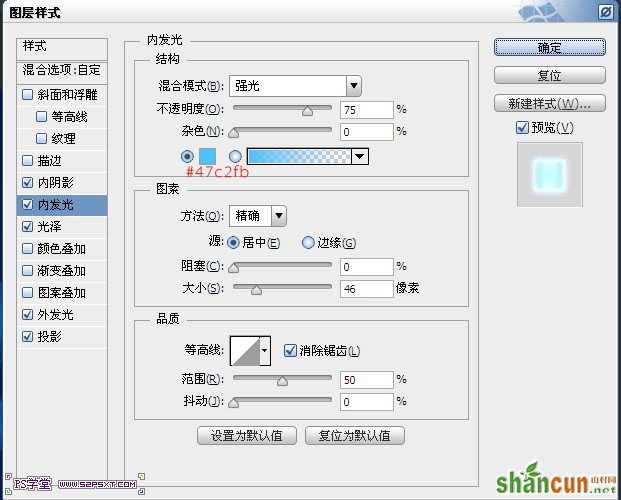
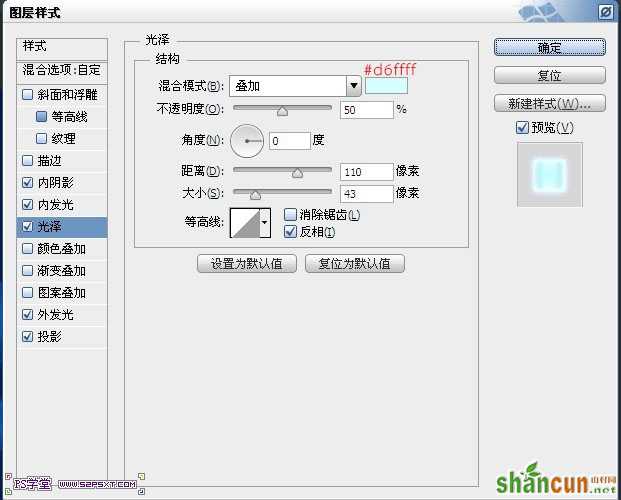
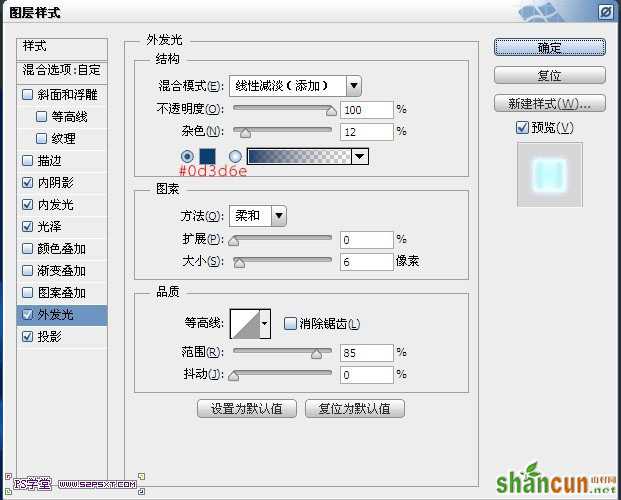
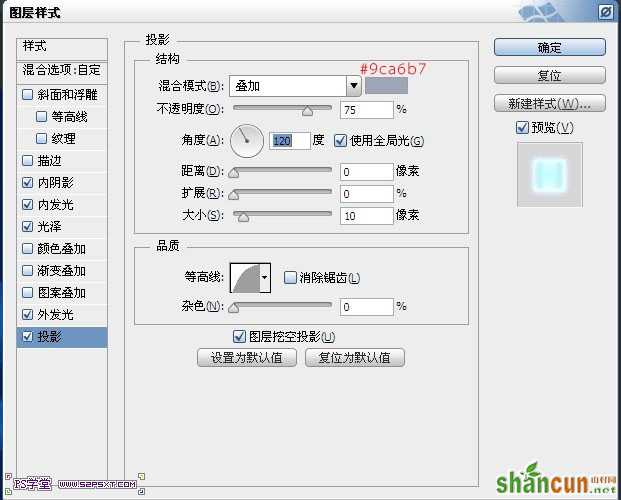
3.将字体图层填充改为0%,设置图层样式如下:

按住ctrl键点击副本图层,得到字体选区
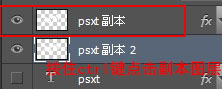

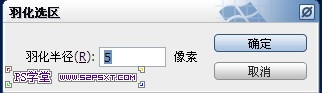
选择--修改--羽化5px,delete键删除(确保此时你是在副本2上面进行的操作),ctrl+D取消选区


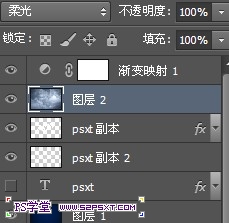
6.在所有图层最上面新添调整图层--渐变映射颜色从#131d2f到#11263a,改图层模式为柔光。

7.最后我们拉入云彩素材,放到映射图层下方,摆放好位置,改图层样式为柔光
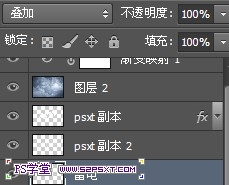
8.新建图层“雷电”,图层模式为叠加,放在字体图层下方。我们预设管理器导入我们素材中的雷电笔刷,用颜色#ebebeb在字体周边画出雷电效果,最后用柔软画笔将字体上面的擦拭干净,完工。
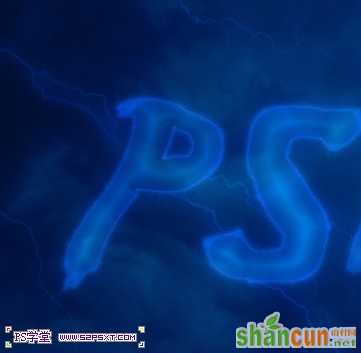
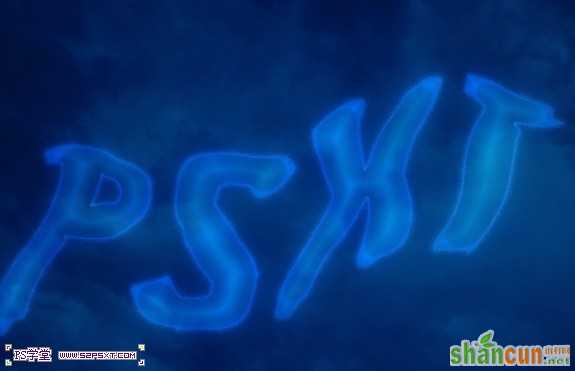
完成效果图啦。。
注:更多精彩教程请关注山村photoshop教程栏目,山村PS群:182958314欢迎你的加入


