
如何用Photoshop制作水晶纹理字
最终效果

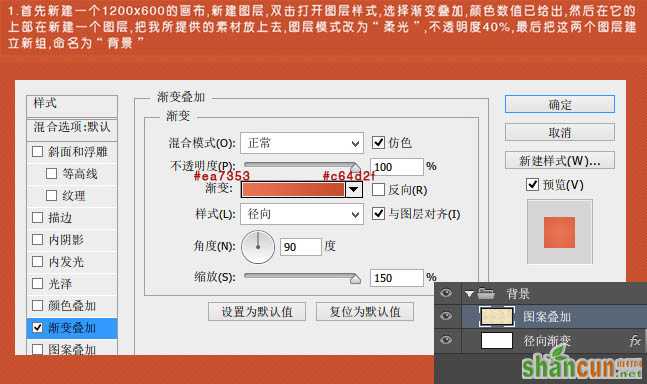
1、首先新建一个1200 * 600的画布。新建图层,双击打开图层样式,选择渐变叠加,颜色设置如下图。
新建一个图层,打开花纹素材,拖进来,混合模式改为“柔光”,不透明度40%。
<点小图查看大图>
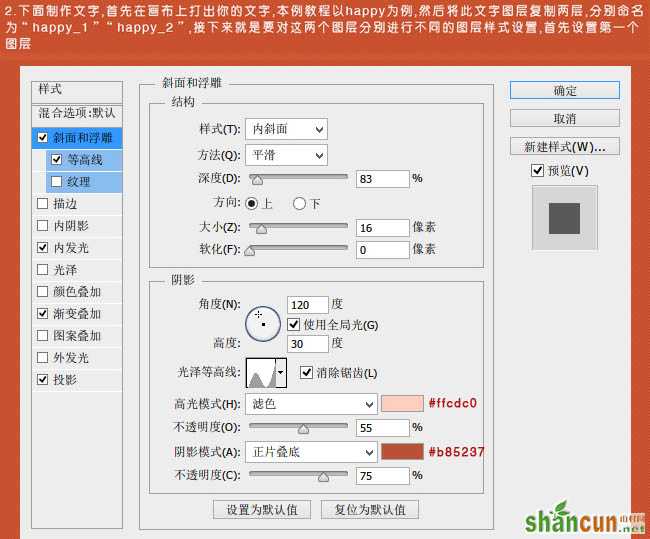
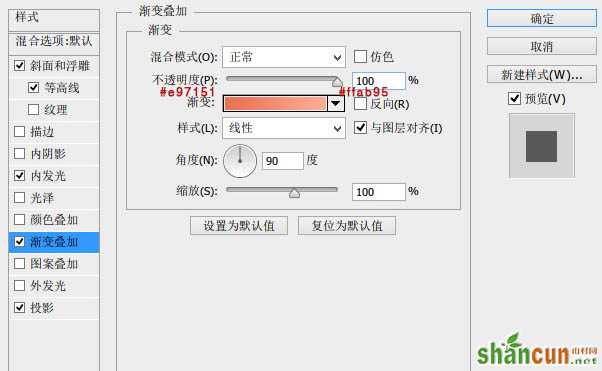
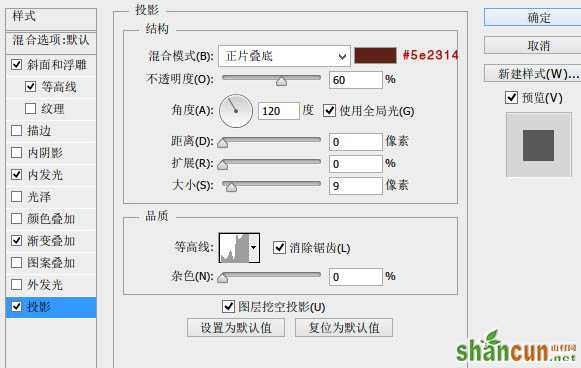
2、下面制作文字。首先在画布上打出你的文字(点这里下载字体),本例教程以“Happy”为例。然后将此文字图层复制两层,分别命名为“Happy_1”,“Happy_2”,接下来就是要对这两个图层分别进行不同的图层样式设置,首先设置第一个文字图层“Happy_1”,参数设置如下图,确定后把填充度改为:0%。
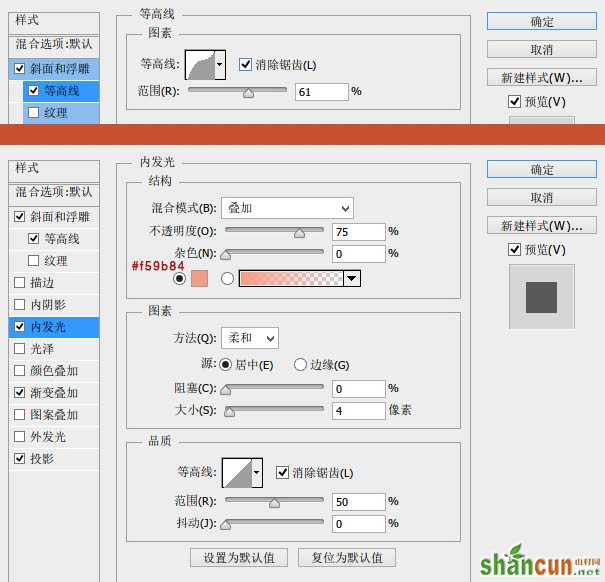
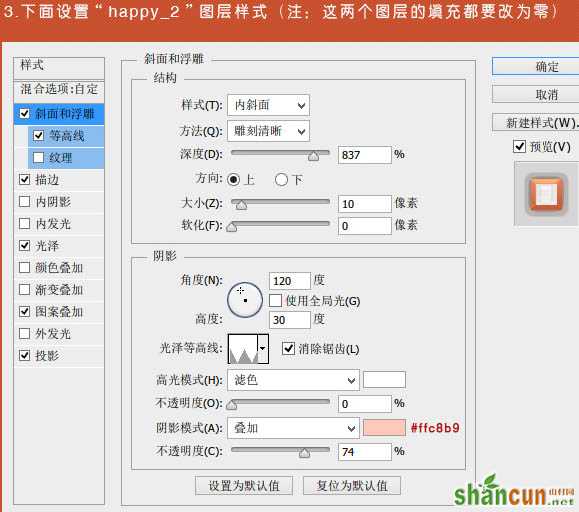
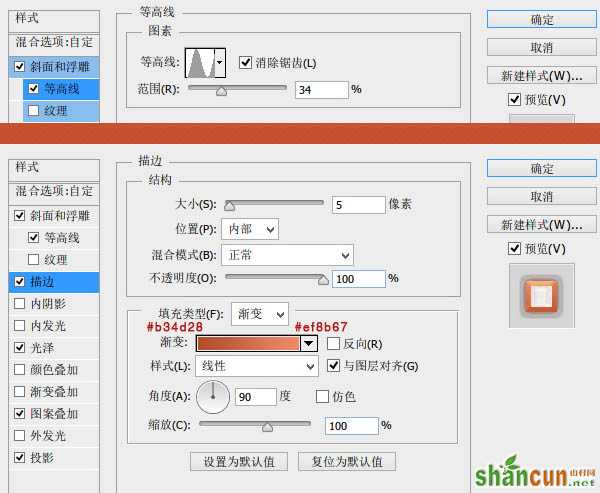
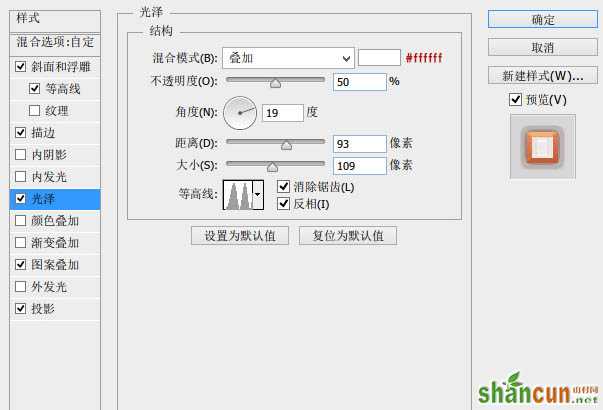
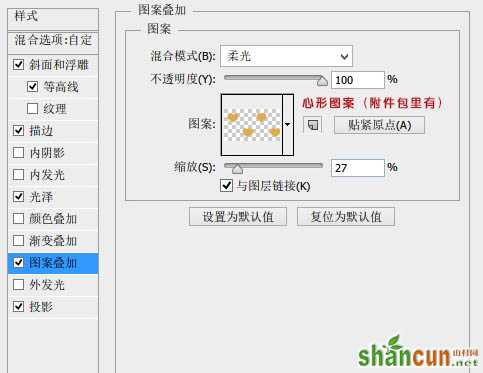
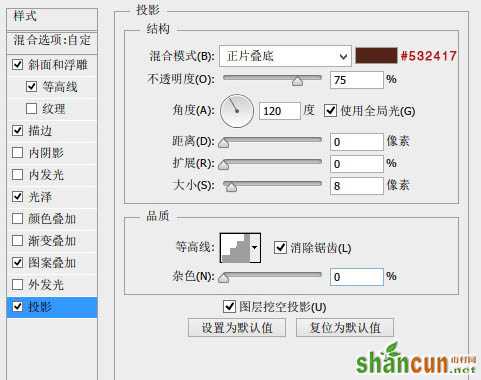
3、下面设置“Happy_2”图层样式(点这里下载样式中用到的图案),参数设置如下图,确定后把填充度改为“0%。
4、现在文字效果已经呈现在大家眼前了,但它还不够质感,所以我们用星光笔刷点缀一下高光,主意要调整不同的大小,这样文字效果就会更加具有质感了。

最终效果:

更多知识请关注 山村ps教程 栏目
相关推荐
Photoshop怎么绘制黄金字体
PS怎么打造金属文字
Photoshop蓝色字特效


