
PS怎么裂纹文字效果
最终的效果。

另外的版本
我们开始吧!
完成这个教程,你需要以下的素材
1.Grunge Brushset(破旧笔刷)
2.Font
3.Crack Brushset
Step 1
创建一个新的文档,大小在1200px*800px,填充背景图层颜色为黑色,创建一个新层,名叫“banckground texture”,在背景图层上面,然后我们开始画一些纹理背景,用我们刚刚下载的笔刷“grunge brush”
首先,我们想加载笔刷到Photoshop中,按下键盘上面的“B”键,选择画笔工具,并且按照下面截图所示的步骤。
1. 点击旁边的向下箭头画笔形状/大小
2. 点击右边的“画笔”调板右上角的箭
3.点击“加载画笔”的按钮
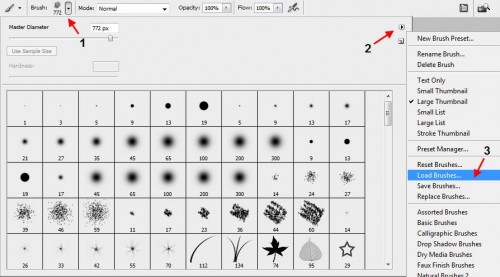
在此之后,你会看到一个弹出的窗口,这个窗口中将会显示你所加载的笔刷,如下图所示。

(黄亮部分则是我们刚刚加载的)
现在我们有了一套破旧纹理的笔刷,去创建我们的背景质地。在 “background texture” 层 ,我么使用这些加载的笔刷,并且绘制一些不规则的图案在上面。
(提示:不要坚持一个笔刷,试试它们的组合和调整不同的笔刷设置,如流量和不透明度,也许你会得到不一样的效果)
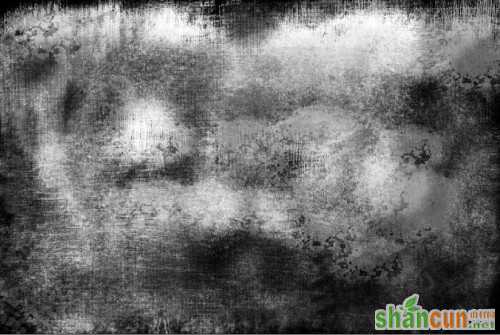
这个就是我使用破旧纹理所画出的效果。
Step 2
现在我们有了一个很凌乱蹩脚感觉的背景。键入一些文字上在上面,使用我们在本教程开始下载的字体,

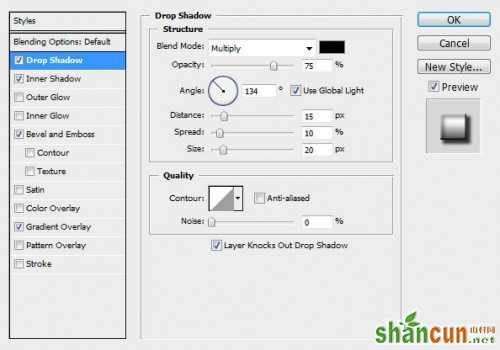
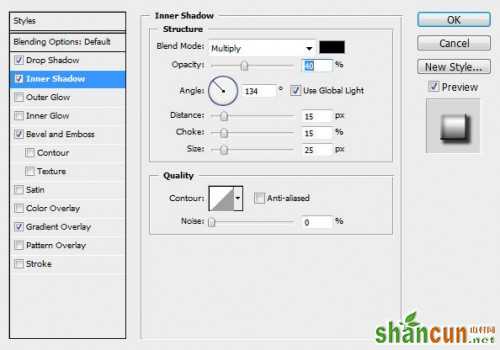
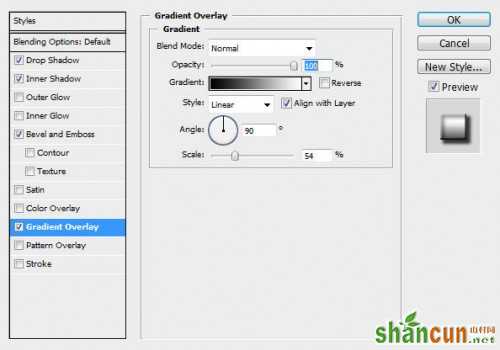
在这个文本层上中,请套用下列的图层混合选项:
阴影
内阴影
斜面和浮雕

渐变叠加(提示:你可以调整渐变的位置,按住左键不放,便可拖动)
现在你得到的效果如下

复制这个文本层,使文字看起来更粗壮和浑厚:

Step 3
按住ctrl键,选择文本图层的选区, (如果你不知道如何操作, 可以看看以前的教程) ,创建一个新层,叫做“crack texture”. 保持选区蚂蚁线的存在, 加载 “Crack brushset” 到 Photoshop ,在“crack texture” 层, 有选区的位置,笔刷一遍。
你会看到,因为我们选择一部分选区,裂纹纹理只出现在选择范围内:

复制 “crack texture” 图层然后改变此图层的混合模式为正片叠底(加色模式,暗的更暗),裂纹的纹理将变暗。
给裂纹创造一些更多的变化,我们可以添加一些更多的层,每个层,从画笔面板中使用不同的裂纹纹理,并设置图层混合模式为“叠加”。
您可以添加许多层如你所愿,在这里我增加两个层裂纹纹理之后的效果:

Step 4
现在我们可以添加一些颜色在文字上面,选择文字的选区,创建一个新层在这些图层的最顶层,叫做“colour overlay”层
这里有点棘手,我想实现一些色彩的变换,所以我使用套索工具,并且设置10px的羽化,按住“alt”键,减去文字的上部。
保持蚂蚁线,选择一个颜色,然后使用一个软笔刷,绘制颜色在选区里面。

再次加载文本层,在以前的颜色叠加层之上创建一个新层,这时候选择较浅的颜色和柔软的刷子,画在上部的文字,

Step 5
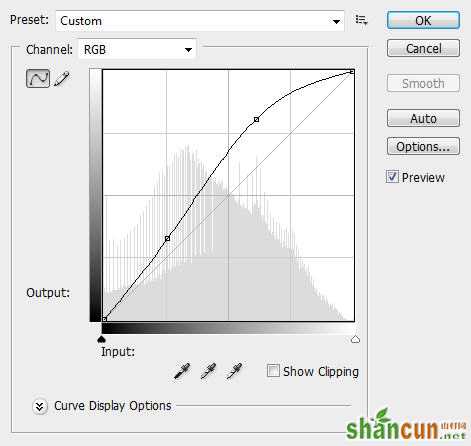
现在我们可以添加调整图层,
整体效果带来了一些色彩对比度和亮度的变换。我添加了以下两个调整图层(图层>新建调整图层> …)
色阶
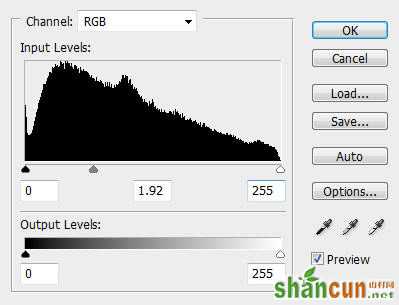
曲线
这里是最后的文本效果:

ok了本教程基本结束,!当然,您也可以添加一些自己的质感效果,并看看有什么样最终结果!请记住要始终保持你的自己的的创造力!

更多知识请关注 山村ps教程 栏目


