
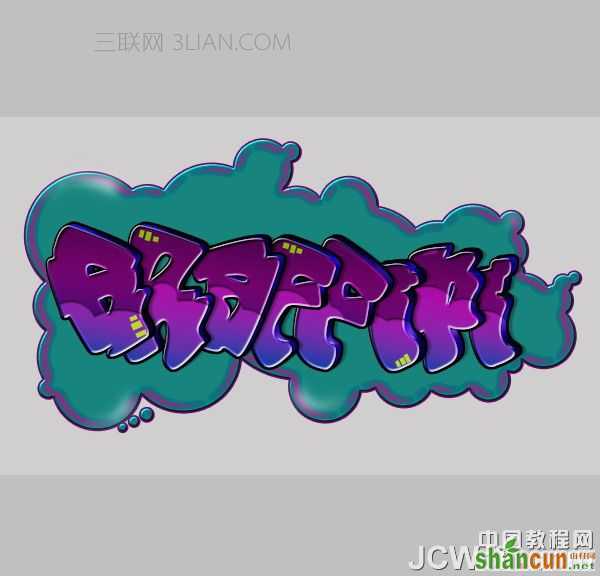
这篇教程介绍了ps怎么做涂鸦字的方法。为了增强文字的个性,字体需要自己去设计,然后再逐个文字去增加质感和立体感。下面一起来看具体操作步骤吧!
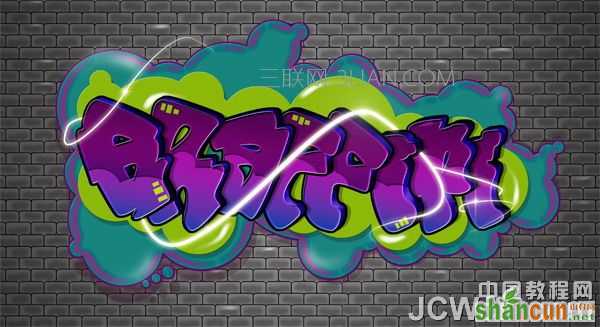
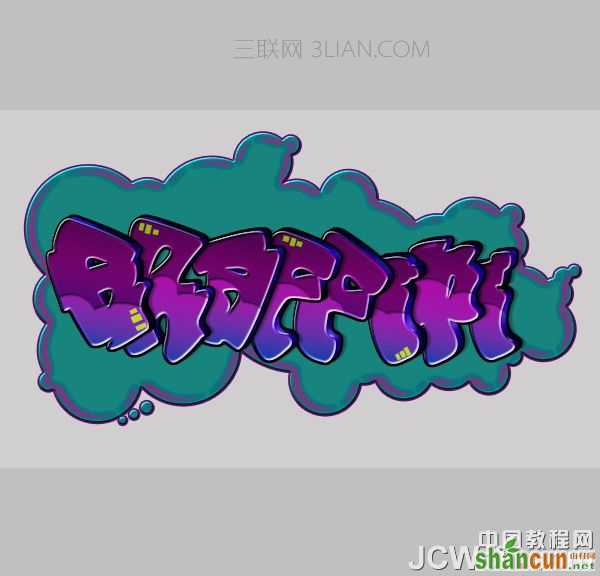
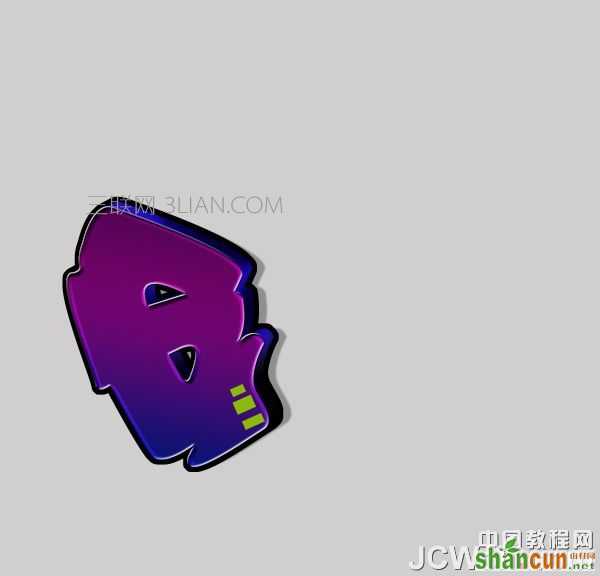
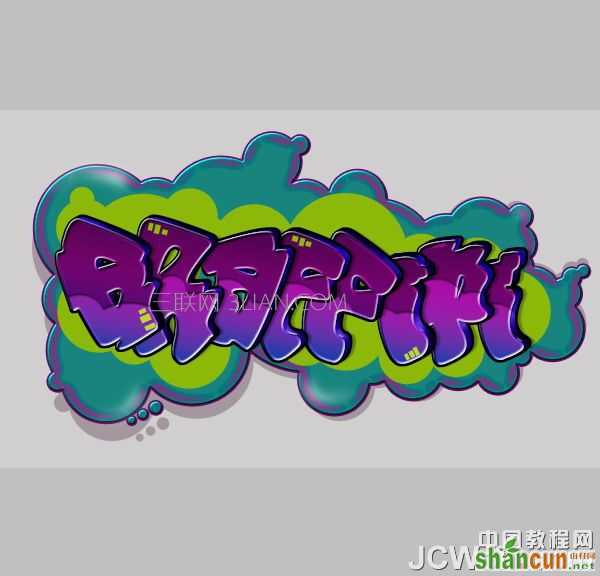
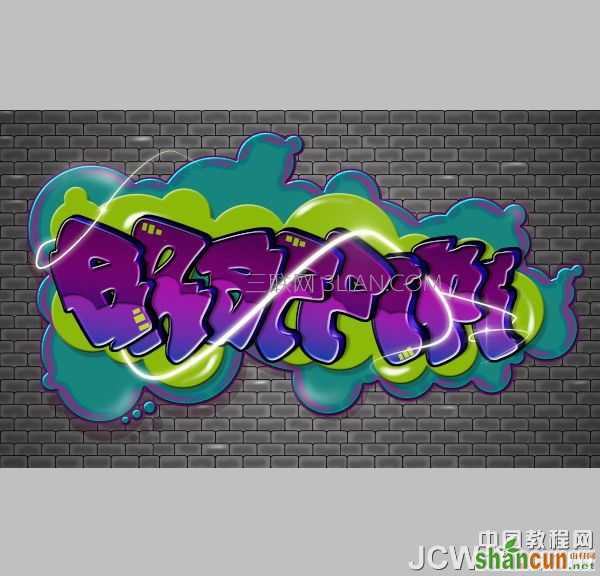
最终效果
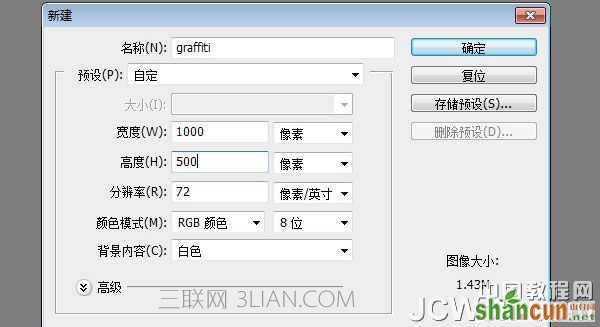
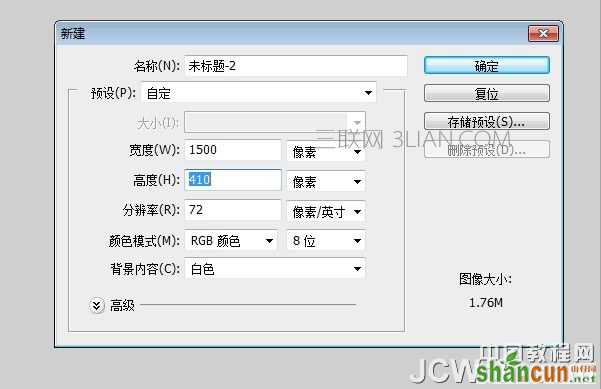
1、文件>新建,创建一个新的1000x500像素的文件。
2、选择背景层,使用油漆桶工具,填充颜色#D0CFCF。

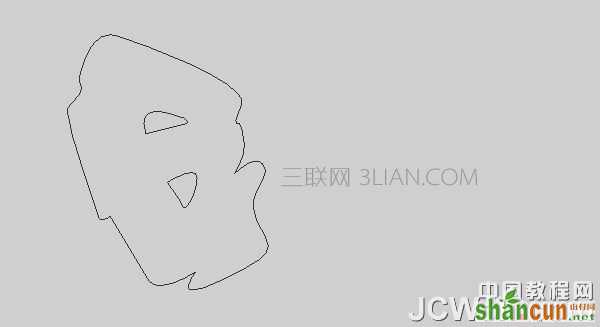
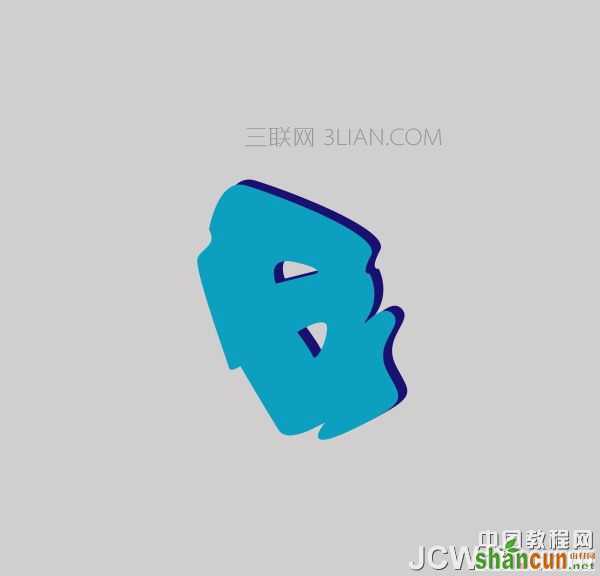
3、现在我们用文本创建一个新层,可以去网上找些卡通类的字体,或自己设计一个去做,这里创建了一个,进入我的电脑和扫描的草图。 下一步,用你的钢笔工具,使一个字母。 我用的是“graffiti”一词,中文的意思就是涂鸦。
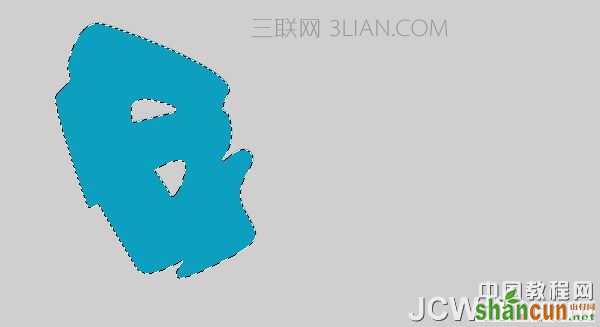
4、选择路径(右键单击进行选择)用颜色填充。
5、命名此层。 这一层起名为“G”。 复制这一层,产生一个G副本层。 双击此的“G副本”层,在弹出的图层样式对话框中,改变颜色。
6、然后使用箭头键移动的“G副本”层向上5PX和移动8或9个像素。
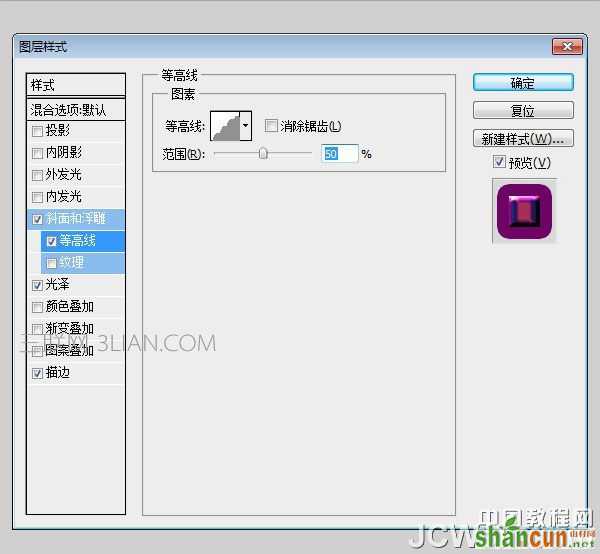
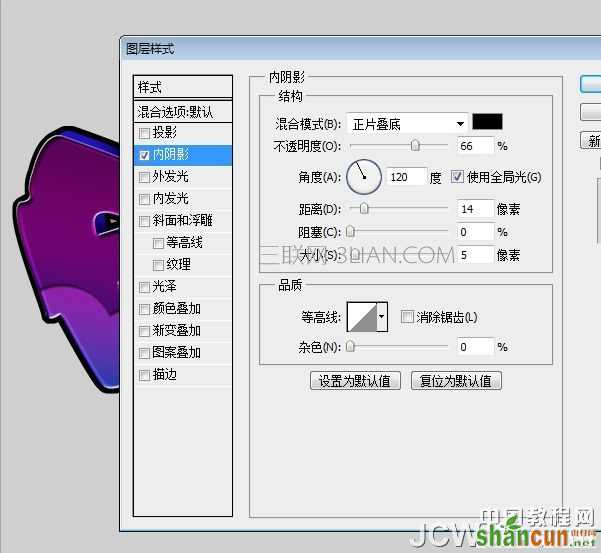
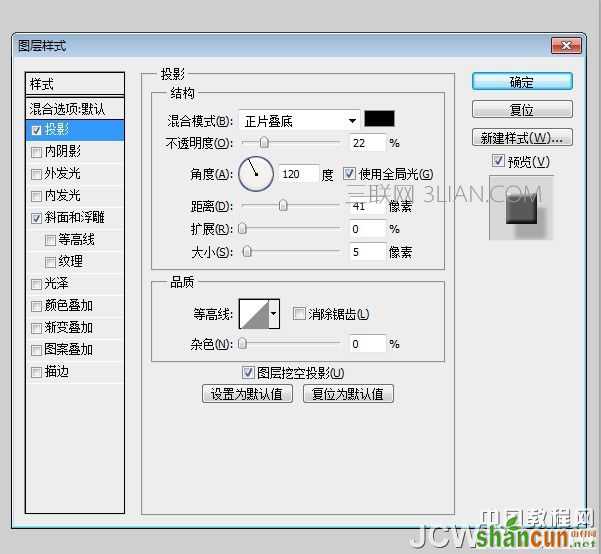
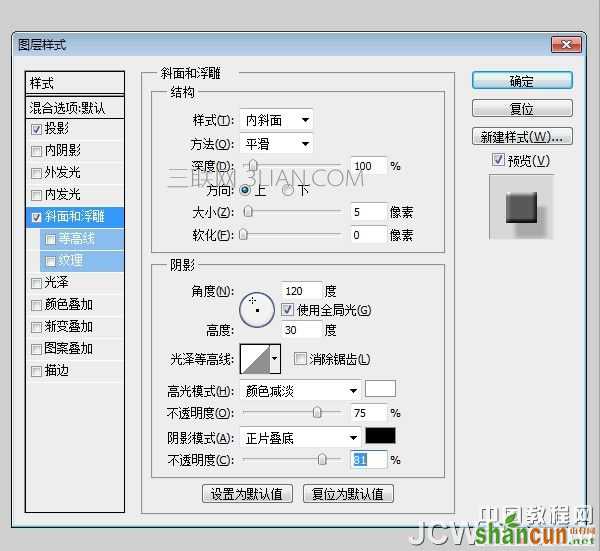
7、对原有的“G”层添加图层样式,制作一个内阴影。
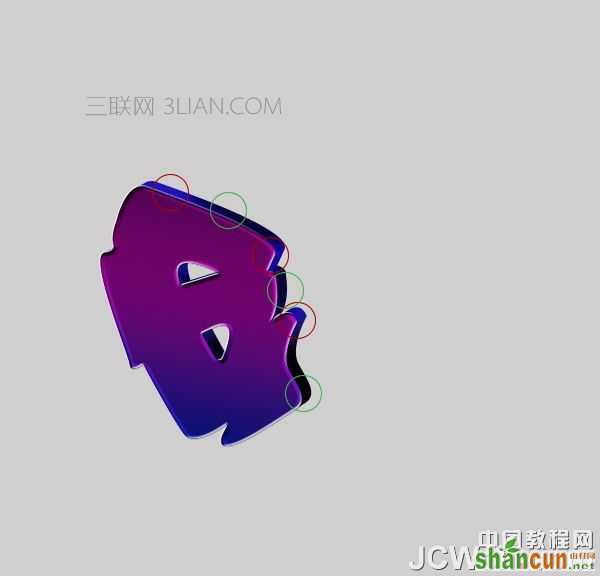
8、在图层面板选择“G副本”层,图层菜单>图层样式>创建图层。 选择图层使用加深工具或减淡工具,是图层中的G字部分地方变暗或减淡。 注:绿色圆圈用加深工具,红圈用减淡工具。
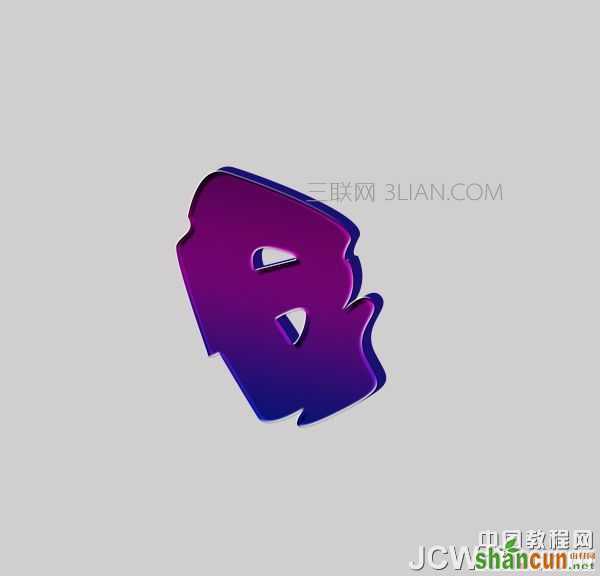
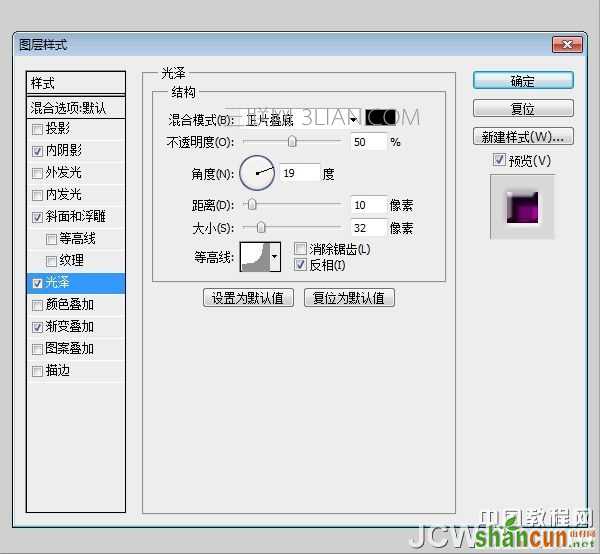
9、在“G副本”层中添加阴影。
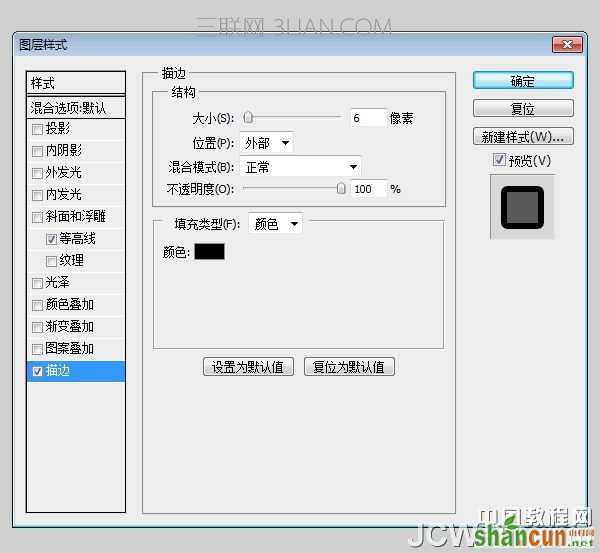
10、选择“G副本”层再次制作一个副本。 然后,在新图层中,编辑>描边。
11、创建一个新层,并重新命名为“窗口”,并用选择工具制作一个窗口,在窗口上填充颜色#8cb809。
12、现在我们将添加的亮的区域,创建一个新层,用钢笔工具创建的地方突出显示的区域。 用颜色#FFFFFF填充。
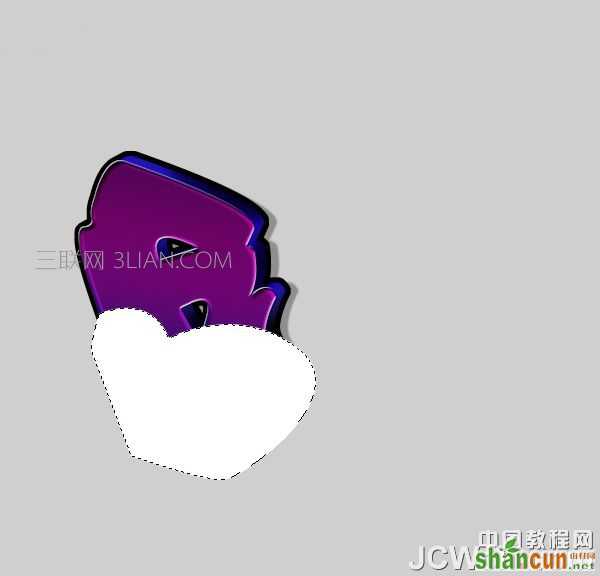
13、删除不必要领域。 按住原“G”和“G副本”图层(按住“CTRL + ALT键,选择框层的名字旁)选取框选择 选择>反选,然后删除,我们看我们刚才加亮的区域还在选择状态。
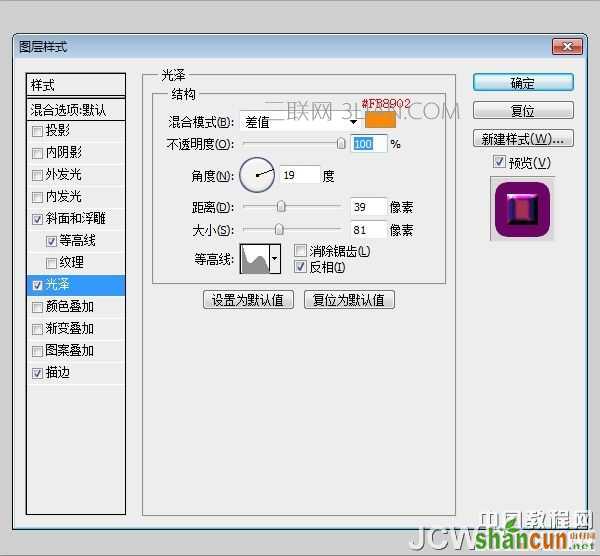
14、改变这层“柔光”,并添加图层样式(图层>图层样式>内阴影)。
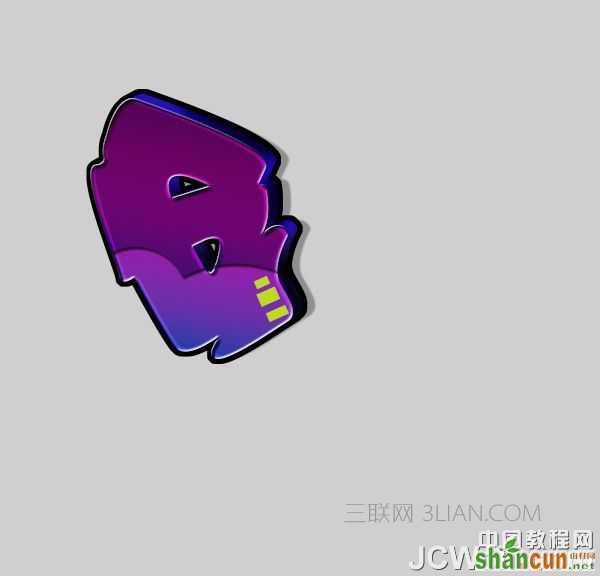
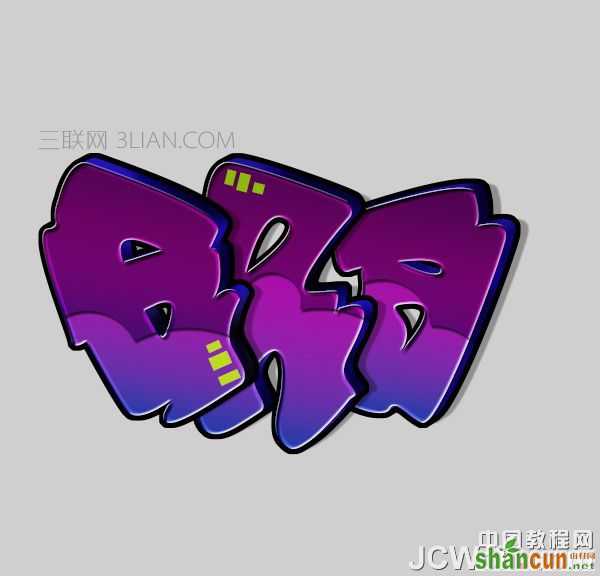
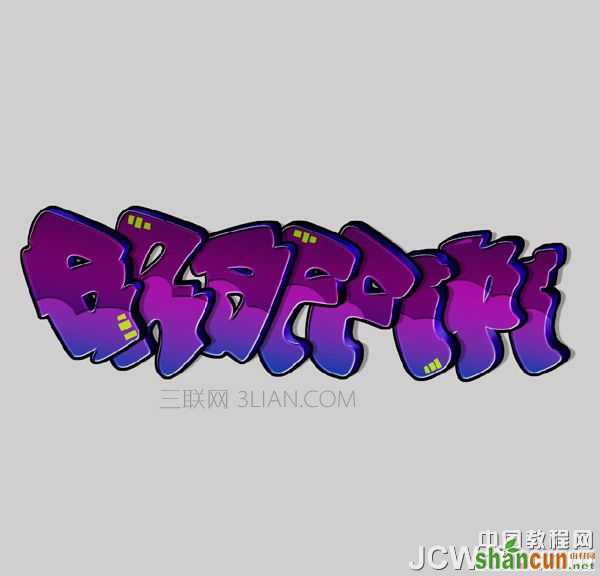
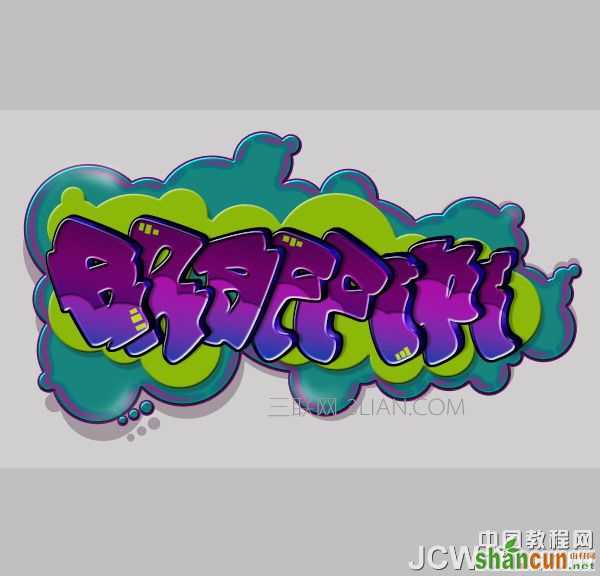
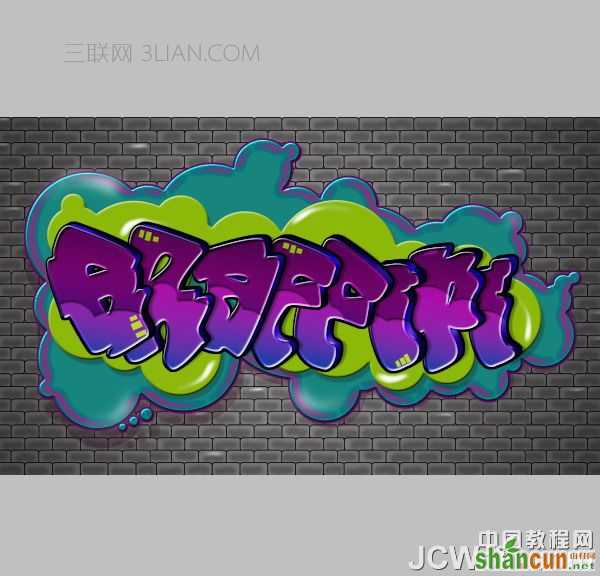
15、其余字母重复这些相同的步骤。


16、创建一个新层,其重命名为“云”。 放置我们刚才制作的图层下这一层。 拿起你的画笔工具,并使用不同大小的圆圈,以创建云。 我用颜色#e40480。 完成后复制这一层。
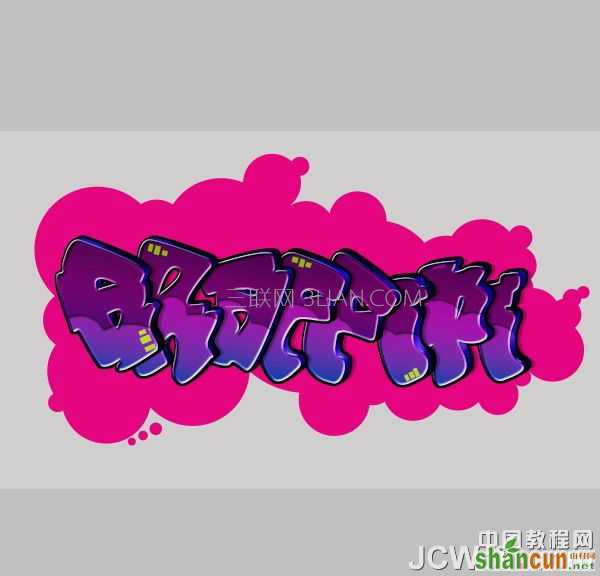
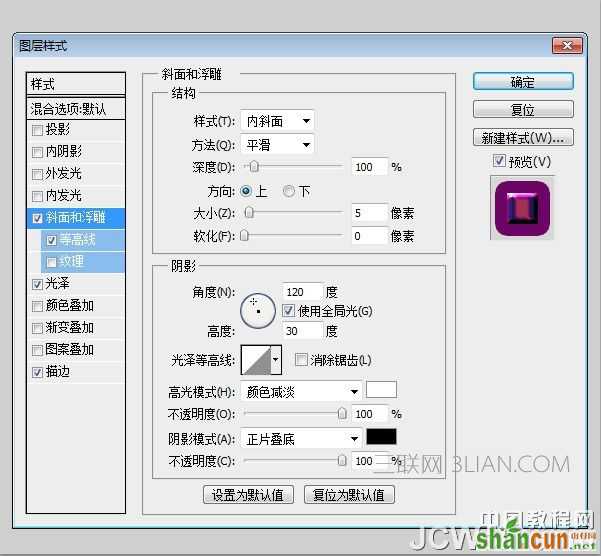
17、这些图层样式添加到原图层(图层>图层样式>斜面和浮雕)。
18、创建一个新层在云层之上,用颜色#FFFFFF设置为低的不透明度画笔刷云层亮的位置。
19、在“云副本”层,原云层下方将改变这层的不透明度为27%。 使阴影显示。
20、设置大小不同的圆形笔刷,并创建一个云创建一个新层。 颜色设置为#8cb809。
21、图层样式添加到这一层。
22、创建一个新层,用涂抹工具添加一些闪亮的小亮点到这个云层。

23、现在创建背景。 首先创建一个新的文档。
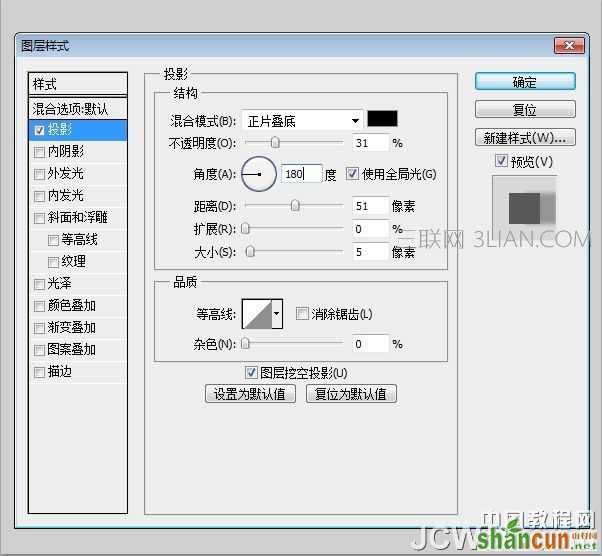
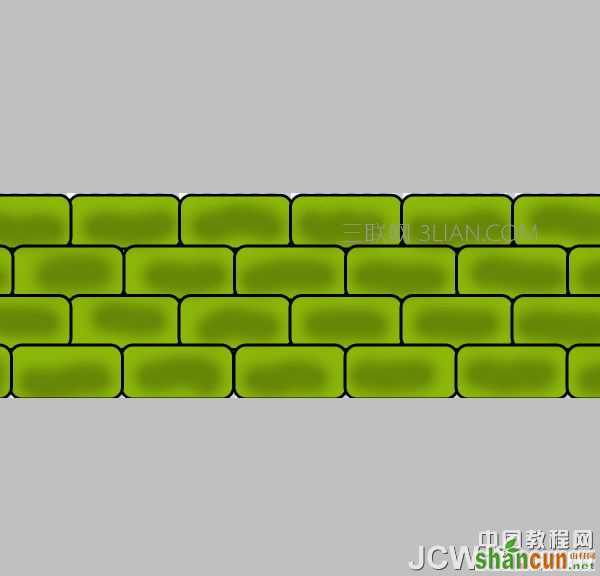
24、使用圆角矩形工具,画一个矩形。 颜色#8cb809 半径:21px。
25、在图层样式面板设置描边。
26、多个重复的砖。 注意:确保重叠的砖块,以便没有白色背景漏出来。
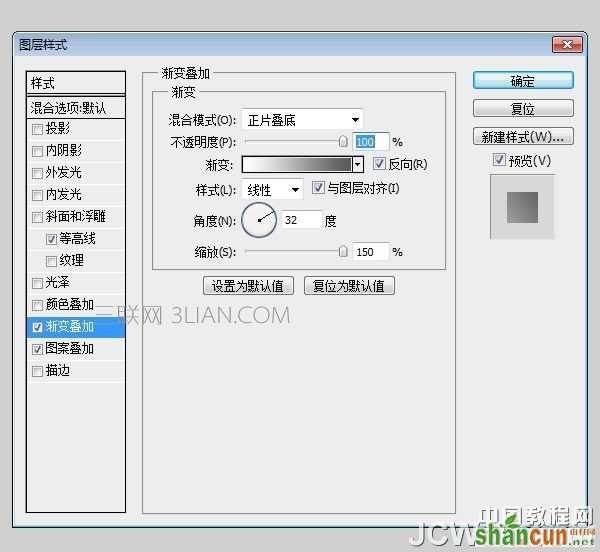
27、创建一个新层,用 60px#000000软画笔刷阴影砖。 层的不透明度为27%。
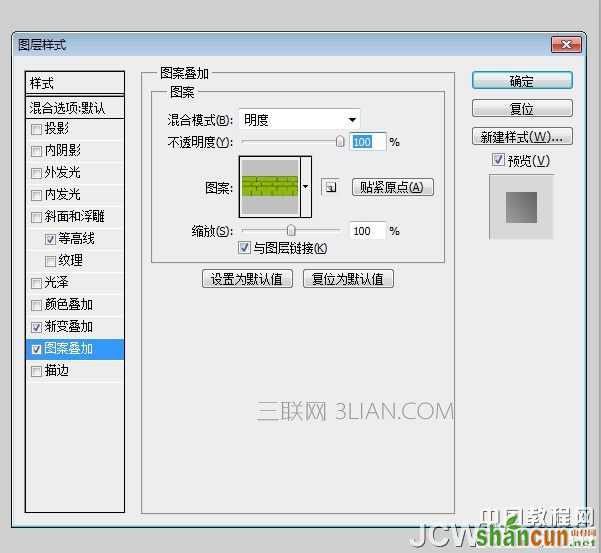
28、编辑>定义图案,并将它命名为砖,单击“确定”。 然后云层下方创建一个新层。 用#FFFFFF填充层。 改变这层填充为0%。 设置图层样式。
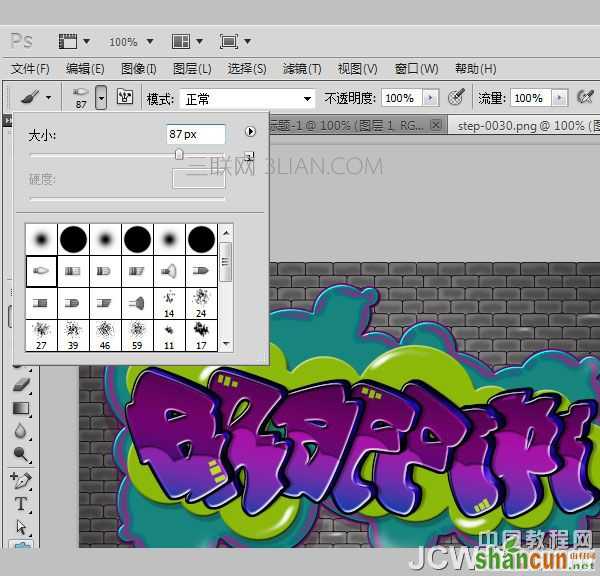
29、创建一个新层,并随机增添亮点。
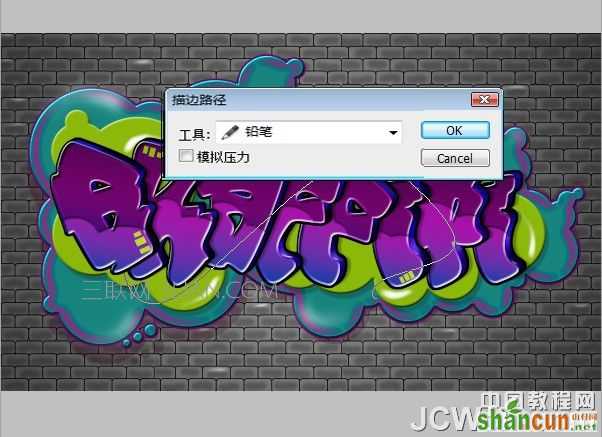
30、创建一个新的文本层,使用钢笔工具。 设置画笔工具87px。
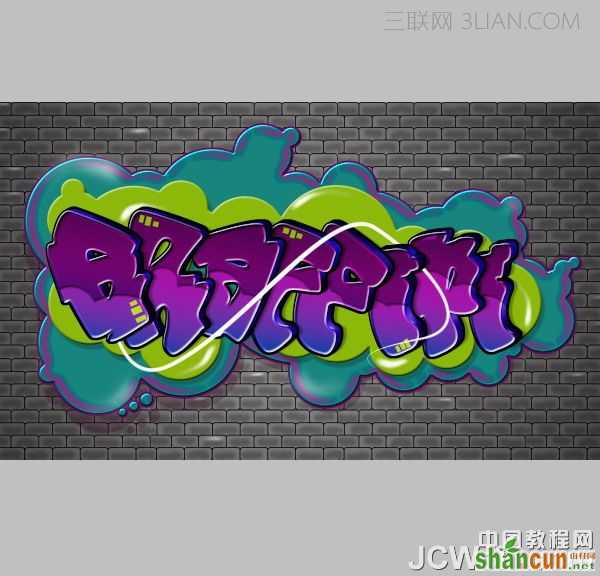
31、创建了光条,用钢笔工具,右键单击路径描边路径(确保“模拟压力”复选框被选中)。
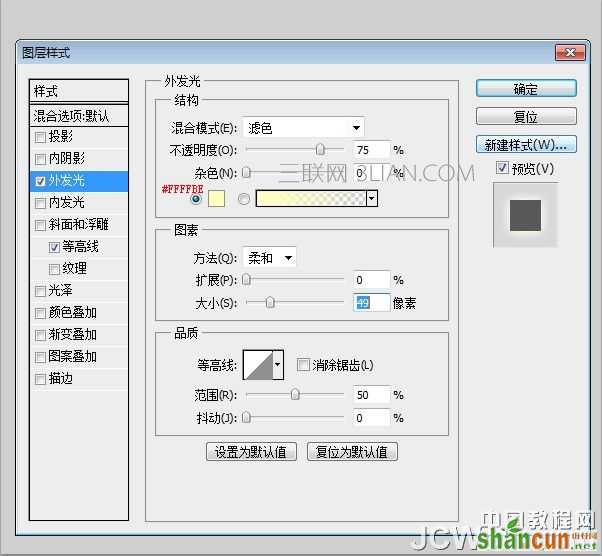
32、添加外发光。
33、创建另一个光条。
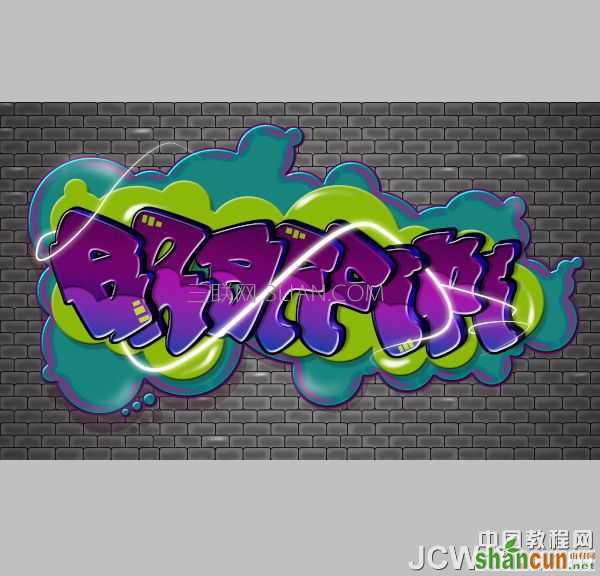
34、创建一个新层,并添加一些闪光星,使用下载的笔刷刷。
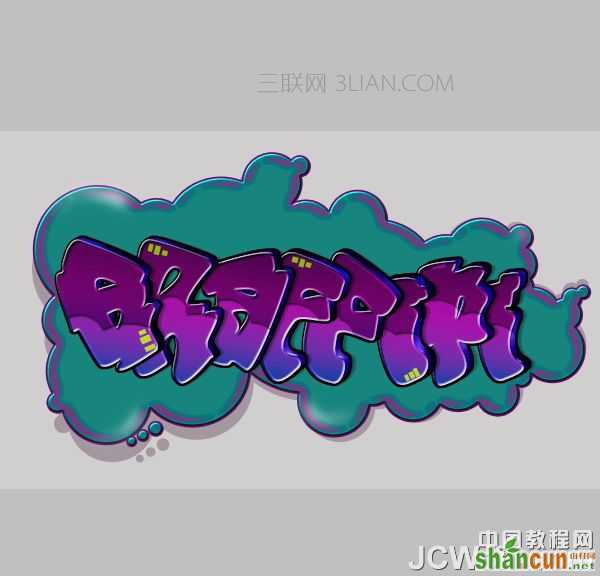
最终效果:


