
车子的构造非常复杂,在绘制的时候需要先分解出每一部分的构件,然后按照一定的顺序,把各个组件画好,然后拼贴在一起并调整细节,最后加上阴影及背景即可。
最终效果
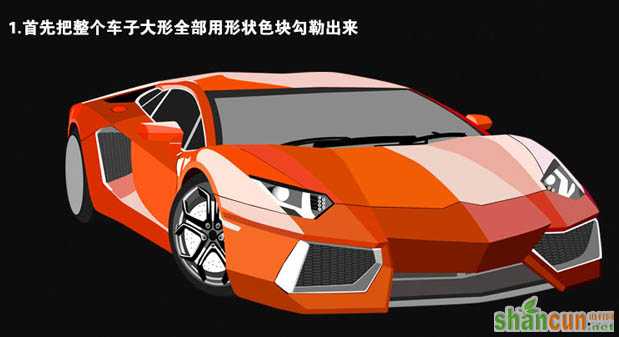
1、首先把整个车子大形全部用形状色块勾勒出来。
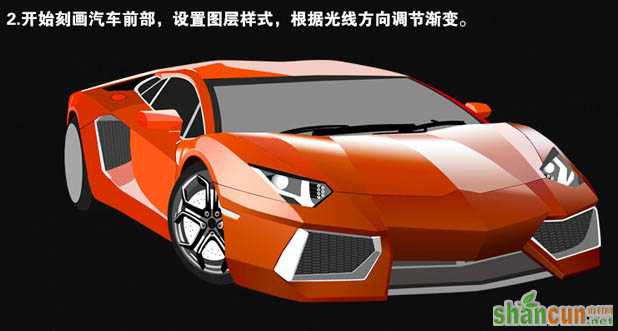
2、开始刻画汽车前部,设置图层样式,根据光线方向调节渐变。
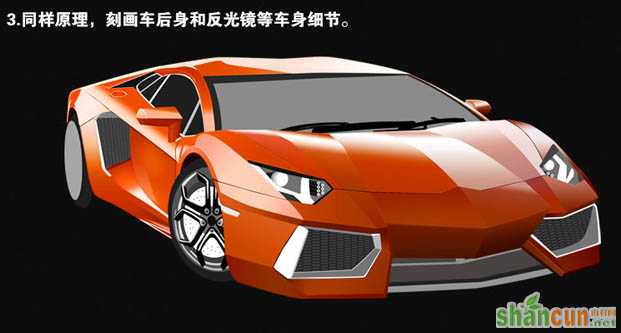
3、同样原理,刻画车后身和反光镜等车身细节。
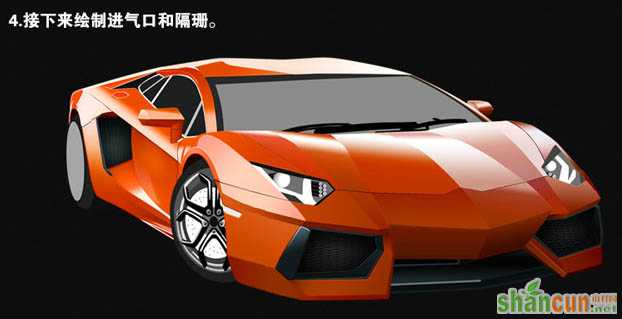
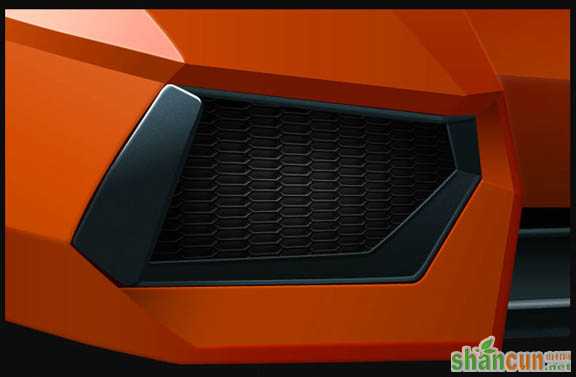
4、接下来绘制进气口和格栅。
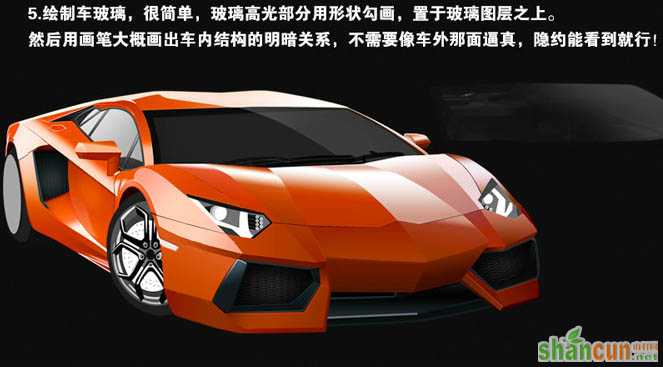
5、绘制车玻璃,很简单,玻璃高光部分用形状勾画,置于玻璃图层之上。然后用画笔大概画出车内结构的明暗关系,不需要像车外那面逼真,隐约能看到就行。
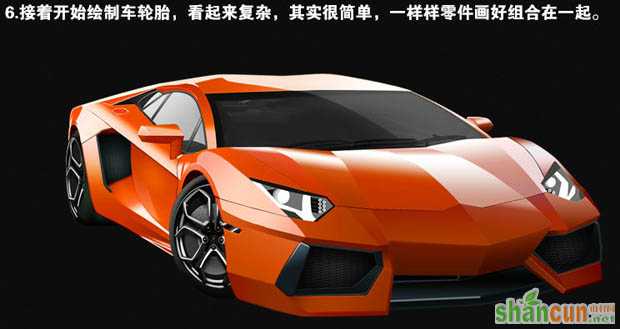
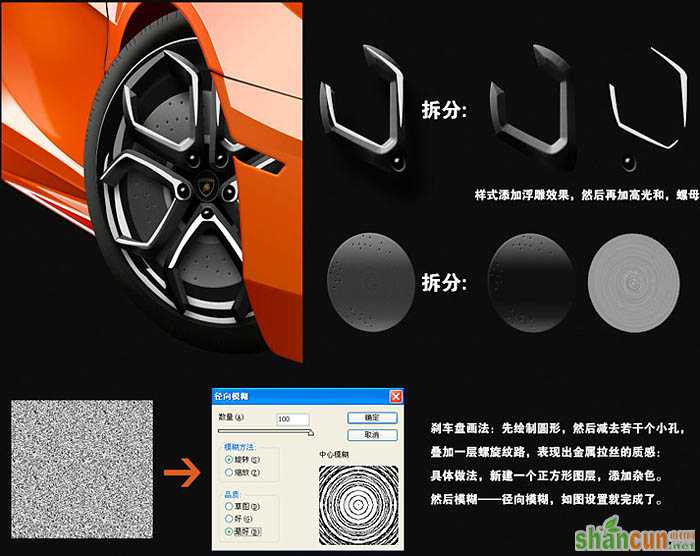
6、接着开始绘制车轮胎,看起来复杂,其实很简单,一样样零件画好组合在一起。
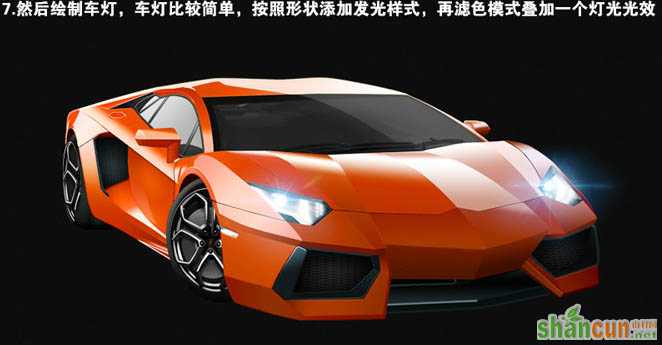
7、然后绘制车灯,车灯比较简单,按住形状添加发光样式,在滤色模式叠加一个灯光光效。
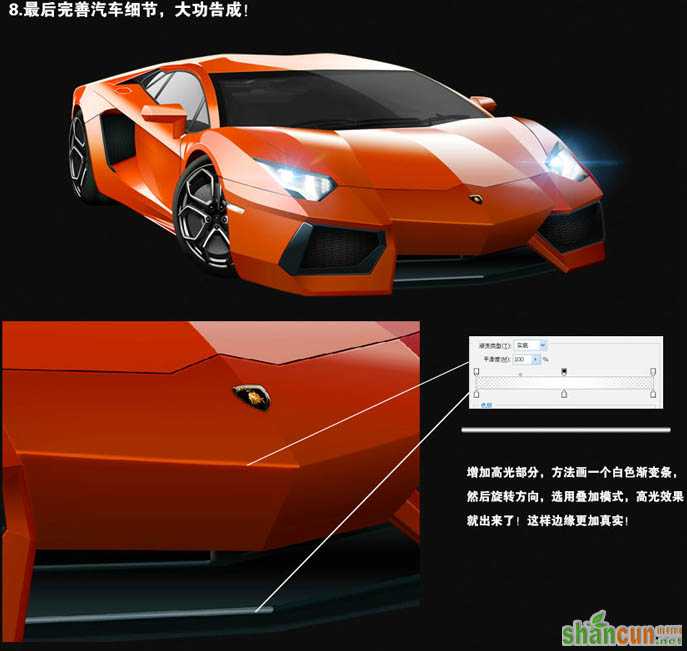
8、最后完善汽车细节。
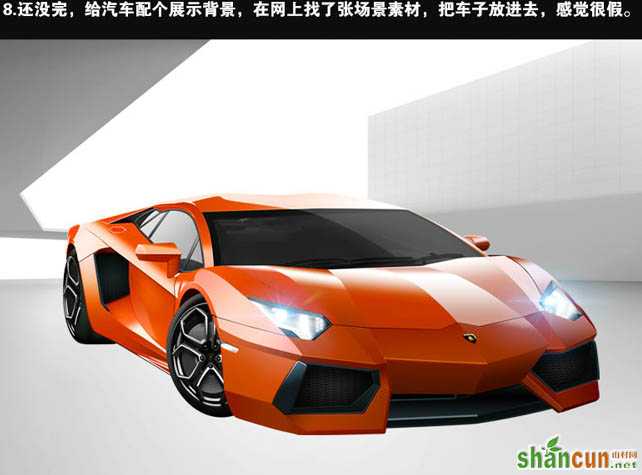
给汽车配个展示背景,在网上找了场景素材,把车子放进去。
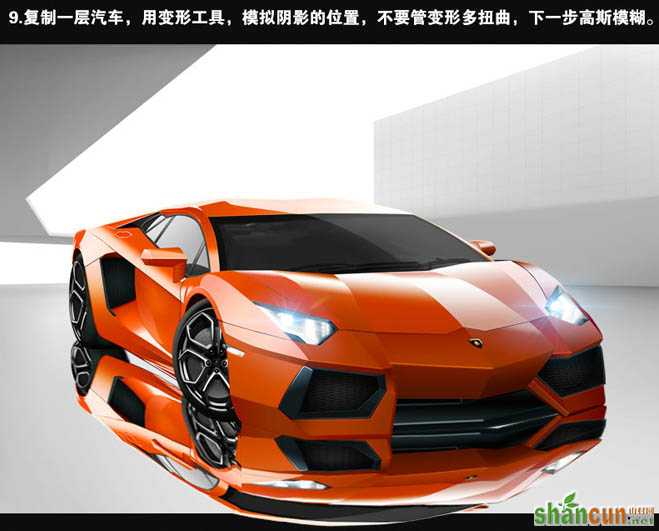
9、复制一层汽车,用变形工具,模拟阴影的位置,不要管变形多扭曲,下一步高斯模糊。
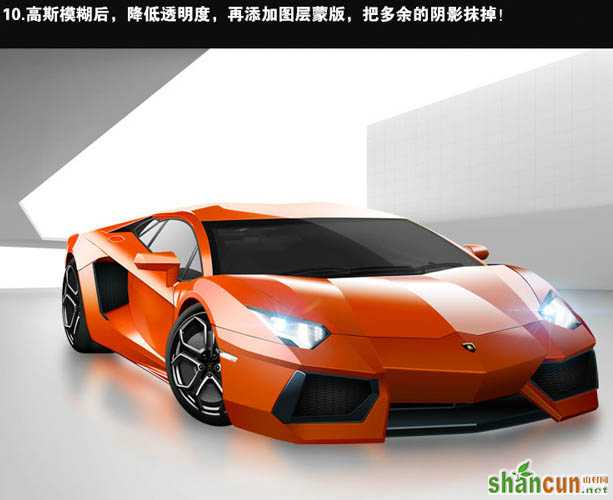
10、高斯模糊后,降低透明度,再添加图层蒙版,把多余的阴影抹掉。
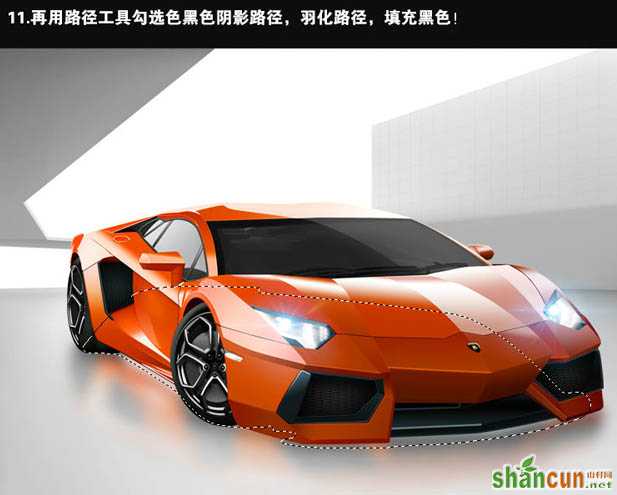
11、再用路径工具勾选黑色阴影路径,羽化路径填充黑色。
12、最后加上标志,完成最终效果。
注:更多精彩教程请关注山村photoshop教程栏目,山村PS群:339853166欢迎你的加入


