
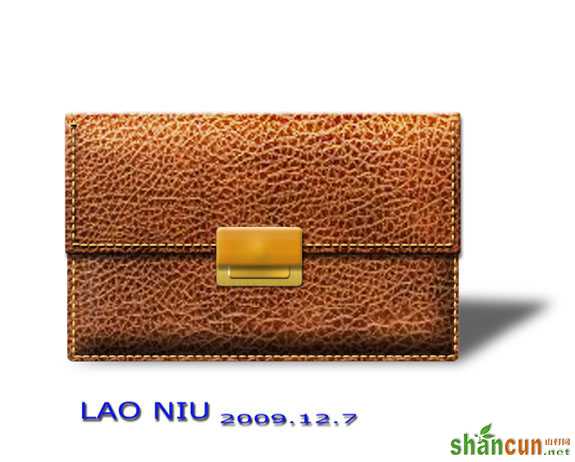
最终效果
 nmousewheel="return bbimg(this)" onload="javascript:resizepic(this)" border="0"/>
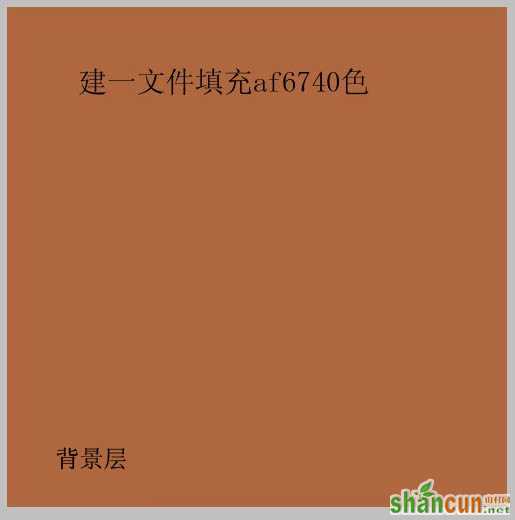
1、新建一个大小适当的文档,背景填充颜色:#af6740。
 nmousewheel="return bbimg(this)" onload="javascript:resizepic(this)" border="0"/>
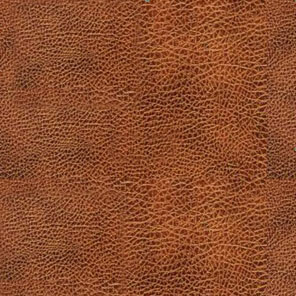
2、打开下图所示的纹理素材,拖进来,如果不够大的话,可以多复制几份拼贴在一起。
 nmousewheel="return bbimg(this)" onload="javascript:resizepic(this)" border="0"/>
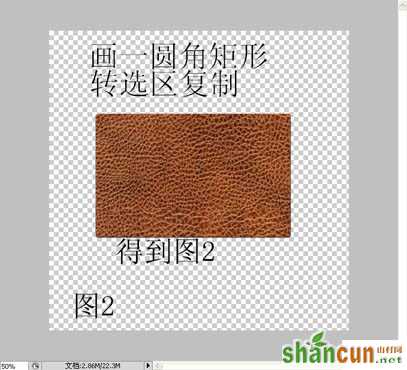
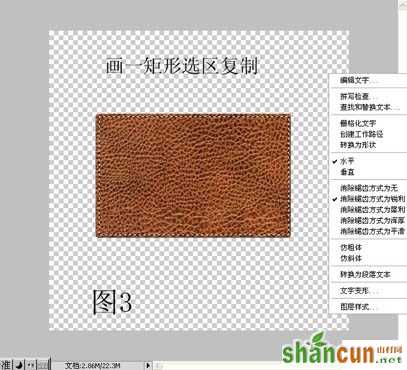
3、用圆角矩形工具拉一个圆角矩形,转为选区后按Ctrl + J 把纹理复制到新的图层,再把背景图层隐藏,效果如下图。
 nmousewheel="return bbimg(this)" onload="javascript:resizepic(this)" border="0"/>
4、用矩形选框工具拉一个较小的矩形,按Ctrl + J 复制到新的图层。
 nmousewheel="return bbimg(this)" onload="javascript:resizepic(this)" border="0"/>
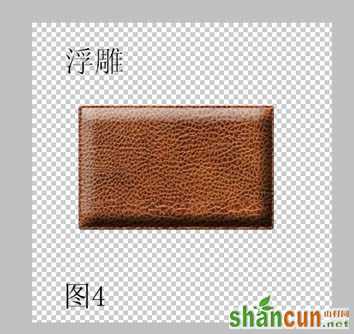
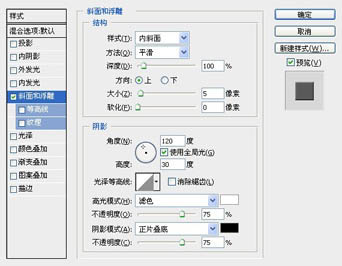
5、双击图层调成图层样式,设置斜面与浮雕,参数及效果如下图。
 nmousewheel="return bbimg(this)" onload="javascript:resizepic(this)" border="0"/>
 nmousewheel="return bbimg(this)" onload="javascript:resizepic(this)" border="0"/>
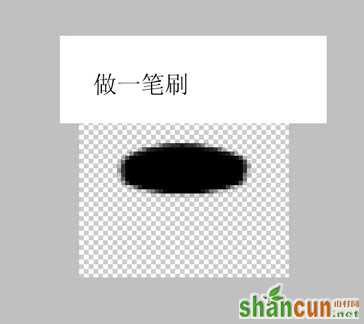
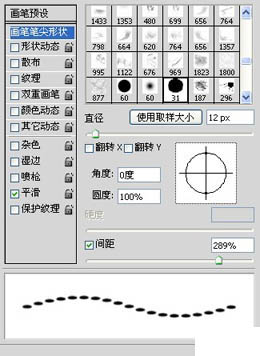
6、新建一个透明文档,大小适当,用椭圆选框工具画一个较小的椭圆选区,填充黑色,然后执行:编辑 > 定义笔刷。
 nmousewheel="return bbimg(this)" onload="javascript:resizepic(this)" border="0"/>
7、调成浮雕图层选区,回到路径面板,把选区转为路径,回到图层面板,新建一个图层,右键路径用刚才做的笔刷描边路径。做出包的缝纫线,再加点浮雕效果。
 nmousewheel="return bbimg(this)" onload="javascript:resizepic(this)" border="0"/>
 nmousewheel="return bbimg(this)" onload="javascript:resizepic(this)" border="0"/>
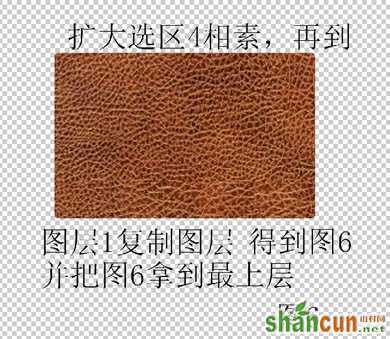
8、调成浮雕图层选区,选择菜单:选择 > 修改 > 扩展,数值为4,然后把纹理图层显示出来,按Ctrl + J 复制纹理,按Ctrl + Shift + ] 把复制出来的纹理置顶。
 nmousewheel="return bbimg(this)" onload="javascript:resizepic(this)" border="0"/>
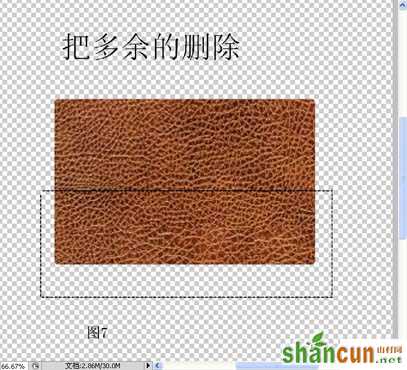
9、用矩形选框工具选取,纹理的下半部分,按Delete删除。
 nmousewheel="return bbimg(this)" onload="javascript:resizepic(this)" border="0"/>
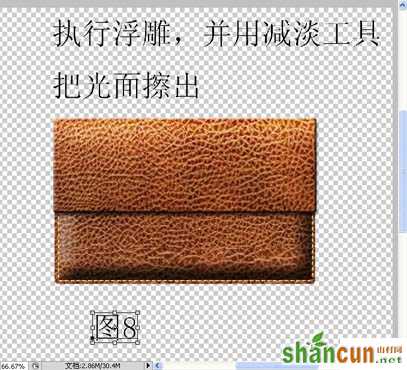
10、加上浮雕效果,可以复制之前的样式,确定后用减淡工具把高光部分擦出来。
nmousewheel="return bbimg(this)" onload="javascript:resizepic(this)" border="0"/>
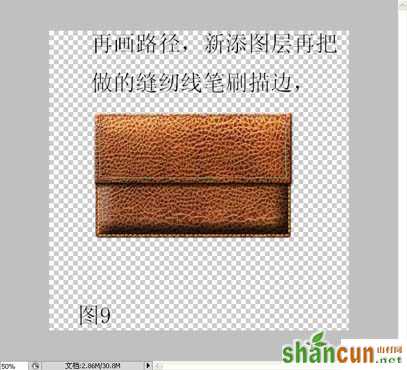
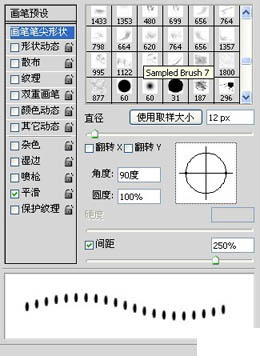
11、同上的方法,新建图层做一些缝纫线出来,效果如下图。
 nmousewheel="return bbimg(this)" onload="javascript:resizepic(this)" border="0"/>
 nmousewheel="return bbimg(this)" onload="javascript:resizepic(this)" border="0"/>
12、描边后,多出的部分删掉。
 nmousewheel="return bbimg(this)" onload="javascript:resizepic(this)" border="0"/>
 nmousewheel="return bbimg(this)" onload="javascript:resizepic(this)" border="0"/>
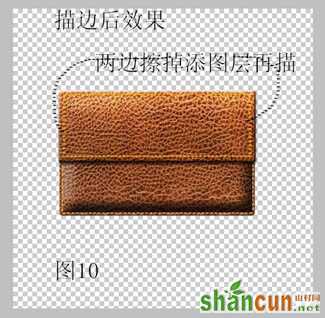
13、描边后,3lian.com,把两边擦掉。
 nmousewheel="return bbimg(this)" onload="javascript:resizepic(this)" border="0"/>
14、把刚才制作的线加上浮雕效果。
nmousewheel="return bbimg(this)" onload="javascript:resizepic(this)" border="0"/>
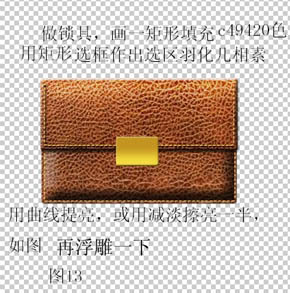
15、做锁具,画一矩形填充颜色:#c49420,用矩形选框做出选区,适当的羽化后用曲线提亮,或用减淡工具擦亮一半,如下图。确定后再加上浮雕效果。
nmousewheel="return bbimg(this)" onload="javascript:resizepic(this)" border="0"/>
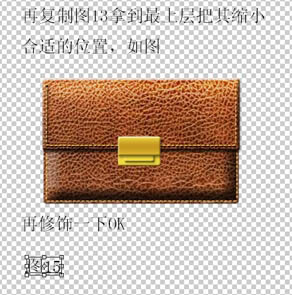
16、复制刚才的图形,3lian.com适当缩小一点,如下图。
nmousewheel="return bbimg(this)" onload="javascript:resizepic(this)" border="0"/>
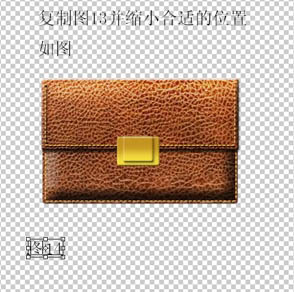
17、再复制图层13把他放到图层的最上面,并调整好大小,如下图。
 nmousewheel="return bbimg(this)" onload="javascript:resizepic(this)" border="0"/>
最终效果。
nmousewheel="return bbimg(this)" onload="javascript:resizepic(this)" border="0"/>


