
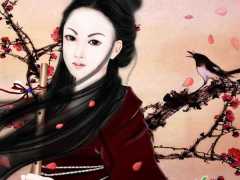
教程作者展示了一幅较为忧伤的古典插画。不断飘落的花瓣增加了女孩忧伤的心思,散乱的头发及忧郁的眼神,告诉我们她真正期盼他的回归。。。作者整个鼠绘的过程都描述的非常详细,过程图也非常丰富,喜欢鼠绘,尤其是喜欢古典鼠绘的朋友可以尝试一下。
最终效果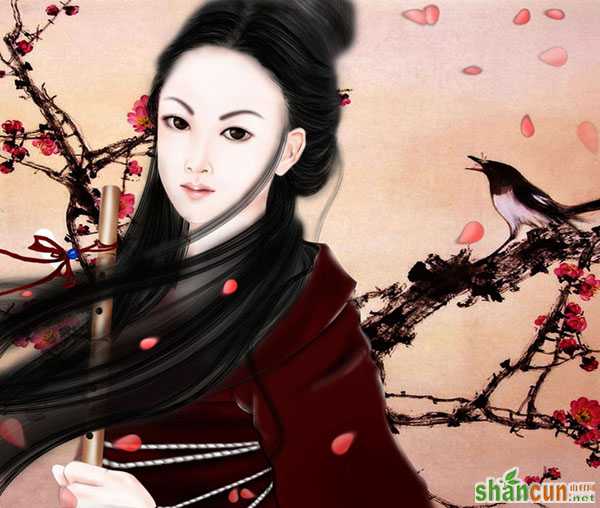 nmousewheel="return bbimg(this)" onload="javascript:resizepic(this)" border="0"/>
<点小图查看大图>
局部放大图 nmousewheel="return bbimg(this)" onload="javascript:resizepic(this)" border="0"/>
1、新建一个大小适当的文档,先画出线稿,如下图。 nmousewheel="return bbimg(this)" onload="javascript:resizepic(this)" border="0"/>
2、在路径面板用钢笔工具勾出肤色部分,如下图。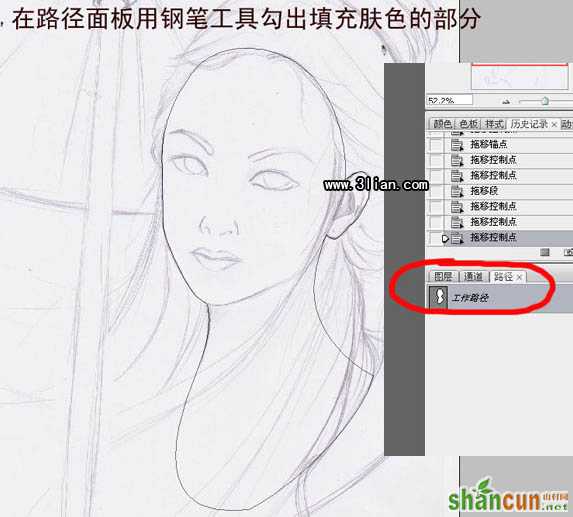 nmousewheel="return bbimg(this)" onload="javascript:resizepic(this)" border="0"/>
3、新建一个图层,把路径转为选区后填充颜色:#fbeae4。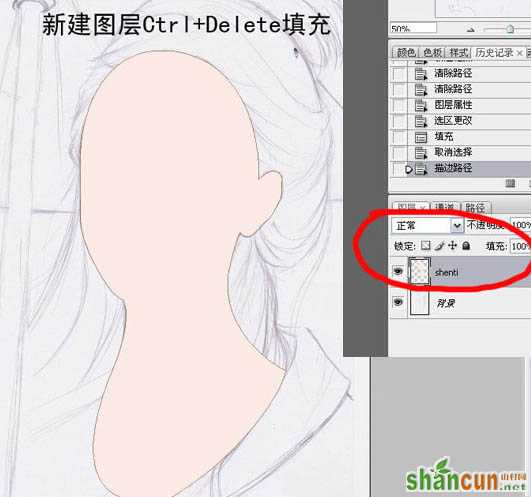 nmousewheel="return bbimg(this)" onload="javascript:resizepic(this)" border="0"/>
4、新建一个路径层,用钢笔勾出眼眶部分的选区,填充颜色:#610303。顺便眼白也画了。直接用画笔画不需要用钢笔。 nmousewheel="return bbimg(this)" onload="javascript:resizepic(this)" border="0"/>
 nmousewheel="return bbimg(this)" onload="javascript:resizepic(this)" border="0"/>
5、新建一个路径层,椭圆选框工具画出眼珠部分选区,填充颜色:#610303。然后把眼眶部分稍微用模糊工具模糊处理。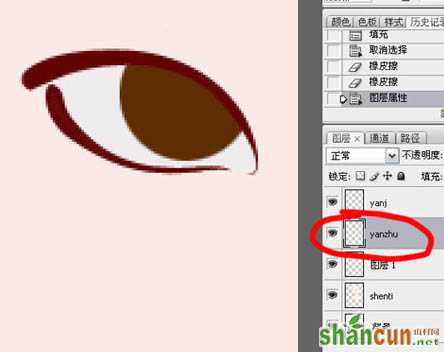 nmousewheel="return bbimg(this)" onload="javascript:resizepic(this)" border="0"/>
6、选中“yan”图层,复制一层,执行:滤镜 > 模糊 > 高斯模糊,数值自定,大致效果如下图。nmousewheel="return bbimg(this)" onload="javascript:resizepic(this)" border="0"/>
7、用钢笔工具把双眼皮勾出来描边,眼白部分用加深,减淡,模糊,涂抹工具处理就可以了。注意调整曝光度。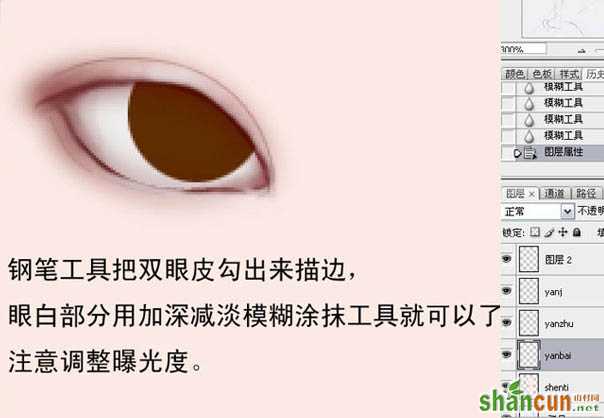 nmousewheel="return bbimg(this)" onload="javascript:resizepic(this)" border="0"/>
8、新建一个路径,用钢笔勾出上眼睑的路径。 nmousewheel="return bbimg(this)" onload="javascript:resizepic(this)" border="0"/>
9、转为选区后,按Ctrl + Alt + D 羽化2个像素,新建一个图层填充颜色:#610303。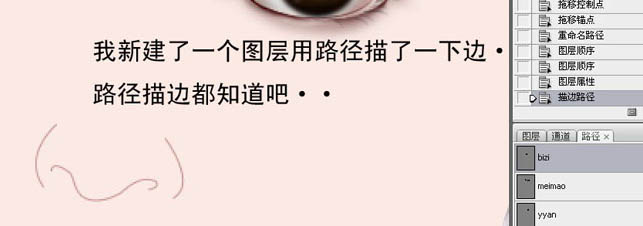 nmousewheel="return bbimg(this)" onload="javascript:resizepic(this)" border="0"/>
10、选中加深,减淡工具画出眼珠立体感。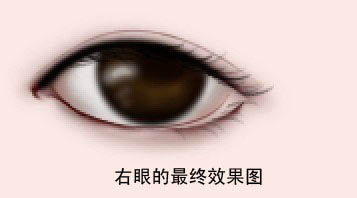 nmousewheel="return bbimg(this)" onload="javascript:resizepic(this)" border="0"/>
11、眼珠的大致效果如下图。 nmousewheel="return bbimg(this)" onload="javascript:resizepic(this)" border="0"/>
12、选择画笔工具,在笔刷面板选择112笔刷,参数设置如下图。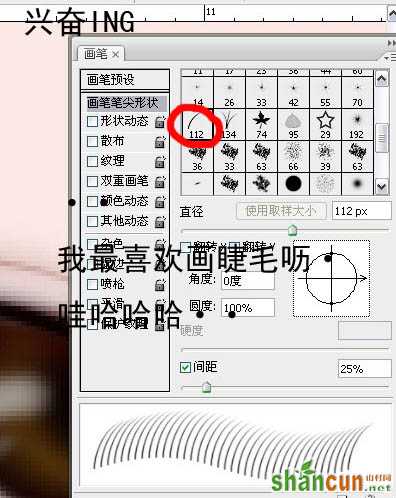 nmousewheel="return bbimg(this)" onload="javascript:resizepic(this)" border="0"/>
13、顺便说下睫毛的顺向。可以调整画笔的角度。就不会都朝一个方向。毕竟睫毛是有弧度的。大致效果如下图。 nmousewheel="return bbimg(this)" onload="javascript:resizepic(this)" border="0"/>
nmousewheel="return bbimg(this)" onload="javascript:resizepic(this)" border="0"/>
14、同样的方法制作另一只眼睛。 nmousewheel="return bbimg(this)" onload="javascript:resizepic(this)" border="0"/>nmousewheel="return bbimg(this)" onload="javascript:resizepic(this)" border="0"/>
15、接下来是眉毛部分的制作。可以先隐藏皮肤图层,在草稿上用钢笔工具勾眉毛的路径,如下图。 nmousewheel="return bbimg(this)" onload="javascript:resizepic(this)" border="0"/>
16、路径转换成选区后,用刷眼睫毛的笔刷按睫毛走向,一根根的刷出睫毛,如下图。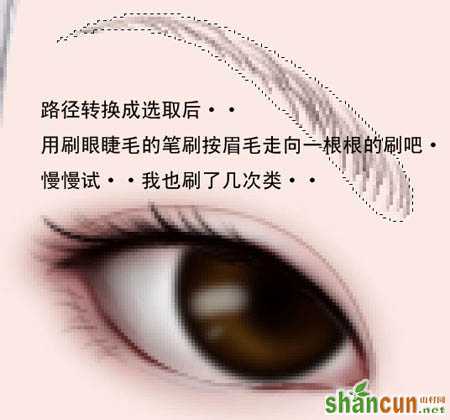 nmousewheel="return bbimg(this)" onload="javascript:resizepic(this)" border="0"/>
17、右眼也是如此。 nmousewheel="return bbimg(this)" onload="javascript:resizepic(this)" border="0"/>
18、睫毛可以加上一点底色,填色后适当羽化或者模糊一下。 nmousewheel="return bbimg(this)" onload="javascript:resizepic(this)" border="0"/>
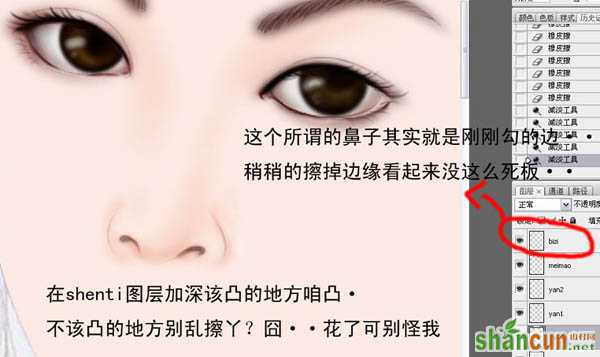
19、新建一个路径,用钢笔勾出鼻子的路径,如下图。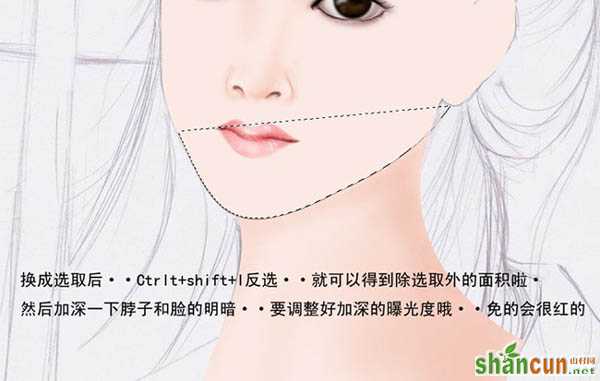 nmousewheel="return bbimg(this)" onload="javascript:resizepic(this)" border="0"/>
20、新建一个图层,用路径描边,如下图。
nmousewheel="return bbimg(this)" onload="javascript:resizepic(this)" border="0"/>
21、回到“shenti”图层,用加深,减淡工具涂出鼻子的立体感。
 nmousewheel="return bbimg(this)" onload="javascript:resizepic(this)" border="0"/>
22、在路径面板新建一个路径,命名为“zuiba”,用钢笔勾出嘴部的路径。
 nmousewheel="return bbimg(this)" onload="javascript:resizepic(this)" border="0"/>
23、转为选区后新建一个图层,填充粉红色。然后用钢笔勾出嘴巴中间线,如下图。
 nmousewheel="return bbimg(this)" onload="javascript:resizepic(this)" border="0"/>
24、按照刚画的线,先把大概的深浅用加深工具涂出来。
 nmousewheel="return bbimg(this)" onload="javascript:resizepic(this)" border="0"/>
25、慢慢的涂,然后用下图所示的笔刷画唇线。
nmousewheel="return bbimg(this)" onload="javascript:resizepic(this)" border="0"/>
26、大致完成的效果。
 nmousewheel="return bbimg(this)" onload="javascript:resizepic(this)" border="0"/>
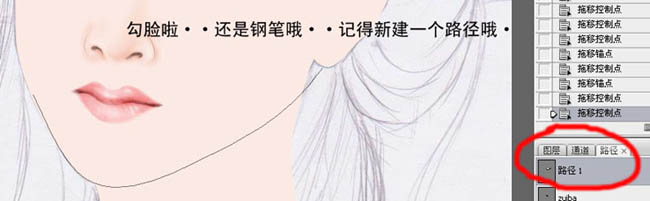
27、新建一个图层,用钢笔勾出脸部的路径。
 nmousewheel="return bbimg(this)" onload="javascript:resizepic(this)" border="0"/>
28、转为选区后,按Ctrl + Shift + I 把选区反选,用加深工具加深一下脖子和脸的明暗。要调整好加深的曝光度。
nmousewheel="return bbimg(this)" onload="javascript:resizepic(this)" border="0"/>
29、耳朵部分制作,先用钢笔勾出大概的路径。
 nmousewheel="return bbimg(this)" onload="javascript:resizepic(this)" border="0"/>
30、用加深,减淡工具涂出立体感,大致效果如下图。
 nmousewheel="return bbimg(this)" onload="javascript:resizepic(this)" border="0"/>
 nmousewheel="return bbimg(this)" onload="javascript:resizepic(this)" border="0"/>
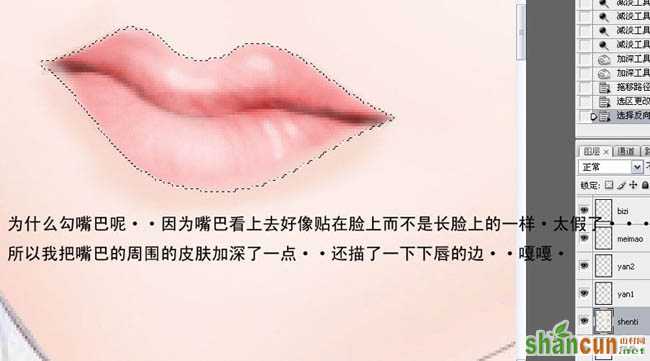
31、用钢笔勾出嘴巴的选区,按Ctrl + Shift + I 把选区反选,用加深工具把周围皮肤加深一点,效果如下图。
 nmousewheel="return bbimg(this)" onload="javascript:resizepic(this)" border="0"/>
nmousewheel="return bbimg(this)" onload="javascript:resizepic(this)" border="0"/>
32、新建一个图层,开始画头发。选择画笔工具,笔刷选择40号画笔。然后简单的画出头发的大致底图。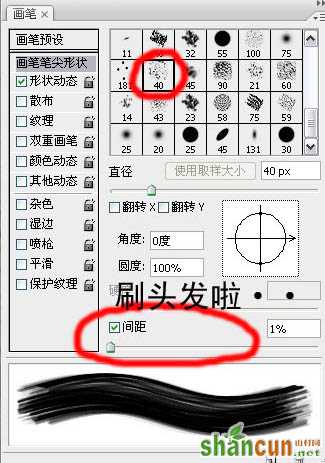 nmousewheel="return bbimg(this)" onload="javascript:resizepic(this)" border="0"/> nmousewheel="return bbimg(this)" onload="javascript:resizepic(this)" border="0"/>
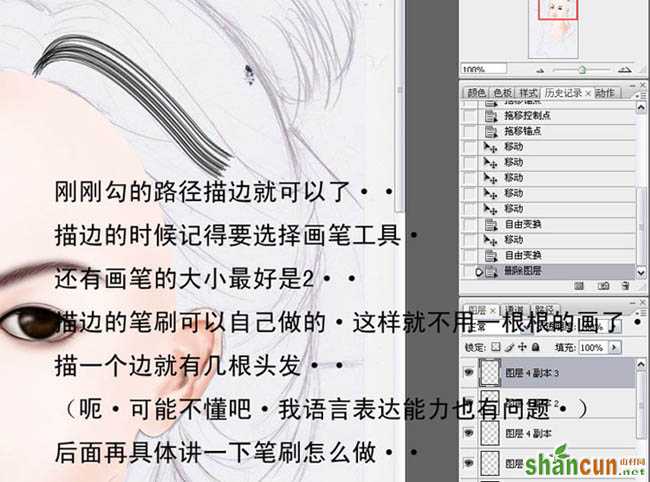
33、新建一个路径,用钢笔勾出发丝的路径。nmousewheel="return bbimg(this)" onload="javascript:resizepic(this)" border="0"/>
34、刚刚勾的路径描边就可以了。描边的时候记得要选择画笔工具,还有画笔的大小为2像素。描边的笔刷可以自己做的。这样就不用一根根的画了。描一个边就有几根头发。nmousewheel="return bbimg(this)" onload="javascript:resizepic(this)" border="0"/>
35、画一根头发可以按住Alt键托住头发就可以复制很多了。还可以按Ctrl + T 旋转头发。 nmousewheel="return bbimg(this)" onload="javascript:resizepic(this)" border="0"/>


