
教程的眼泪制作得非常逼真。作者的制作过程非常也写得比较详细。
大致过程:先找好素材图片,最好是脸部特写的,然后用钢笔勾出泪痕的路径,填色后适当加上一些图层样式,做出半透明效果。最后再加上高光即可。
原图 nmousewheel="return bbimg(this)" onload="javascript:resizepic(this)" border="0"/>
最终效果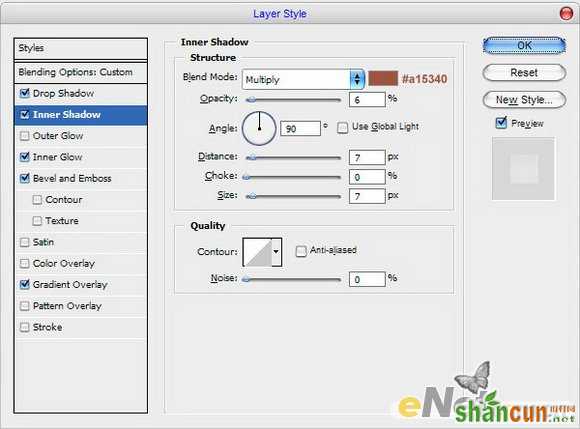 nmousewheel="return bbimg(this)" onload="javascript:resizepic(this)" border="0"/>
1、在开始的时候你应该找到一个很好的照片。您可以尝试使用自己的照片或在网络上搜索一张照片。打开图片。然后选择钢笔工具,并如下图制作一个眼泪的路径。
nmousewheel="return bbimg(this)" onload="javascript:resizepic(this)" border="0"/>
2、制作好路径,下面我们来设置图层样式:
如下图首先设置阴影参数:
 nmousewheel="return bbimg(this)" onload="javascript:resizepic(this)" border="0"/>
3、设置内阴影参数:
nmousewheel="return bbimg(this)" onload="javascript:resizepic(this)" border="0"/>
4、设置内发光参数:
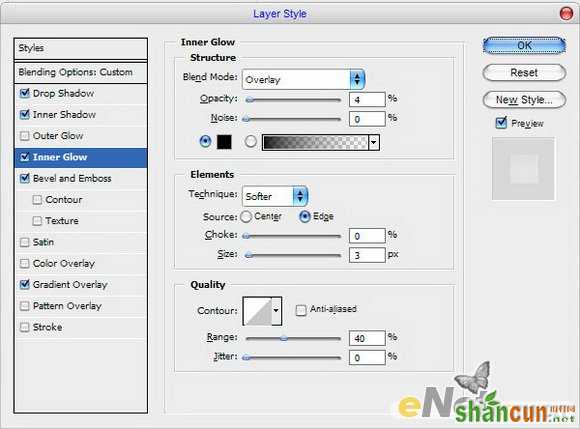 nmousewheel="return bbimg(this)" onload="javascript:resizepic(this)" border="0"/>
5、设置斜面与浮雕参数:
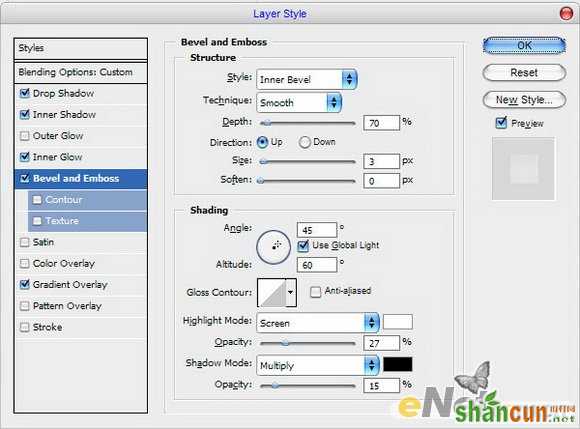 nmousewheel="return bbimg(this)" onload="javascript:resizepic(this)" border="0"/>
6、设置渐变叠加参数:
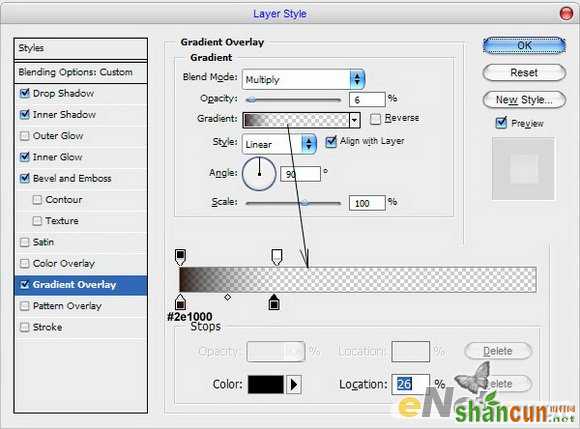 nmousewheel="return bbimg(this)" onload="javascript:resizepic(this)" border="0"/>
3lian素材
7、得到的效果:
nmousewheel="return bbimg(this)" onload="javascript:resizepic(this)" border="0"/>
8、看起来不错,但是和结果还是有些差距。我想展现的是透明发亮的效果。选择铅笔工具和笔刷约1个像素的画笔,然后再眼泪的痕迹上用白色点几个点,来制作高光。
 nmousewheel="return bbimg(this)" onload="javascript:resizepic(this)" border="0"/>
9、之后,给当前层应用模糊工具:
 nmousewheel="return bbimg(this)" onload="javascript:resizepic(this)" border="0"/>
10、我们得到了一个很好的结果,不是吗?不要害怕尝试,你会得到你自己满意的作品!
nmousewheel="return bbimg(this)" onload="javascript:resizepic(this)" border="0"/>


