
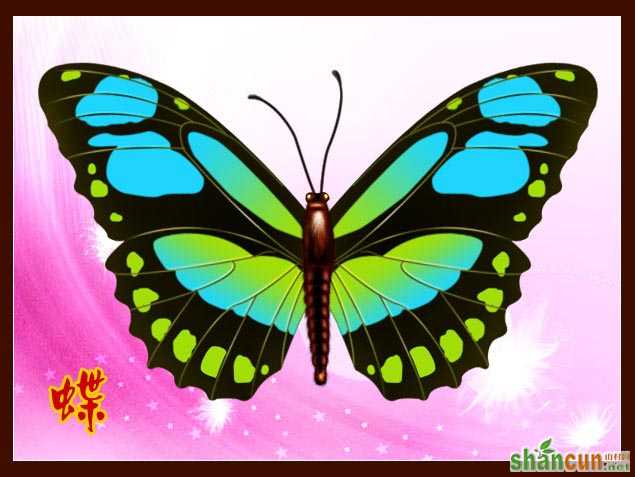
最终效果图
 nmousewheel="return bbimg(this)" onload="javascript:resizepic(this)" border="0"/>
1、用钢笔工具绘制路径,如下图: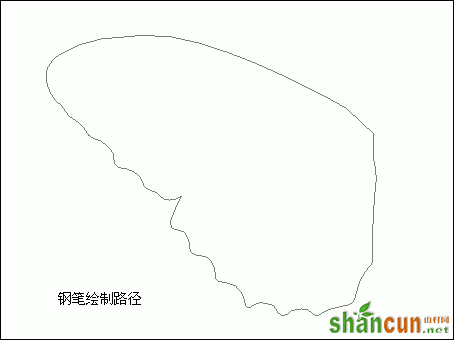 nmousewheel="return bbimg(this)" onload="javascript:resizepic(this)" border="0"/>
2、按Ctrl+Enter,把路径转换选区,填充深灰色。如下图: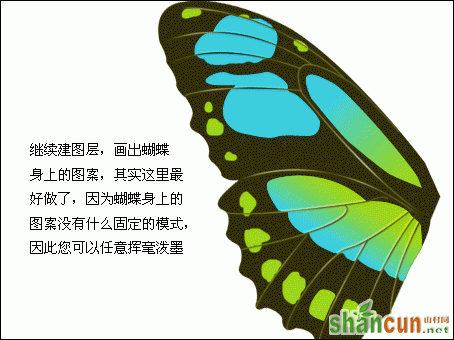 nmousewheel="return bbimg(this)" onload="javascript:resizepic(this)" border="0"/>
3、继续路径。如下图: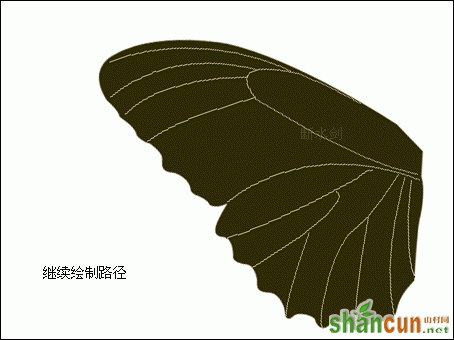 nmousewheel="return bbimg(this)" onload="javascript:resizepic(this)" border="0"/>
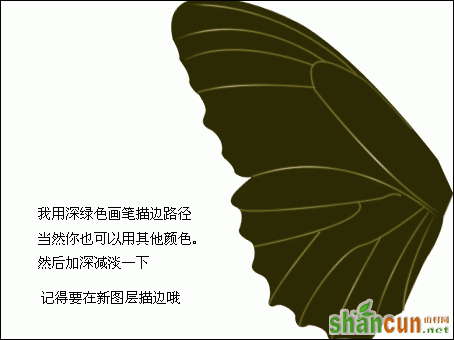
4、我用深绿色画笔描边路径,当然你也可用它颜色,然后加深减淡下,记得要在新图层描边哦。
 nmousewheel="return bbimg(this)" onload="javascript:resizepic(this)" border="0"/>
5、继续新建图层,画出蝴蝶身上的图案,其实这里最好做了,因为蝴蝶身上的图案没有做固定的模式,因此你可以任意发挥。
nmousewheel="return bbimg(this)" onload="javascript:resizepic(this)" border="0"/>
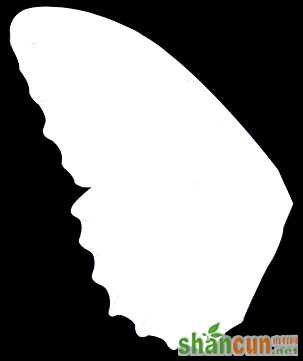
6、为节约课堂时间,我给做好了一个现成的模板,可以魔棒直接得到翅膀的选区,建议在下面多练练钢笔工具,自己做出翅膀。
 nmousewheel="return bbimg(this)" onload="javascript:resizepic(this)" border="0"/>
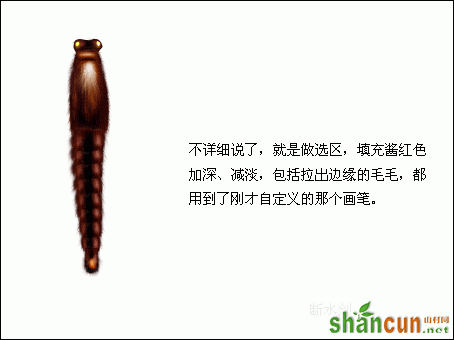
7、不详细说发,就是做选区,填充酱红,加深、减淡,包括拉出边缘的毛毛,都用到了刚才自定义的那个画笔。
 nmousewheel="return bbimg(this)" onload="javascript:resizepic(this)" border="0"/>
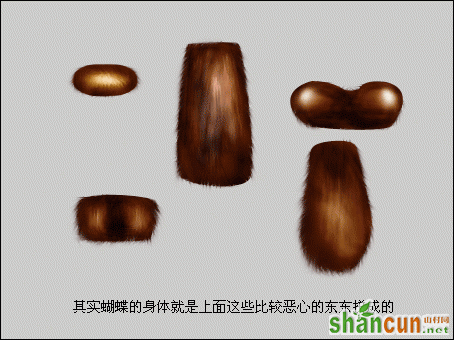
8、其实蝴蝶的身体就是上面这些图片拼成的。
 nmousewheel="return bbimg(this)" onload="javascript:resizepic(this)" border="0"/>
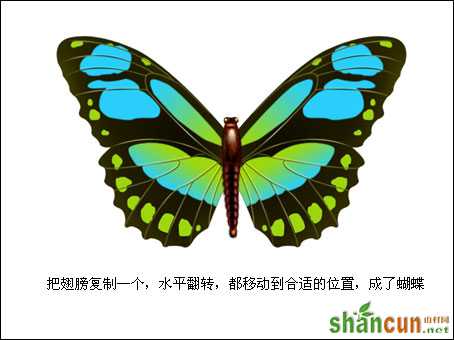
9、把翅膀复制一个,水平翻转,都移动到合适的位置,成了蝴蝶。
 nmousewheel="return bbimg(this)" onload="javascript:resizepic(this)" border="0"/>
10、画上触角(钢笔、描边路径,触角头上用一下液化) 完成。
 nmousewheel="return bbimg(this)" onload="javascript:resizepic(this)" border="0"/>
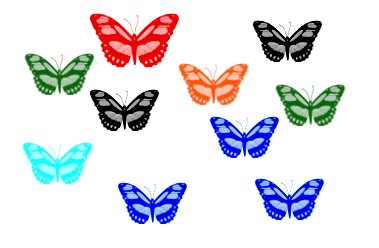
可以调整色相变换颜色
nmousewheel="return bbimg(this)" onload="javascript:resizepic(this)" border="0"/>
还可以做成笔刷
 nmousewheel="return bbimg(this)" onload="javascript:resizepic(this)" border="0"/>


