
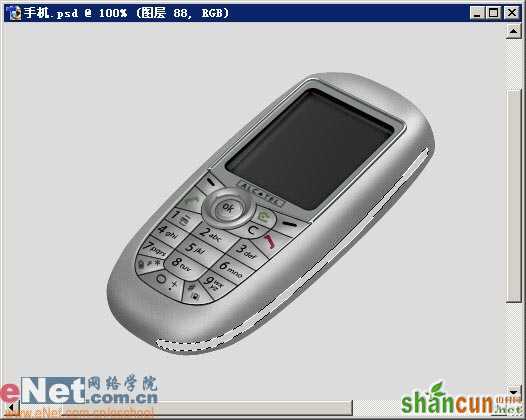
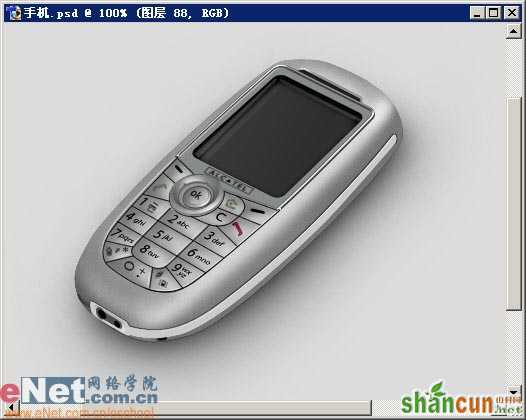
最终效果图 nmousewheel="return bbimg(this)" onload="javascript:resizepic(this)" border="0"/>
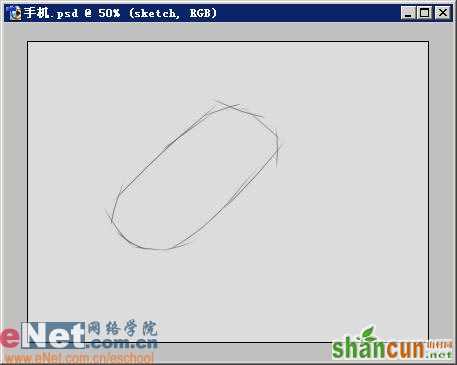
1、大概草图,图片如下:
 nmousewheel="return bbimg(this)" onload="javascript:resizepic(this)" border="0"/>
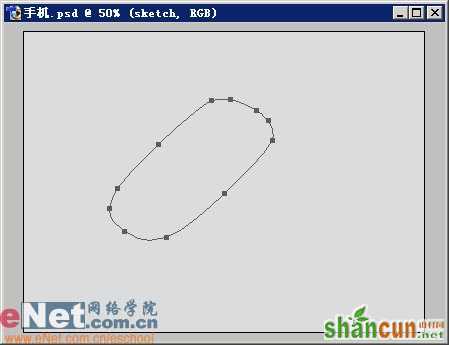
2.然后用路径根据草图勾勒出手机的形状。
 nmousewheel="return bbimg(this)" onload="javascript:resizepic(this)" border="0"/>
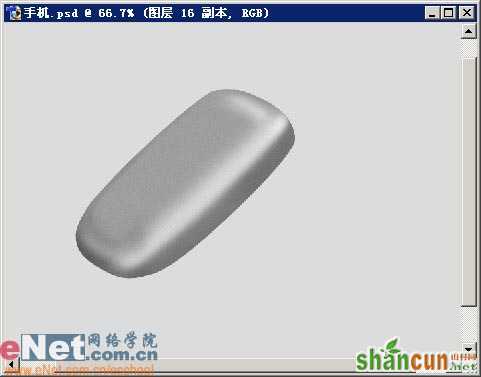
3.使用加深,减淡工具并结合选区的作用对手机的机身进行涂抹,使之具有立体感。
 nmousewheel="return bbimg(this)" onload="javascript:resizepic(this)" border="0"/>
4.继续对机身进行刻画,然后再添加一个轻微的杂色滤镜。
 nmousewheel="return bbimg(this)" onload="javascript:resizepic(this)" border="0"/>
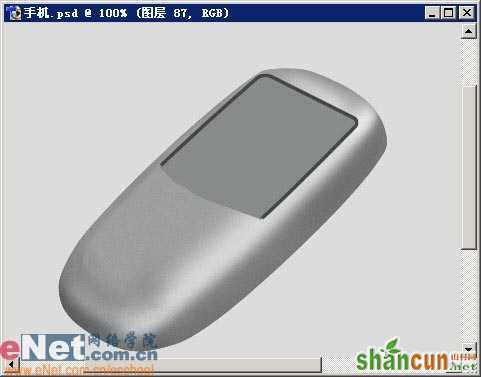
5.新建图层,然后再用路径画出如下图的形状,填充颜色R :134 G :140 B :137。
 nmousewheel="return bbimg(this)" onload="javascript:resizepic(this)" border="0"/>
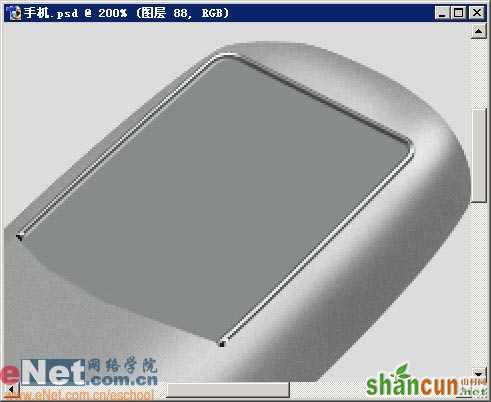
6.新建图层,再画出屏幕底层周边的边框。
nmousewheel="return bbimg(this)" onload="javascript:resizepic(this)" border="0"/>
7.接着在边框上画出一些细小的高光。
 nmousewheel="return bbimg(this)" onload="javascript:resizepic(this)" border="0"/>
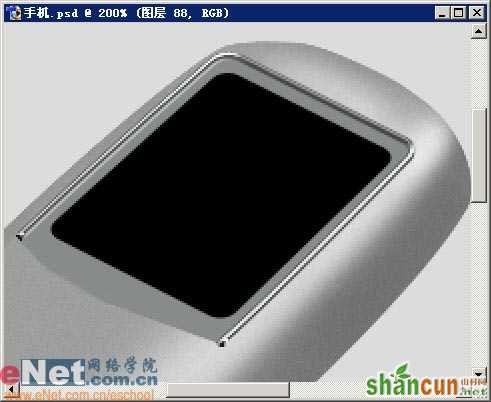
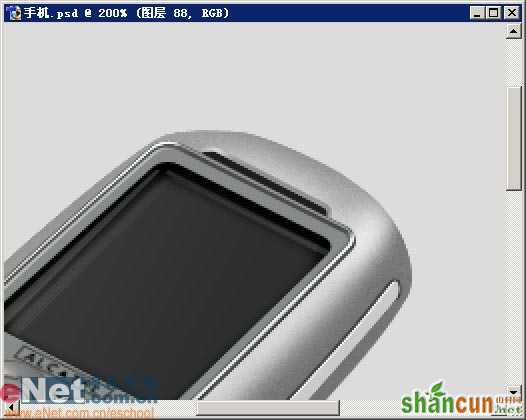
8.新建一层,在屏幕底层上画出黑色的屏幕。
 nmousewheel="return bbimg(this)" onload="javascript:resizepic(this)" border="0"/>
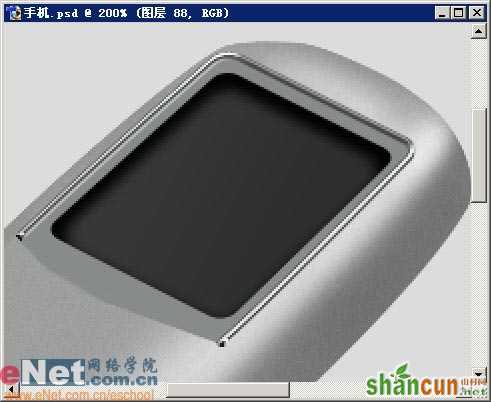
9.创建一个圆角矩形,用Ctrl+T调整,栅格化后模糊一下,在刚才的黑色屏幕上画出一个颜色较浅的部分来。
 nmousewheel="return bbimg(this)" onload="javascript:resizepic(this)" border="0"/>
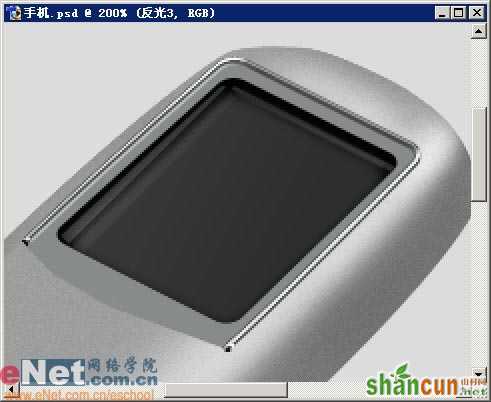
10.继续画出一些颜色较浅的反光来。
 nmousewheel="return bbimg(this)" onload="javascript:resizepic(this)" border="0"/>
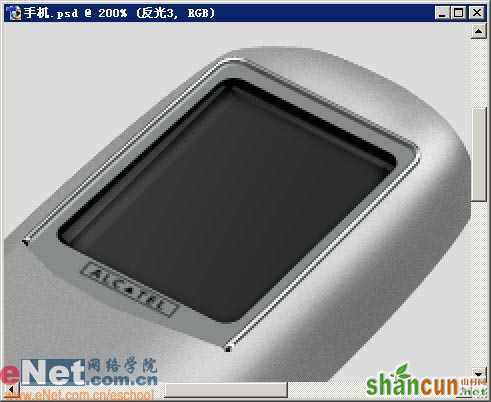
11.然后在屏幕的底部画上阿尔卡特的标志。
 nmousewheel="return bbimg(this)" onload="javascript:resizepic(this)" border="0"/>
12.接下来制作按键部分,首先用路径工具画出键与键之间的空隙。
 nmousewheel="return bbimg(this)" onload="javascript:resizepic(this)" border="0"/>
13.按键的制作有点麻烦,首先,新建一层,放在间隙层的下方,然后根据键盘的外形填充一个颜色为R: 158 G :158 B :158 的区域,然后用魔棒工具点选每个按键,用加深,减淡工具涂抹,魔棒要点选用于所有图层,并对按键的周围增添些细小的高光。
nmousewheel="return bbimg(this)" onload="javascript:resizepic(this)" border="0"/>
14.接下来制作中间的导向键,创建出下图的圆环状选区后,用加深,减淡工具进行涂抹。
 nmousewheel="return bbimg(this)" onload="javascript:resizepic(this)" border="0"/>
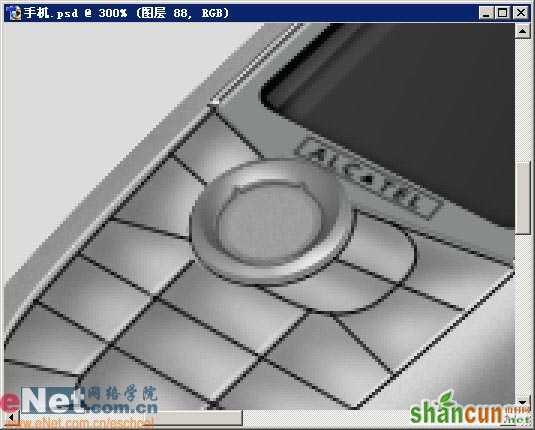
15.然后进一步画出中心的部分,用加深,减淡工具画出立体感。
 nmousewheel="return bbimg(this)" onload="javascript:resizepic(this)" border="0"/>
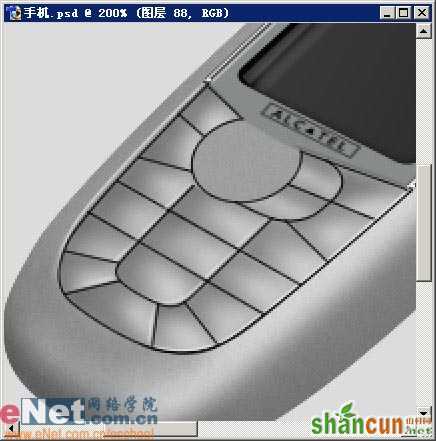
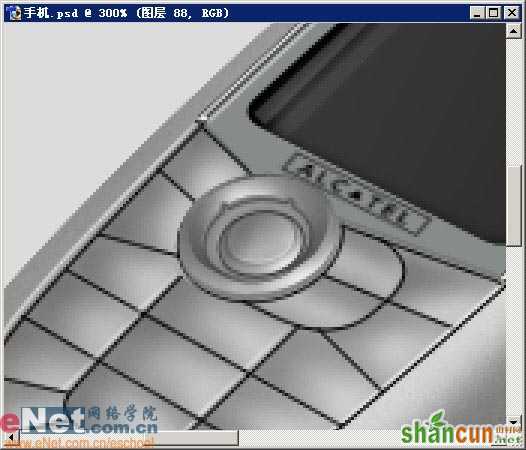
16.导向键的最后完成,图片如下:
 nmousewheel="return bbimg(this)" onload="javascript:resizepic(this)" border="0"/>
17.制作按键上的数字,字母和符号。用文本工具做出数字和字母,用路径画出符号,比如开,关机的图形。
 nmousewheel="return bbimg(this)" onload="javascript:resizepic(this)" border="0"/>
18.下面制作边饰,新建图层,3lian素材,创建下图所示的选区,填充亮色。
 nmousewheel="return bbimg(this)" onload="javascript:resizepic(this)" border="0"/>
19.然后在刚才创建的部分上方用路径描边出一条黑色的细缝,然后在手机的底部添加些较为简单的部件。
 nmousewheel="return bbimg(this)" onload="javascript:resizepic(this)" border="0"/>
20.接着在手机的上方画出听筒。
 nmousewheel="return bbimg(this)" onload="javascript:resizepic(this)" border="0"/>
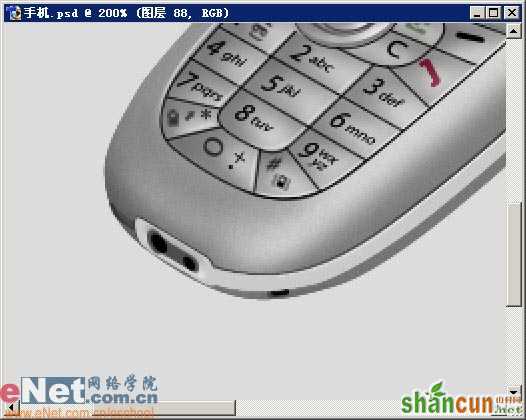
21.下面添加阴影,新建图层,放在底层,只位于背景层之上,选择手机外形的路径,然后填充黑色,用橡皮工具使用软笔刷,进行修改。最后添加文字就可以了!
 nmousewheel="return bbimg(this)" onload="javascript:resizepic(this)" border="0"/>


