
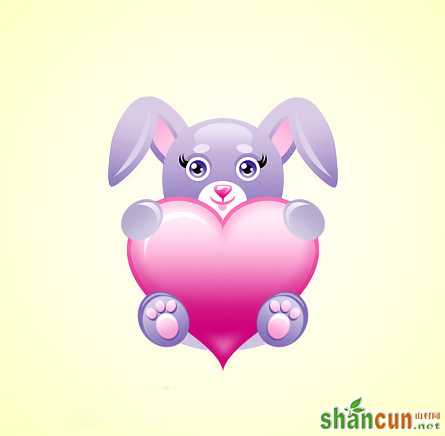
教程简单介绍卡通兔子的制作方法。整个制作过程也非常简单。只需要把物体拆分分一些细小的部分来制作。每一个构成的部分用选区工具做出选区并拉上渐变色及高光即可。
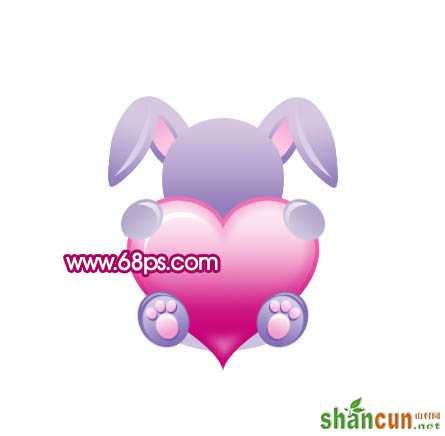
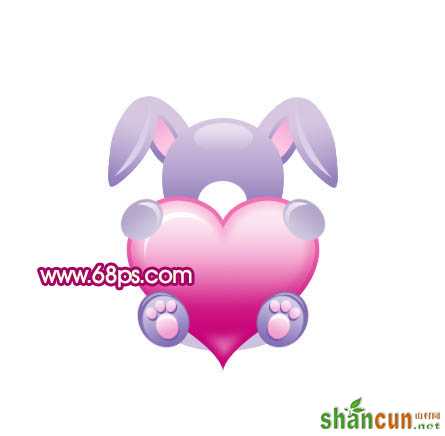
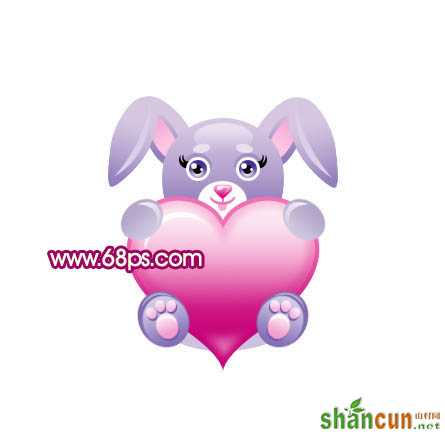
最终效果
 nmousewheel="return bbimg(this)" onload="javascript:resizepic(this)" border="0"/>
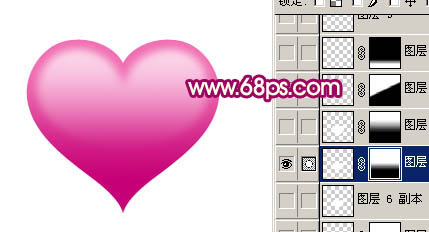
1、新建一个600 * 600像素的文件,背景填充白色,新建一个图层,在画布的底部位置用钢笔勾出一个心形路径,转为选区如下图。
 nmousewheel="return bbimg(this)" onload="javascript:resizepic(this)" border="0"/>
图1
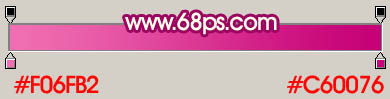
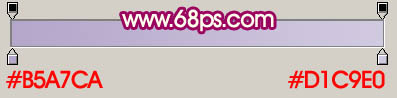
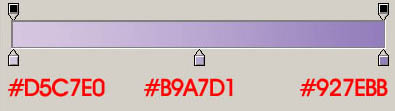
2、选择渐变工具,颜色设置如图2,拉出图3所示的线性渐变。
 nmousewheel="return bbimg(this)" onload="javascript:resizepic(this)" border="0"/>
图2
 nmousewheel="return bbimg(this)" onload="javascript:resizepic(this)" border="0"/>
图3
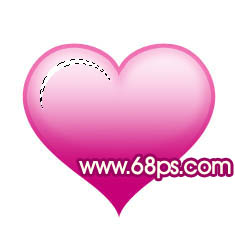
3、新建一个图层,用钢笔勾出图4所示的选区,填充白色,按Ctrl + D 取消选区后执行:滤镜 > 模糊 > 高斯模糊,数值为3,确定后加上图层蒙版,用黑白线性渐变拉出透明效果,如图5。
 nmousewheel="return bbimg(this)" onload="javascript:resizepic(this)" border="0"/>
图4
 nmousewheel="return bbimg(this)" onload="javascript:resizepic(this)" border="0"/>
图5
4、新建一个图层,用钢笔勾出图6所示的选区,填充白色,加上图层蒙版,用黑白渐变拉出透明度效果,如图7。
 nmousewheel="return bbimg(this)" onload="javascript:resizepic(this)" border="0"/>
图6
 nmousewheel="return bbimg(this)" onload="javascript:resizepic(this)" border="0"/>
图7
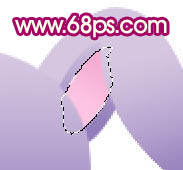
5、新建一个图层,用钢笔勾出图8所示的选区,填充白色,作为高光。
 nmousewheel="return bbimg(this)" onload="javascript:resizepic(this)" border="0"/>
图8
6、新建一个图层,用画笔把底部也加一点高光,效果如下图。
 nmousewheel="return bbimg(this)" onload="javascript:resizepic(this)" border="0"/>
图9
7、新建一个图层,用钢笔勾出图10所示的选区,选择渐变工具,颜色设置如图11,拉出图12所示的线性渐变。
 nmousewheel="return bbimg(this)" onload="javascript:resizepic(this)" border="0"/>
图10
 nmousewheel="return bbimg(this)" onload="javascript:resizepic(this)" border="0"/>
图11
 nmousewheel="return bbimg(this)" onload="javascript:resizepic(this)" border="0"/>
图12
8、新建一个图层,加上高光部分,效果如下图。
 nmousewheel="return bbimg(this)" onload="javascript:resizepic(this)" border="0"/>
图13
9、另外几只脚的制作方法相同,效果如图14,15。
 nmousewheel="return bbimg(this)" onload="javascript:resizepic(this)" border="0"/>
图14
 nmousewheel="return bbimg(this)" onload="javascript:resizepic(this)" border="0"/>
图15
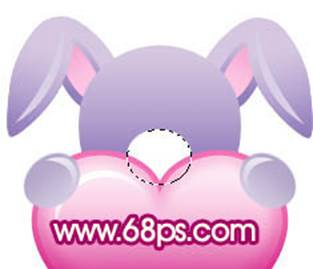
10、在背景图层上面新建一个图层,用钢笔勾出图16所示的选区,填充颜色:#CDC0DE。
 nmousewheel="return bbimg(this)" onload="javascript:resizepic(this)" border="0"/>
图16
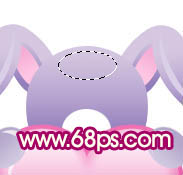
11、新建一个图层,用椭圆选框工具拉图下图所示的椭圆选区作为头部,然后拉上右边所示的线性渐变。
 nmousewheel="return bbimg(this)" onload="javascript:resizepic(this)" border="0"/>
图17
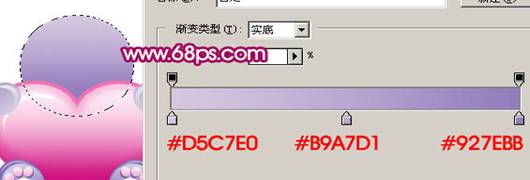
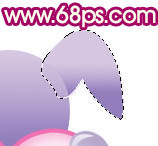
12、在当前图层的下面新建一个图层,用钢笔勾出耳朵部分的选区,拉上图19所示的线性渐变。
 nmousewheel="return bbimg(this)" onload="javascript:resizepic(this)" border="0"/>
图18
 nmousewheel="return bbimg(this)" onload="javascript:resizepic(this)" border="0"/>
图19
13、新建一个图层,用钢笔勾出图20所示的选区,3lian素材,拉上图21所示的线性渐变。
nmousewheel="return bbimg(this)" onload="javascript:resizepic(this)" border="0"/>
图20
nmousewheel="return bbimg(this)" onload="javascript:resizepic(this)" border="0"/>
图21
14、在当前图层下面新建一个图层,用钢笔分别勾出图22,23所示的选区,并拉上渐变色。
 nmousewheel="return bbimg(this)" onload="javascript:resizepic(this)" border="0"/>
图22
 nmousewheel="return bbimg(this)" onload="javascript:resizepic(this)" border="0"/>
图2315、新建一个图层,加上高光。右耳就基本完成了。左耳直接复制过程就可以了,效果如图25。
 nmousewheel="return bbimg(this)" onload="javascript:resizepic(this)" border="0"/>
图24
nmousewheel="return bbimg(this)" onload="javascript:resizepic(this)" border="0"/>
图25
16、新建一个图层,用椭圆选框工具拉出下图所示的椭圆选区,填充白色。
 nmousewheel="return bbimg(this)" onload="javascript:resizepic(this)" border="0"/>
图26
17、新建一个图层,用椭圆选框工具拉出下图所示的椭圆选区,填充白色,取消选区后加上图层蒙版,用黑白渐变拉出透明效果,如图28。
 nmousewheel="return bbimg(this)" onload="javascript:resizepic(this)" border="0"/>
图27
 nmousewheel="return bbimg(this)" onload="javascript:resizepic(this)" border="0"/>
图28
18、同样的方法制作眼睛部分,如图29-31。
 nmousewheel="return bbimg(this)" onload="javascript:resizepic(this)" border="0"/>
图29
 nmousewheel="return bbimg(this)" onload="javascript:resizepic(this)" border="0"/>
图30
nmousewheel="return bbimg(this)" onload="javascript:resizepic(this)" border="0"/>
图31
19、制作嘴巴部分,如图32,33。
 nmousewheel="return bbimg(this)" onload="javascript:resizepic(this)" border="0"/>
图32
nmousewheel="return bbimg(this)" onload="javascript:resizepic(this)" border="0"/>
图33
20、最后调整下细节,再加上背景颜色,完成最终效果。
nmousewheel="return bbimg(this)" onload="javascript:resizepic(this)" border="0"/>
图34


