
教程的制作重点是把树人像化。制作的时候需要找较多的素材然合成。为了渲染一种恐怖的氛围,
图片的背景选择了阴云密布的素材,整个画面的光感也调得很暗,再加上一些恐怖的素材,效果非常逼真。不过教程中没有提供原始素材,需要去网上找类似的素材。文字部分可能是翻译的,不是那么准确,请以效果图为参考去发挥。
最终效果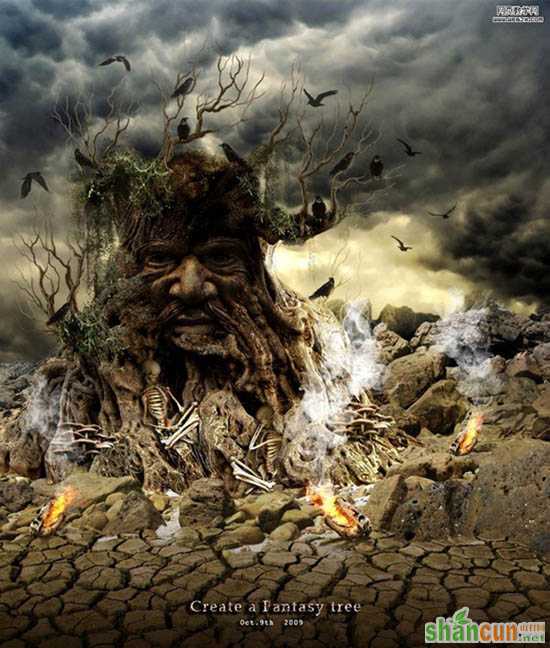 nmousewheel="return bbimg(this)" onload="javascript:resizepic(this)" border="0"/>
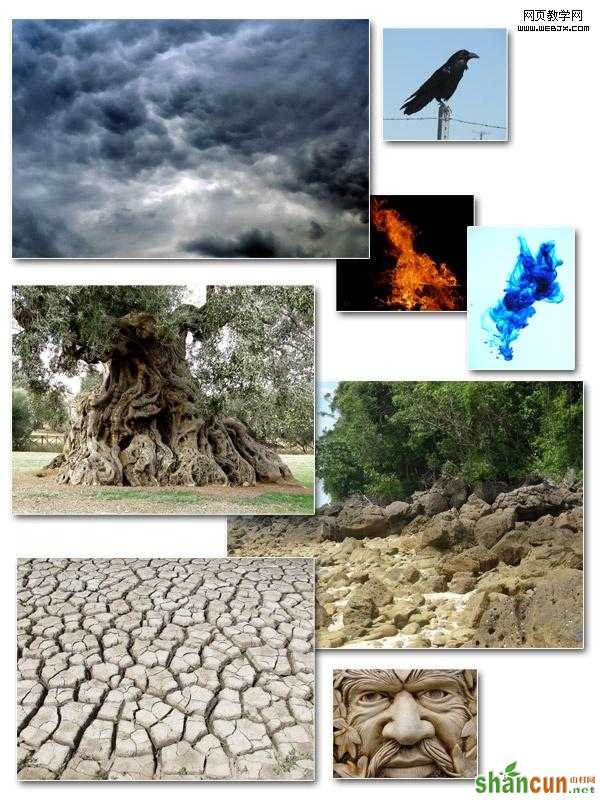
素材图(作者没有提供原始的素材图片,如果需要的话可以去网上找类似的图片)
 nmousewheel="return bbimg(this)" onload="javascript:resizepic(this)" border="0"/>
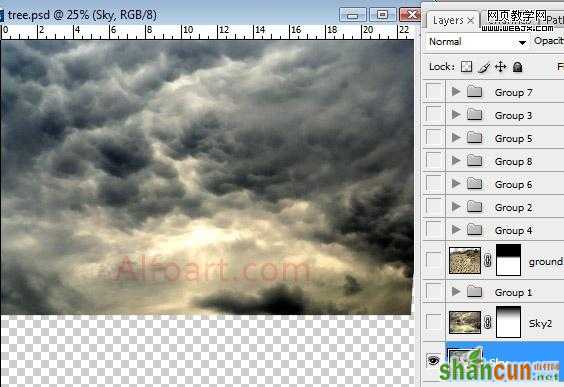
1、打开天空素材。
 nmousewheel="return bbimg(this)" onload="javascript:resizepic(this)" border="0"/>
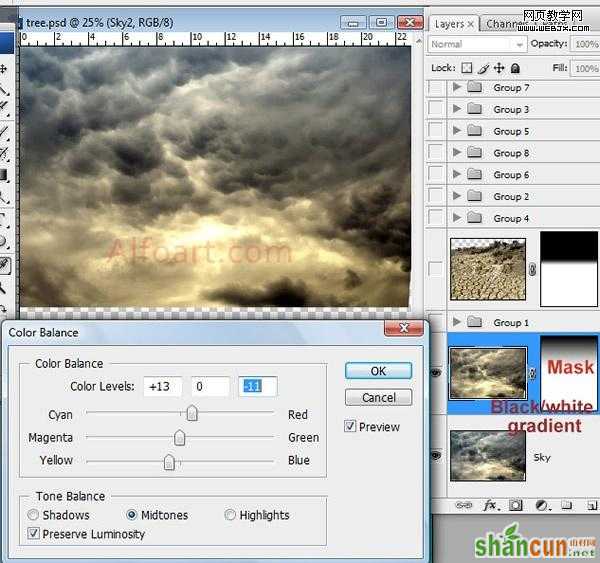
2、复制天空图象层数。图象>调整 >色彩平衡设置:增加黄色和红颜色。再执行图象>调整 >照片滤镜(黄色,橙色颜色以25%不透明)。对复制的图层添加蒙板用黑白线性渐变把下面底层稍微擦出 如图:
 nmousewheel="return bbimg(this)" onload="javascript:resizepic(this)" border="0"/>
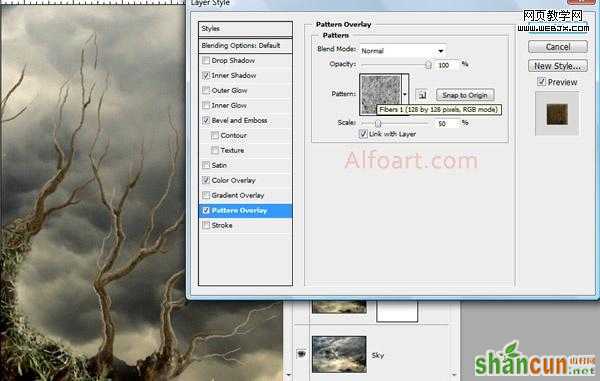
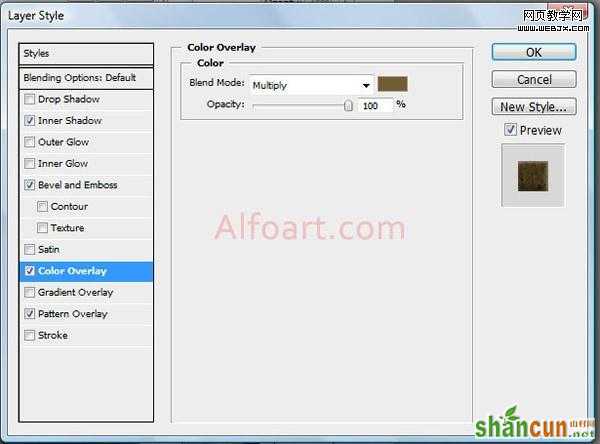
3、插入石头素材。 改变颜色平衡。
 nmousewheel="return bbimg(this)" onload="javascript:resizepic(this)" border="0"/>
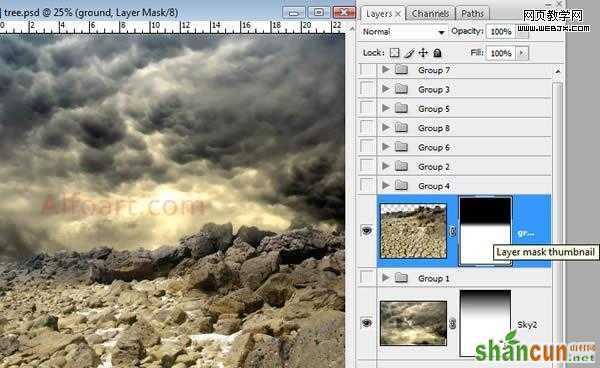
3、插入破裂的地面素材,为了取得颜色更正的更好的结果,使用匹配颜色设置激活地面层,然后选择图象>调整>匹配颜色。从来源菜单在匹配颜色对话框的图象统计地区,确信,在来源菜单的图象是相同的象目标图象。
选择想要匹配的层数颜色的层数菜单。 能从层数菜单也选择合并匹配从所有层数的颜色。然后 可以改正稍微退色,颜色强度,光亮设置。增加层数面到地面层并且用黑白线性填冲在天际区域。
 nmousewheel="return bbimg(this)" onload="javascript:resizepic(this)" border="0"/>
4、合并石头和破裂的地球层数。被合并的层数的Load选择。 与任何颜色的填充选择在新的层数。 调整积土0%。 Apply黑褐色透明梯度躺在了象在例子belowm在覆盖物混和的方式下。 Duplicate梯度层数,和申请倍增Blanding方式对它。
 nmousewheel="return bbimg(this)" onload="javascript:resizepic(this)" border="0"/>
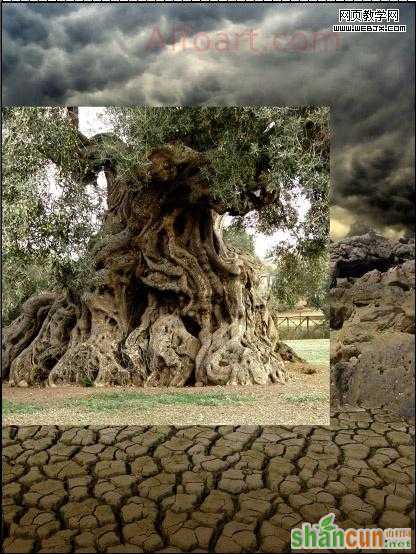
5、插入树素材。
 nmousewheel="return bbimg(this)" onload="javascript:resizepic(this)" border="0"/>
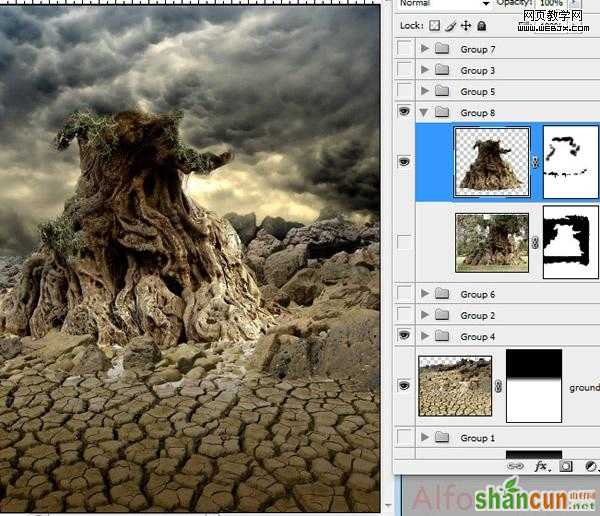
6、删掉其余地区。
 nmousewheel="return bbimg(this)" onload="javascript:resizepic(this)" border="0"/>
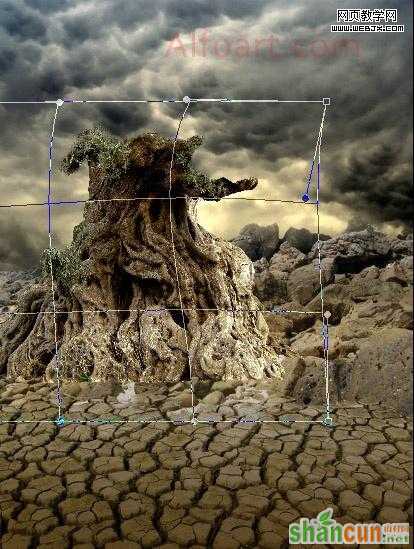
7、使用变形工具改变树的形状。
 nmousewheel="return bbimg(this)" onload="javascript:resizepic(this)" border="0"/>
8、增加层数面具到树层数。 使用透亮圆的刷子,软化边缘。
 nmousewheel="return bbimg(this)" onload="javascript:resizepic(this)" border="0"/>
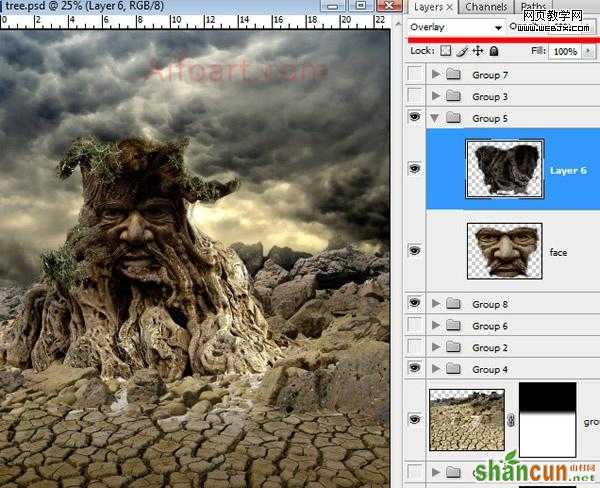
9、插入面孔图象。 改正颜色平衡,并且水平,使图象变暗。
 nmousewheel="return bbimg(this)" onload="javascript:resizepic(this)" border="0"/>
10、使用与动态设置的小圆的刷子画分支。或者下载
 nmousewheel="return bbimg(this)" onload="javascript:resizepic(this)" border="0"/>
 nmousewheel="return bbimg(this)" onload="javascript:resizepic(this)" border="0"/>
 nmousewheel="return bbimg(this)" onload="javascript:resizepic(this)" border="0"/>
3lian素材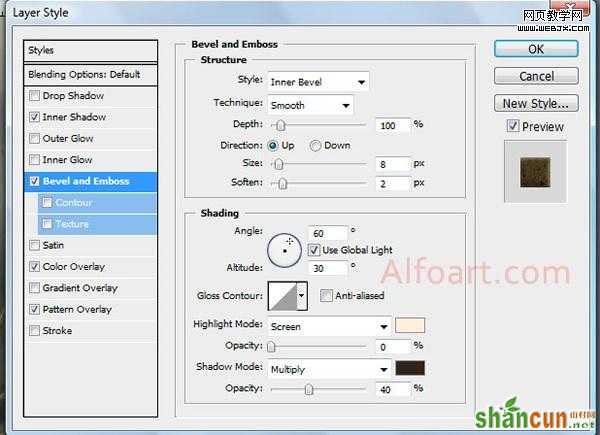 nmousewheel="return bbimg(this)" onload="javascript:resizepic(this)" border="0"/>
 nmousewheel="return bbimg(this)" onload="javascript:resizepic(this)" border="0"/>
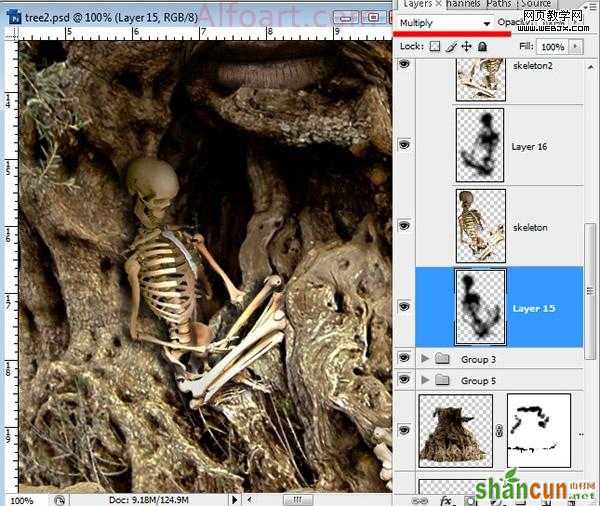
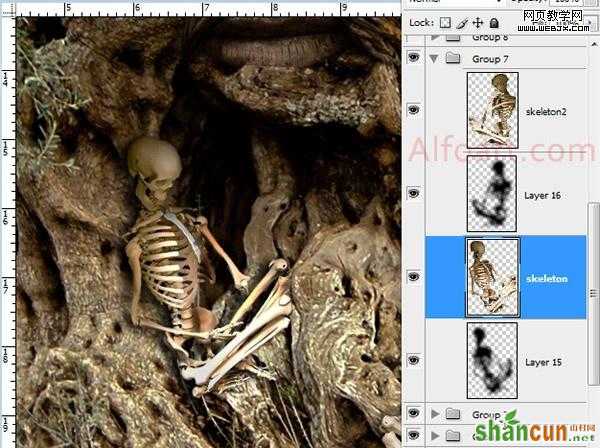
11、插入鸟素材。使用软的透亮删掉工具,软化边缘。 插入骷髅素材,从背景的萃取物骨骼使用萃取物过滤器。
对象的加载选择。 用在底层的黑颜色填装选择。 应用高斯模糊 模式:整篇叠底(它是套印,在CMYK模式中,如CMY都有底色的话,在这三色中就不会漏白。)
 nmousewheel="return bbimg(this)" onload="javascript:resizepic(this)" border="0"/>
nmousewheel="return bbimg(this)" onload="javascript:resizepic(this)" border="0"/>
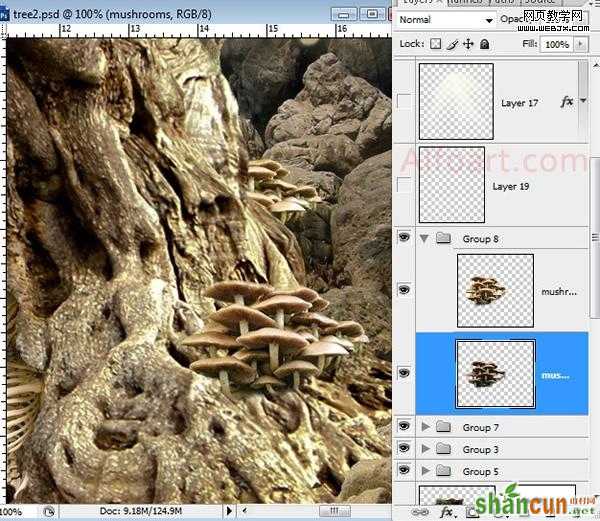
12、增加其他小细节。
 nmousewheel="return bbimg(this)" onload="javascript:resizepic(this)" border="0"/>
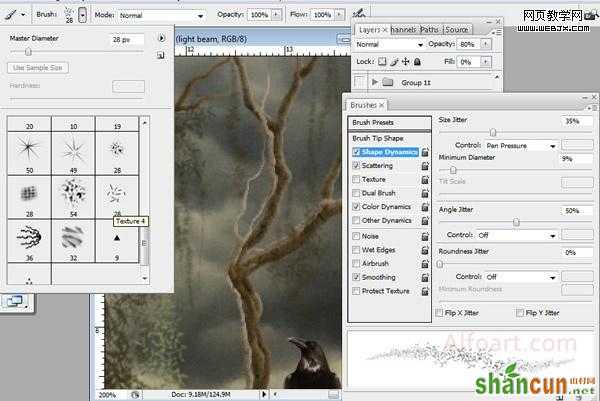
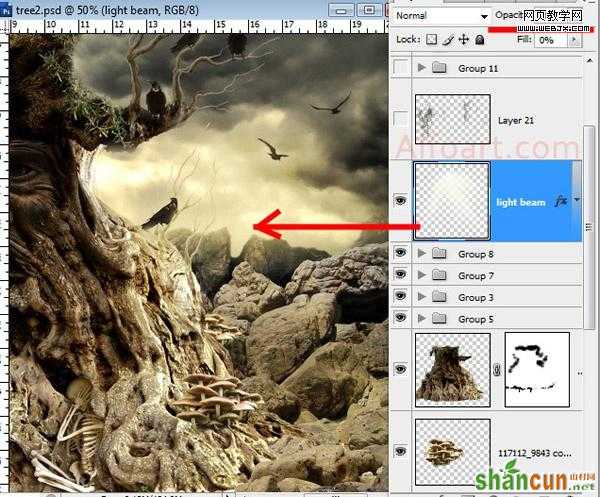
13、使用淡黄色透亮,软的刷子,画光束。 运用不透明80%和叠加混和的方式用于这层数。
 nmousewheel="return bbimg(this)" onload="javascript:resizepic(this)" border="0"/>
14、使用寄生藤条刷子做细节处理。
nmousewheel="return bbimg(this)" onload="javascript:resizepic(this)" border="0"/>
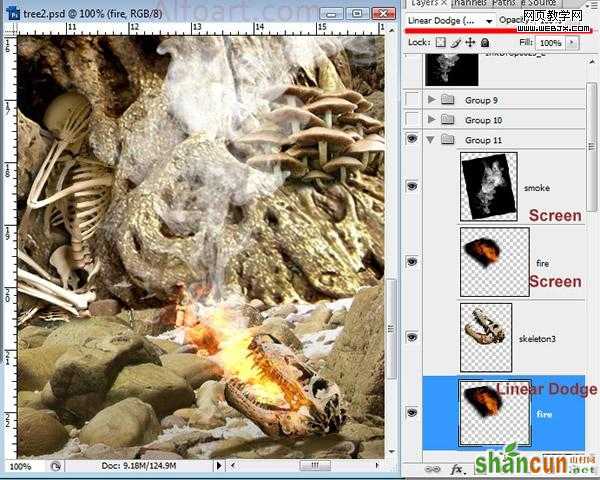
15、拖入烟和火素材。 使用层数顺序和混和方式线性咸淡调整。
 nmousewheel="return bbimg(this)" onload="javascript:resizepic(this)" border="0"/>
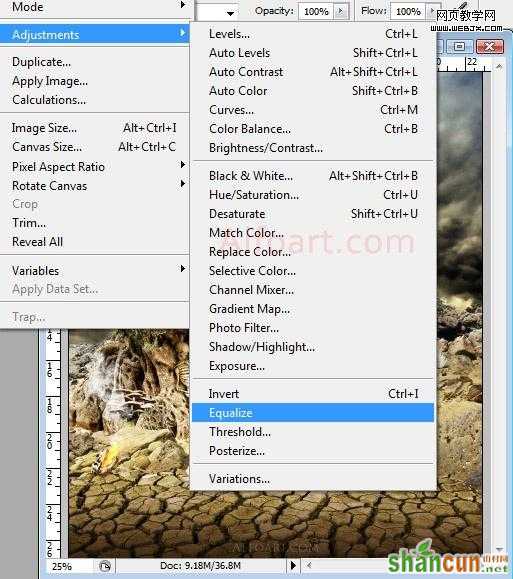
16、合并所有层数。复制一层【Equalize是色调均化 请问知道的是不是 我也不太确定】
 nmousewheel="return bbimg(this)" onload="javascript:resizepic(this)" border="0"/>
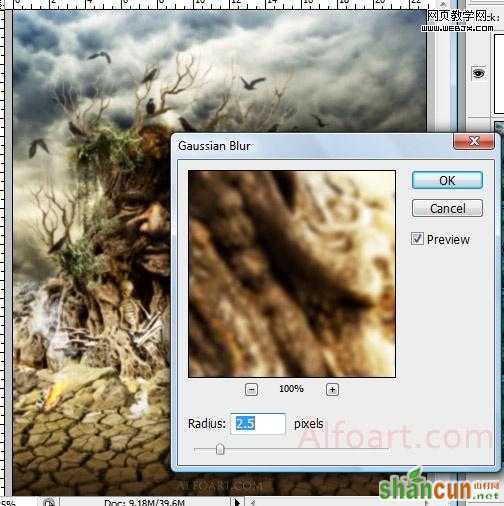
17、高斯模糊(滤镜 > 模糊 > 高斯模糊)。
nmousewheel="return bbimg(this)" onload="javascript:resizepic(this)" border="0"/>
18、混合模式为正片叠底,图层不透明度为35%,完成最终效果:
nmousewheel="return bbimg(this)" onload="javascript:resizepic(this)" border="0"/>


