
最终效果图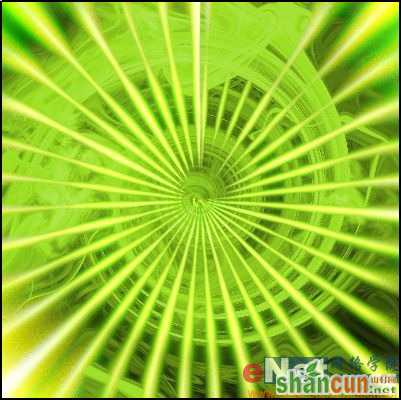 nmousewheel="return bbimg(this)" onload="javascript:resizepic(this)" border="0"/>
1.首先建立一个大小为400*400象素的文档。
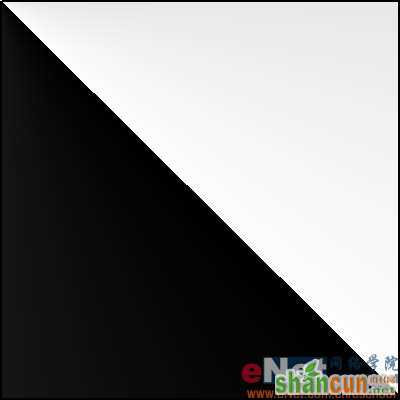
2.设置前景色与背静色分别为亮灰色和黑色。在用渐变工具从文档左下角到文档右上角拉出渐变。
 nmousewheel="return bbimg(this)" onload="javascript:resizepic(this)" border="0"/>
3.应用滤镜-云彩-分层云彩,并重复执行20-30次左右。
 nmousewheel="return bbimg(this)" onload="javascript:resizepic(this)" border="0"/>
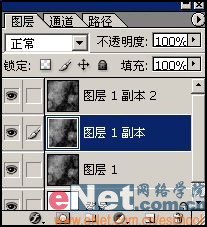
4.将用滤镜处理完的图层另外复制2个。(复制的快捷键是CTRL+J)
 nmousewheel="return bbimg(this)" onload="javascript:resizepic(this)" border="0"/>
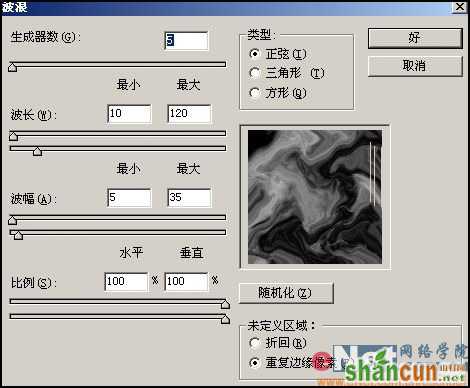
5.在图层副本1上执行滤镜-扭曲-波浪。
 nmousewheel="return bbimg(this)" onload="javascript:resizepic(this)" border="0"/>
按下设置对话当中框随机按纽。
nmousewheel="return bbimg(this)" onload="javascript:resizepic(this)" border="0"/>
6.在图层2副本上重复应用改滤镜5次(快捷键是CTRL+F),设置图层混合模式为变亮。
7.合并所有可见图层。
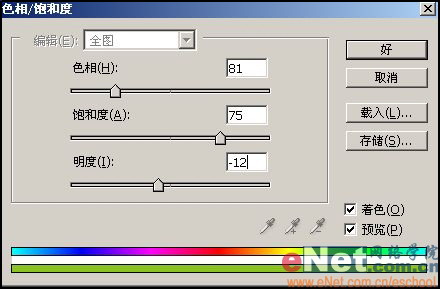
8.按CTRL+U打开色相/饱和度设置对话框:
 nmousewheel="return bbimg(this)" onload="javascript:resizepic(this)" border="0"/>
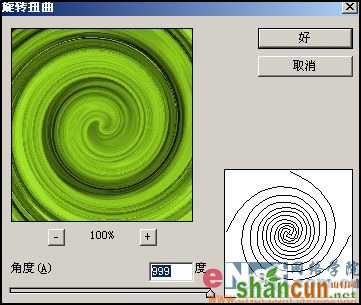
9.复制此图层并执行滤镜-扭曲-旋转扭曲,设置角度为最大999%,设置图层混合模式为变亮。现在在按CTRL+SHIFE+E合并所有可见图层:
 nmousewheel="return bbimg(this)" onload="javascript:resizepic(this)" border="0"/>
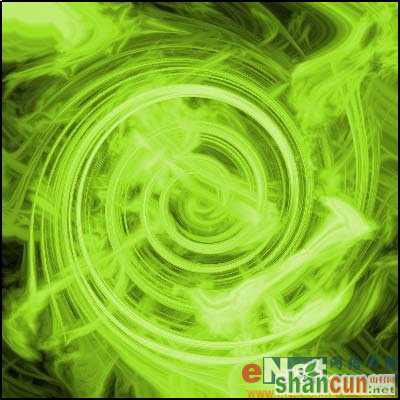
结果如下:
 nmousewheel="return bbimg(this)" onload="javascript:resizepic(this)" border="0"/>
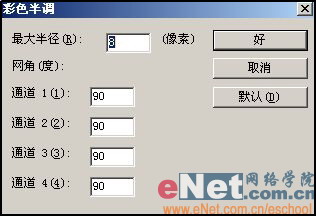
10.复制这个图层执行滤镜-象素化-彩色半调,设置如下:
 nmousewheel="return bbimg(this)" onload="javascript:resizepic(this)" border="0"/>
结果如下:
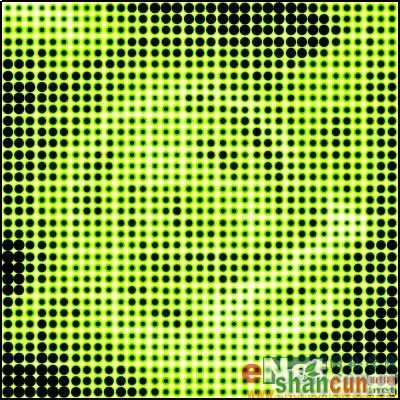 nmousewheel="return bbimg(this)" onload="javascript:resizepic(this)" border="0"/>
11.执行滤镜-扭曲-极坐标,选择平面到极坐标一项:
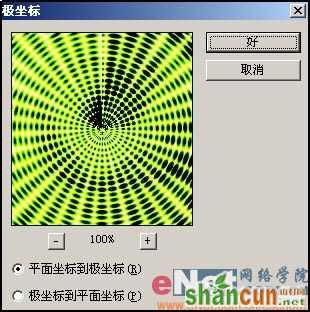 nmousewheel="return bbimg(this)" onload="javascript:resizepic(this)" border="0"/>
结果如下:
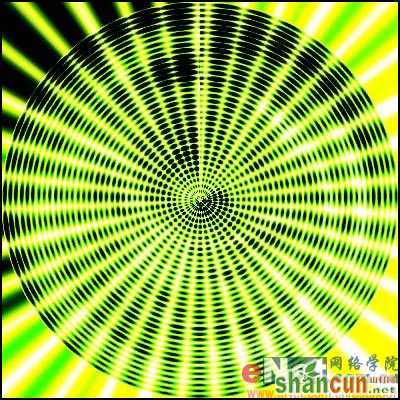 nmousewheel="return bbimg(this)" onload="javascript:resizepic(this)" border="0"/>
12.执行滤镜-模糊-径向模糊:
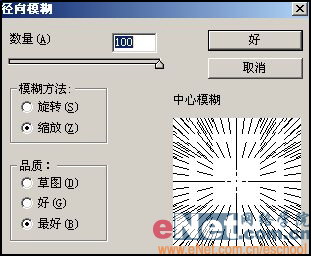 nmousewheel="return bbimg(this)" onload="javascript:resizepic(this)" border="0"/>
最终结果如下:
nmousewheel="return bbimg(this)" onload="javascript:resizepic(this)" border="0"/>


