
最终效果图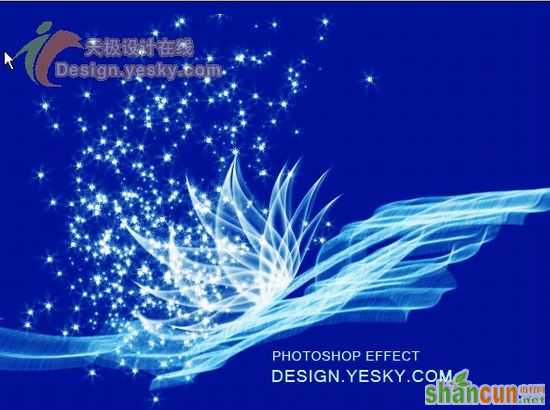 nmousewheel="return bbimg(this)" onload="javascript:resizepic(this)" border="0"/>
1 打开Photoshop,新建立文件,设置背景颜色为黑色:
 nmousewheel="return bbimg(this)" onload="javascript:resizepic(this)" border="0"/>
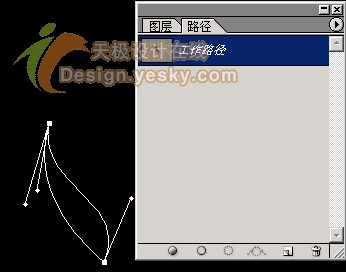
2 用钢笔工具绘制如下图形:
 nmousewheel="return bbimg(this)" onload="javascript:resizepic(this)" border="0"/>
3 将路径转化选区,回到图层,新建一层,填充白色:
 nmousewheel="return bbimg(this)" onload="javascript:resizepic(this)" border="0"/>
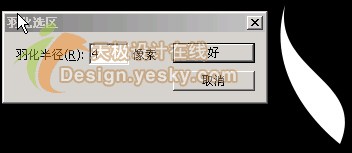
4 执行羽化,具体设置如下:
 nmousewheel="return bbimg(this)" onload="javascript:resizepic(this)" border="0"/>
5 按DELEAT键,得到如下图形:
 nmousewheel="return bbimg(this)" onload="javascript:resizepic(this)" border="0"/>
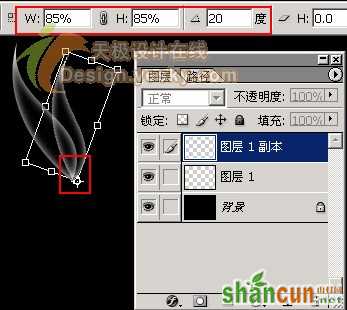
6 按CTRL+ALT+T键,进行变换:
 nmousewheel="return bbimg(this)" onload="javascript:resizepic(this)" border="0"/>
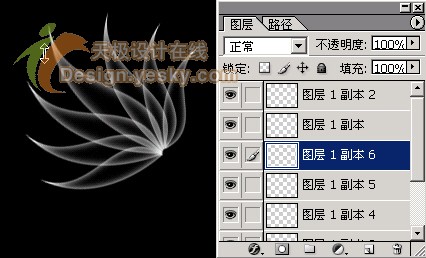
7 按同样的方法进行图形变化,最终得到如下的效果:
 nmousewheel="return bbimg(this)" onload="javascript:resizepic(this)" border="0"/>
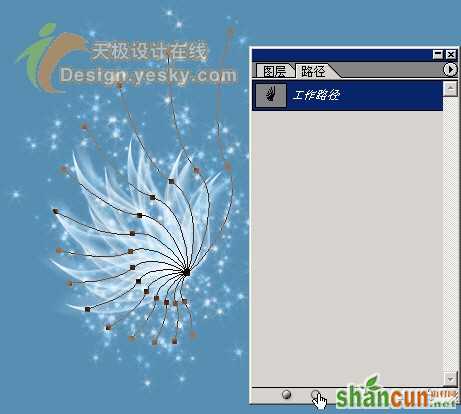
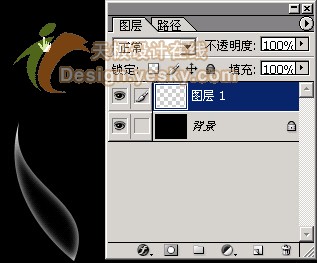
8 合并图层,并且命名为花:
 nmousewheel="return bbimg(this)" onload="javascript:resizepic(this)" border="0"/>
9 复制花层,在复制层执行径向模糊:
nmousewheel="return bbimg(this)" onload="javascript:resizepic(this)" border="0"/>
10 再进行扭曲里的旋转扭曲:
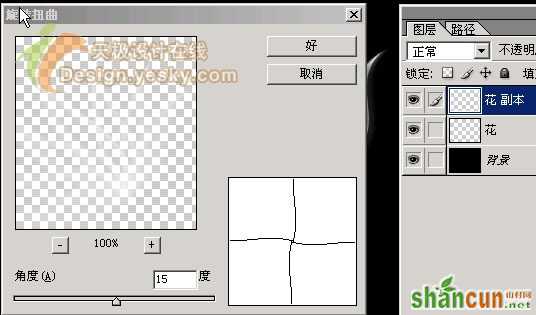 nmousewheel="return bbimg(this)" onload="javascript:resizepic(this)" border="0"/>
11 得到的效果如下:
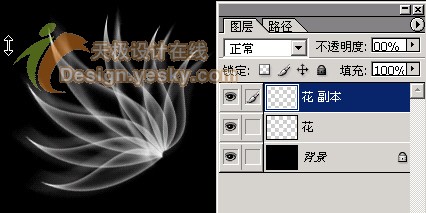 nmousewheel="return bbimg(this)" onload="javascript:resizepic(this)" border="0"/>
12 执行渐变映射:
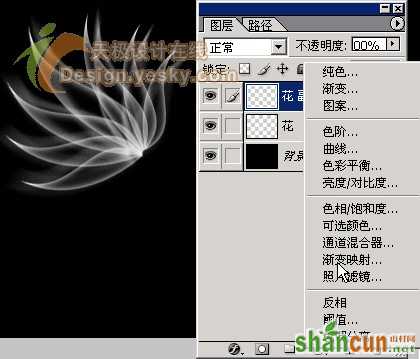 nmousewheel="return bbimg(this)" onload="javascript:resizepic(this)" border="0"/>
13 选择下面设置的渐变色:
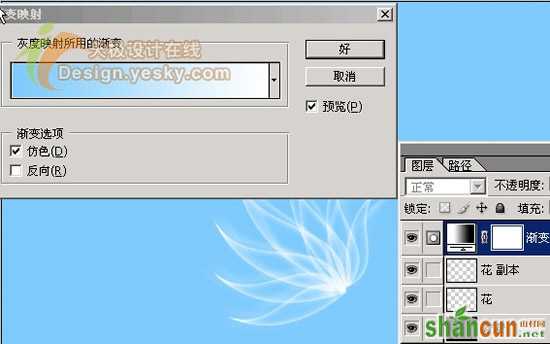 nmousewheel="return bbimg(this)" onload="javascript:resizepic(this)" border="0"/>
14 继续执行应用图象命令:
 nmousewheel="return bbimg(this)" onload="javascript:resizepic(this)" border="0"/>
得到的效果如下:
 nmousewheel="return bbimg(this)" onload="javascript:resizepic(this)" border="0"/>
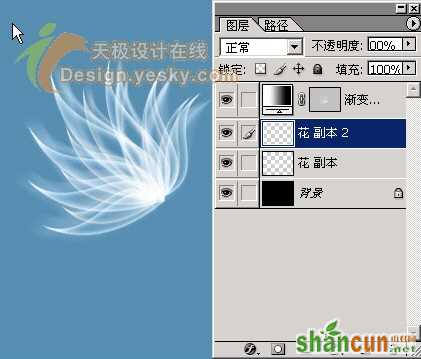
15 合并花和花副本图层,并且复制,将花进行变形,得到如下效果:
nmousewheel="return bbimg(this)" onload="javascript:resizepic(this)" border="0"/>
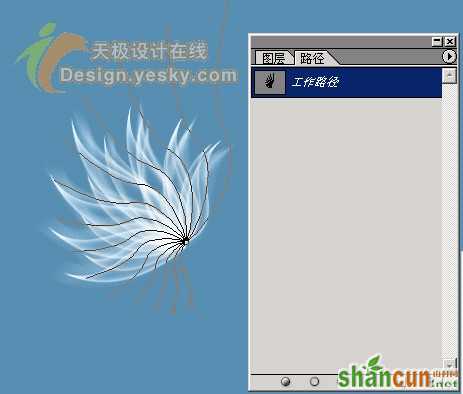
16 继续用钢笔工具绘制路径:
nmousewheel="return bbimg(this)" onload="javascript:resizepic(this)" border="0"/>
17 按CTRL+ALT+T键,进行如下设置:
 nmousewheel="return bbimg(this)" onload="javascript:resizepic(this)" border="0"/>
18 按下ENTER后,连续按CTRL+ALT+SHIFT+T,3lian素材,得到如下的图形:
 nmousewheel="return bbimg(this)" onload="javascript:resizepic(this)" border="0"/>
19 选择这些路径,设置笔触如下:
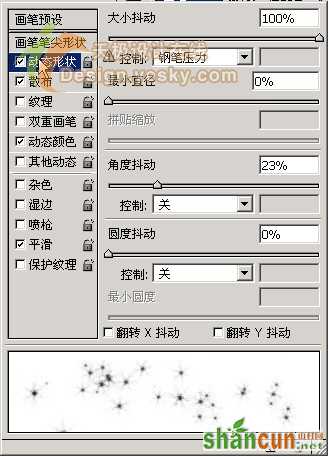 nmousewheel="return bbimg(this)" onload="javascript:resizepic(this)" border="0"/>
20 执行用画笔描边后:
nmousewheel="return bbimg(this)" onload="javascript:resizepic(this)" border="0"/>
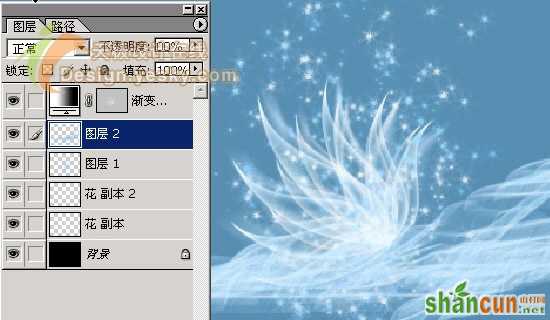
21 同样根据以前绘制轻纱的效果,我们加点修饰:
nmousewheel="return bbimg(this)" onload="javascript:resizepic(this)" border="0"/>
最终效果图
nmousewheel="return bbimg(this)" onload="javascript:resizepic(this)" border="0"/>


