
最终效果图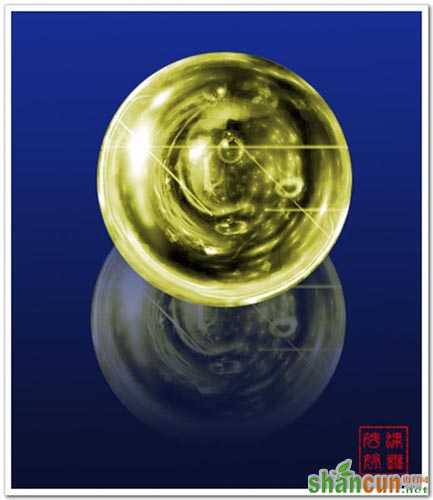 nmousewheel="return bbimg(this)" onload="javascript:resizepic(this)" border="0"/>
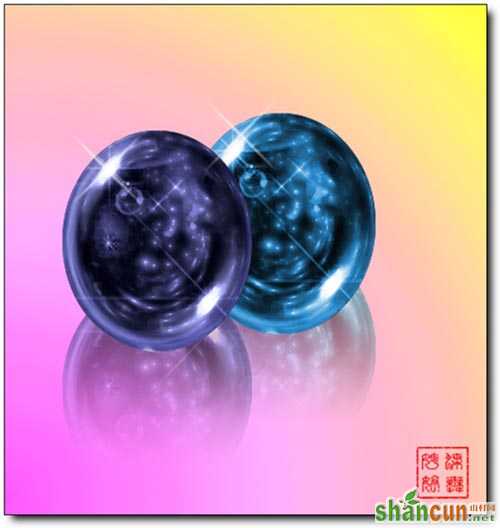 nmousewheel="return bbimg(this)" onload="javascript:resizepic(this)" border="0"/>
素材 nmousewheel="return bbimg(this)" onload="javascript:resizepic(this)" border="0"/>
1、打开素材,复制图层,滤镜--极坐标。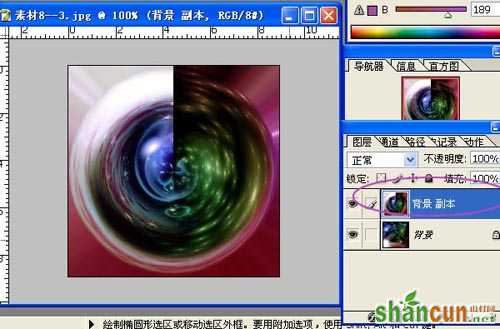 nmousewheel="return bbimg(this)" onload="javascript:resizepic(this)" border="0"/>
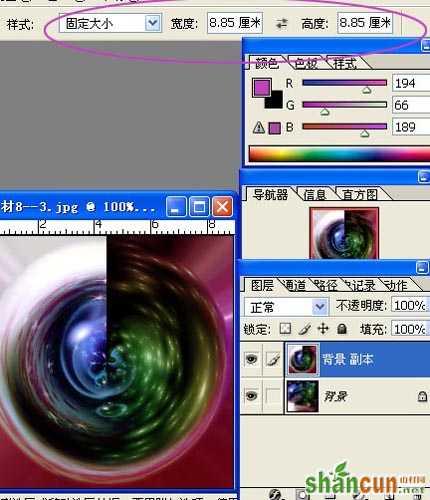
2、我们现在要把球体复制倒一个新的图层.首先执行椭圆选框工具,将样式设为固定大小,根据标尺我们可以知道球体的高度和宽度均为8.85厘米,那么设置就应该如图所示:
 nmousewheel="return bbimg(this)" onload="javascript:resizepic(this)" border="0"/>
3、设置完成后,将鼠标在文件上点击一下,则自动出现一个选区, 我们将选区移动到合适球体的位置上.接着我们将此选区存储到alpha通道1.(不好意思忘了截图,就直接说一下如何存储选区:进入通道新建alpha通道1,然后在选区里面填充白色)
 nmousewheel="return bbimg(this)" onload="javascript:resizepic(this)" border="0"/>
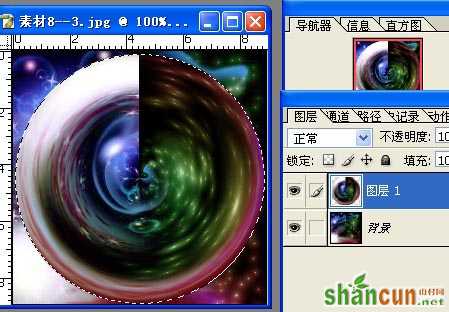
4、按ctrl+J粘贴,球体被复制到新层.然后将背景副本扔掉。
 nmousewheel="return bbimg(this)" onload="javascript:resizepic(this)" border="0"/>
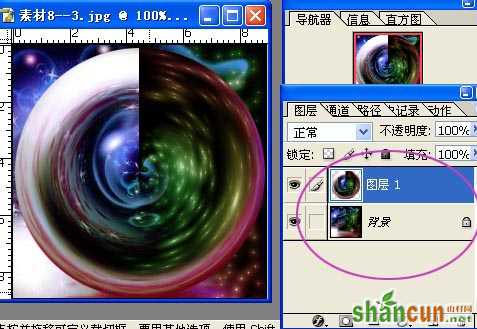
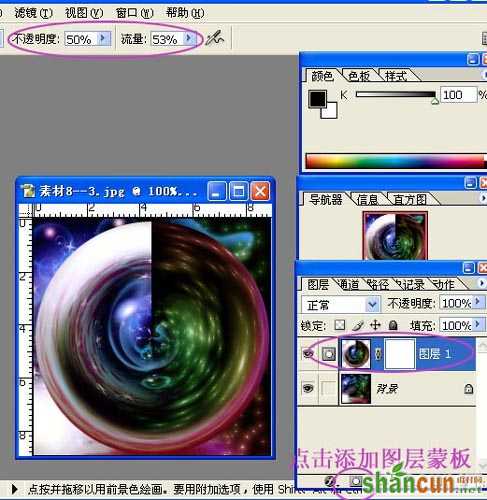
5、给图层1添加图层蒙板,用黑色笔刷抹掉不太自然的地方,这里我们可以将笔刷的流量和不透明度降低。
 nmousewheel="return bbimg(this)" onload="javascript:resizepic(this)" border="0"/>
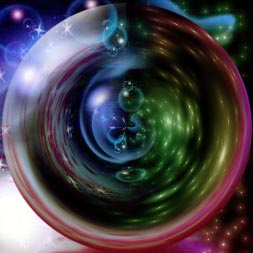
6、现在我们的图大约应该是下面这个样子。
 nmousewheel="return bbimg(this)" onload="javascript:resizepic(this)" border="0"/>
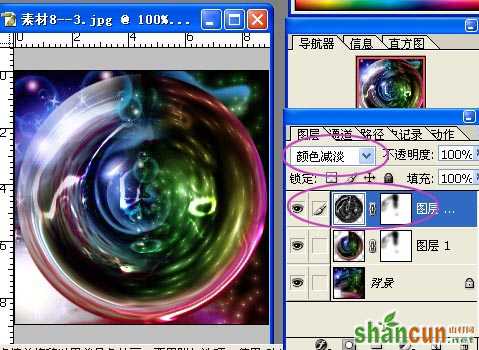
7、复制图层1,执行滤镜--素描--铬黄渐变,设混合模式为颜色减淡.注意:此时的操作是并未在图层蒙板下进行。
 nmousewheel="return bbimg(this)" onload="javascript:resizepic(this)" border="0"/>
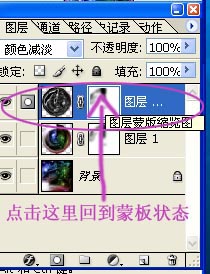
8、现在我们回到蒙板状态。
 nmousewheel="return bbimg(this)" onload="javascript:resizepic(this)" border="0"/>
9、在蒙板状态下,3lian素材,我们用黑色笔刷擦去不太自然的地方。
 nmousewheel="return bbimg(this)" onload="javascript:resizepic(this)" border="0"/>
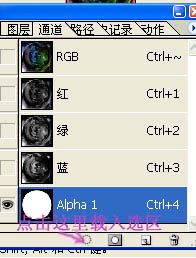
10、合并所有图层.接着我们将alpha通道1载入选区。
 nmousewheel="return bbimg(this)" onload="javascript:resizepic(this)" border="0"/>
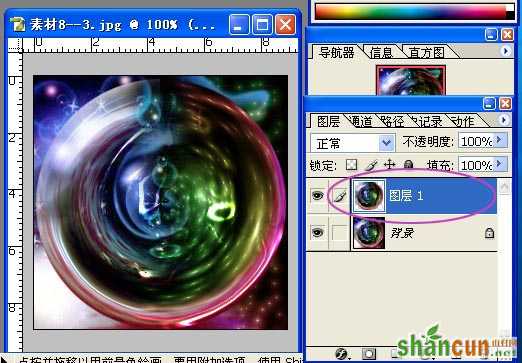
11、回到图层背景,按ctrl+J粘贴,球体被复制到新层。
 nmousewheel="return bbimg(this)" onload="javascript:resizepic(this)" border="0"/>
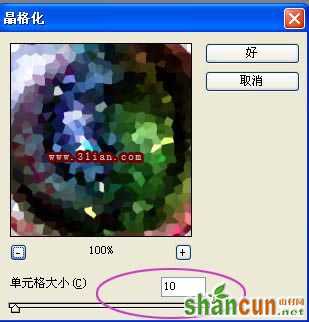
12、执行滤镜--象素化--晶格化。
 nmousewheel="return bbimg(this)" onload="javascript:resizepic(this)" border="0"/>
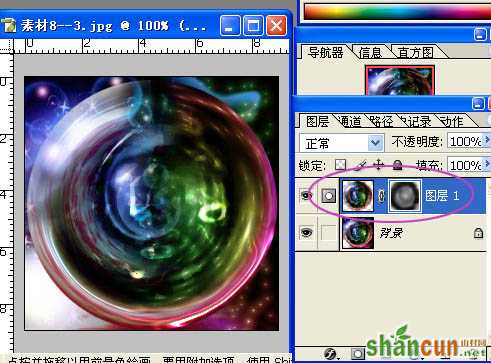
13、添加图层蒙板,用黑色笔刷过渡一下。
 nmousewheel="return bbimg(this)" onload="javascript:resizepic(this)" border="0"/>
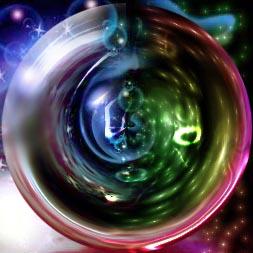
14、合并图层,最后可以根据自己的喜好调整颜色或是加上一些星星笔刷提高亮度,具体操作就*你自己的想象了^_^
最终效果。
nmousewheel="return bbimg(this)" onload="javascript:resizepic(this)" border="0"/>
最后再做个说明,这里我只是跟大家给个方法,具体的操作还得根据实际情况来定,比如下面的这个例子就是用了不同的方法处理出来的,当然大体上还是差不多的,也是运用了极坐标,只是在高光处理上多做了一些步骤,另外晶格化也改成了碎片,大家应该学会灵活运用才是^_^
素材: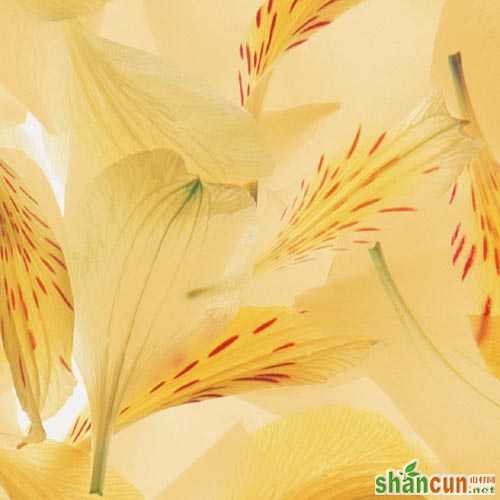 nmousewheel="return bbimg(this)" onload="javascript:resizepic(this)" border="0"/>
最终效果 nmousewheel="return bbimg(this)" onload="javascript:resizepic(this)" border="0"/>


