
效果图 1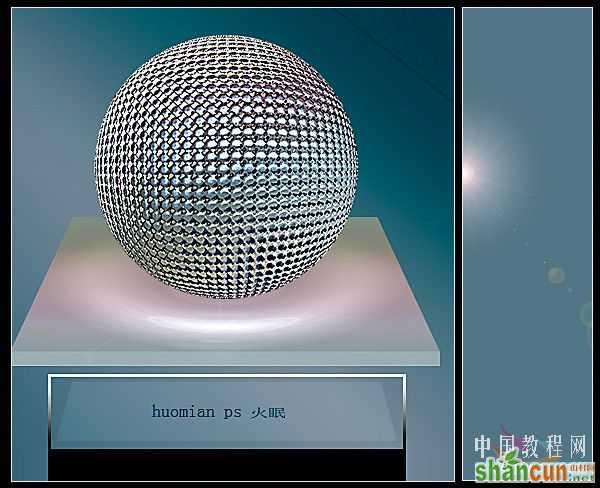 nmousewheel="return bbimg(this)" onload="javascript:resizepic(this)" border="0"/>
效果图 2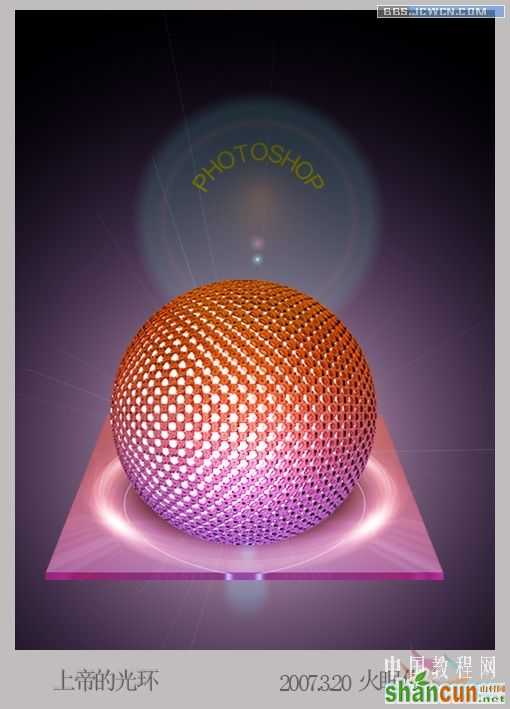 nmousewheel="return bbimg(this)" onload="javascript:resizepic(this)" border="0"/>
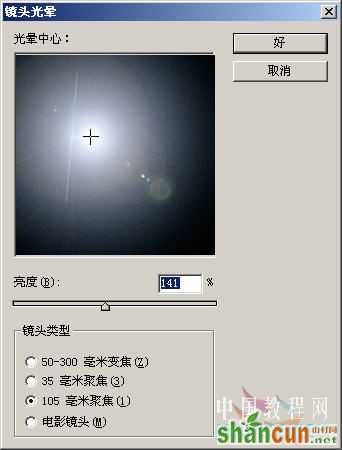
1、新建图像填充黑色,执行滤镜/渲染/镜头光晕。注意光晕中心的位置,不要太居中。参数的设置与画布大小有关。这里是400x400像素。
 nmousewheel="return bbimg(this)" onload="javascript:resizepic(this)" border="0"/>
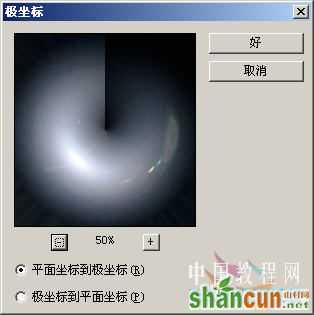
2、执行滤镜/扭曲/极坐标。
 nmousewheel="return bbimg(this)" onload="javascript:resizepic(this)" border="0"/>
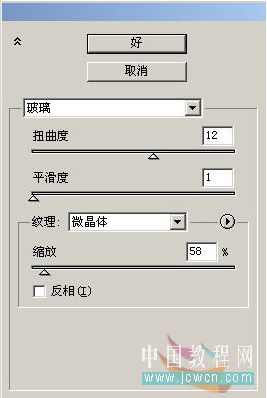
3、滤镜/扭曲/玻璃,选择微晶体纹理,在CS2以后的版本中,这个纹理叫小镜头。
 nmousewheel="return bbimg(this)" onload="javascript:resizepic(this)" border="0"/>
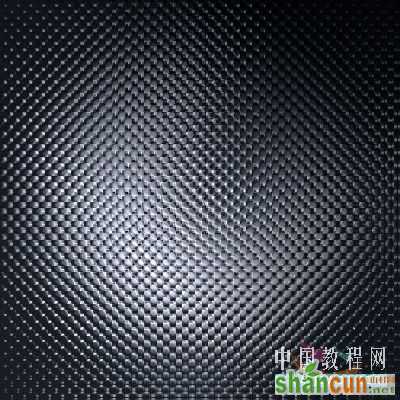
4、好,经过一系列滤镜,得效果如图。
 nmousewheel="return bbimg(this)" onload="javascript:resizepic(this)" border="0"/>
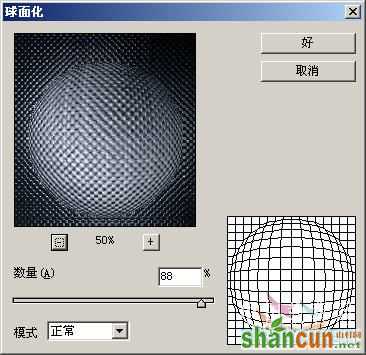
5、用选择工具选择一个正圆区域,执行滤镜/扭曲/球面化。
 nmousewheel="return bbimg(this)" onload="javascript:resizepic(this)" border="0"/>
 nmousewheel="return bbimg(this)" onload="javascript:resizepic(this)" border="0"/>
7、CTRL+J复制为一个新的图层。至此球体的基本形状制作完毕。
 nmousewheel="return bbimg(this)" onload="javascript:resizepic(this)" border="0"/>
8、隐去或删掉背景,因为下面的操作不再用到它。CTRL+SHIFT+ALT+~载入复合通道的选区,将选区反选。
 nmousewheel="return bbimg(this)" onload="javascript:resizepic(this)" border="0"/>
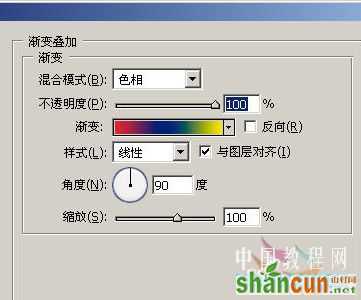
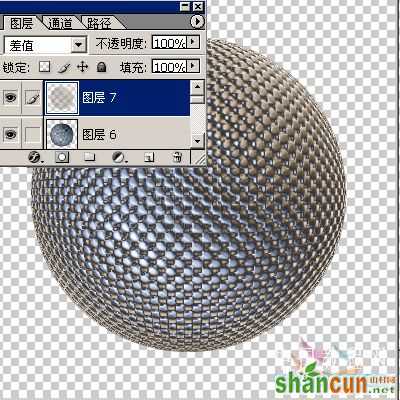
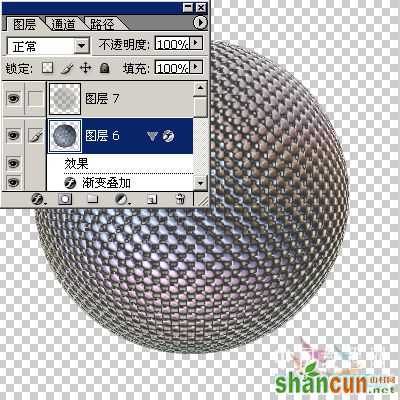
9、对下面的图层应用样式渐变叠加。
nmousewheel="return bbimg(this)" onload="javascript:resizepic(this)" border="0"/>
3lian素材
 nmousewheel="return bbimg(this)" onload="javascript:resizepic(this)" border="0"/>
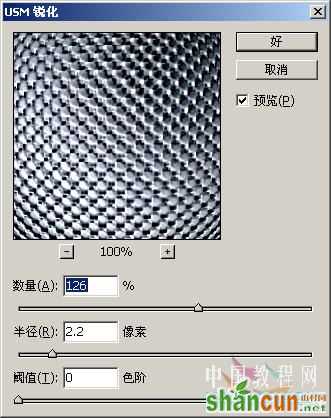
11、继续上面的操作,滤镜/锐化/USM锐化,如果觉得有点刺眼,那可以用复合通道选区从上面的图层7复制一层叠加在上面。
 nmousewheel="return bbimg(this)" onload="javascript:resizepic(this)" border="0"/>
 nmousewheel="return bbimg(this)" onload="javascript:resizepic(this)" border="0"/>
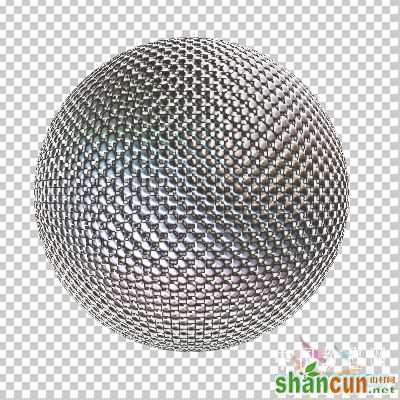
12、将饱和度降低一点,效果如图。
 nmousewheel="return bbimg(this)" onload="javascript:resizepic(this)" border="0"/>
后话:为球体制作一个虚拟的托盘
13、先将画布加高,新建图层填充一种颜色,滤镜/渲染/镜头光晕,用哪种随意啦,你觉得好看就行。复制该层,先极坐标,然后进行透视变换
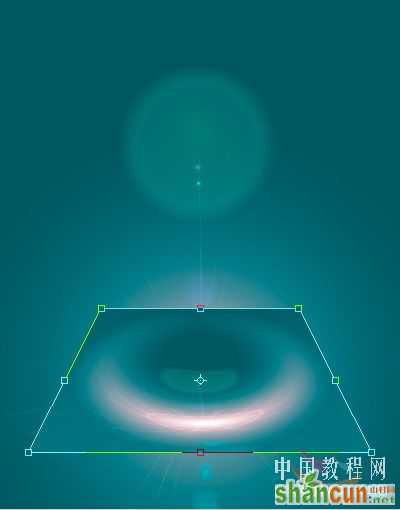 nmousewheel="return bbimg(this)" onload="javascript:resizepic(this)" border="0"/>
14、确定,然后在底边加一条亮线,按住CTRL,点击该层缩略图载入选区,然后按CTRL+ALT+↑(方向键)N下,托盘就做好了,最后将球体放置到上面调整大小和位置。好了,如果觉得好玩,就照着做吧!别忘了加入你自已的想法,开发出更好的效果来。另外一张变形图
nmousewheel="return bbimg(this)" onload="javascript:resizepic(this)" border="0"/>


