
原图  nmousewheel="return bbimg(this)" onload="javascript:resizepic(this)" border="0"/>
最终效果
 nmousewheel="return bbimg(this)" onload="javascript:resizepic(this)" border="0"/>
 nmousewheel="return bbimg(this)" onload="javascript:resizepic(this)" border="0"/>
1、打开图片,ctrl+j两次,得到图层1和图层1副本。
 nmousewheel="return bbimg(this)" onload="javascript:resizepic(this)" border="0"/>
<图1>
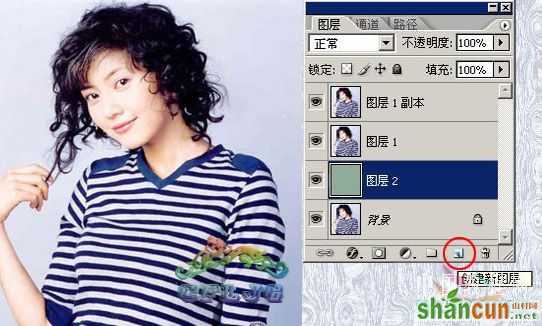
2、点击红圈处,创建新图层,得到图层2把这层放于图层1与背景层之间,并填充颜色,这里填充了绿色,作为检验效果和新的背景层。
 nmousewheel="return bbimg(this)" onload="javascript:resizepic(this)" border="0"/>
<图2>
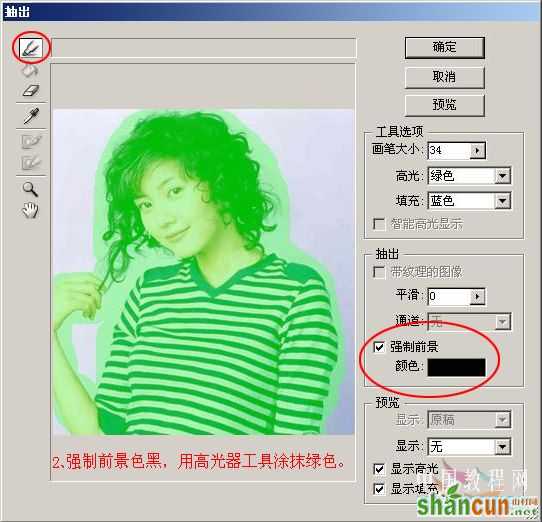
3、在图层1执行滤镜--抽出命令。
 nmousewheel="return bbimg(this)" onload="javascript:resizepic(this)" border="0"/>
<图3>
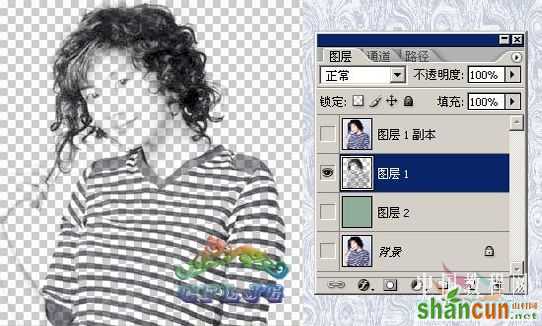
4、我们可以看到抽出后的头发的高光处是半透明的
 nmousewheel="return bbimg(this)" onload="javascript:resizepic(this)" border="0"/>
<图4>
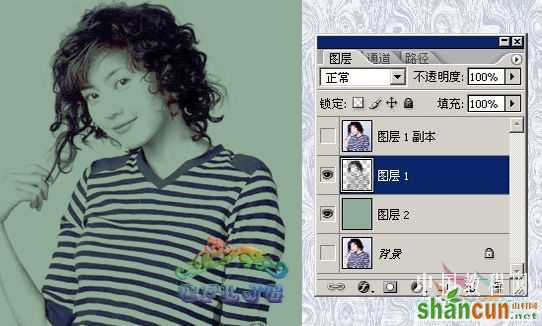
5、半透明之处就露出了新的背景的颜色,3lian素材,这就是本帖要讲的头发溶于背景色的宗旨
 nmousewheel="return bbimg(this)" onload="javascript:resizepic(this)" border="0"/>
<图5>
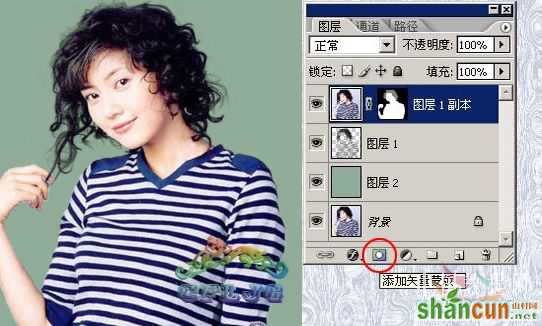
6 、在图层1副本层里,点击红圈处,添加蒙版,用黑画笔涂抹出人物主体及头发以外的新的背景,头发部分用50%灰色画笔涂抹。
 nmousewheel="return bbimg(this)" onload="javascript:resizepic(this)" border="0"/>
<图6>
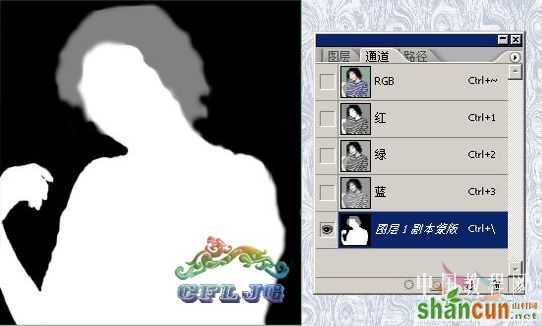
7、蒙版里涂抹大致情况参考。
 nmousewheel="return bbimg(this)" onload="javascript:resizepic(this)" border="0"/>
<图7>
8、再换一下其它颜色的背景看看效果。
nmousewheel="return bbimg(this)" onload="javascript:resizepic(this)" border="0"/>
nmousewheel="return bbimg(this)" onload="javascript:resizepic(this)" border="0"/>


