
要制作一幅成功的作品,首先不要急躁,力争作品的每一个细节完美,颜色应用合理。这样出来的效果就会细腻很多。下面我们一起来领略高手的绘画过程和心得。
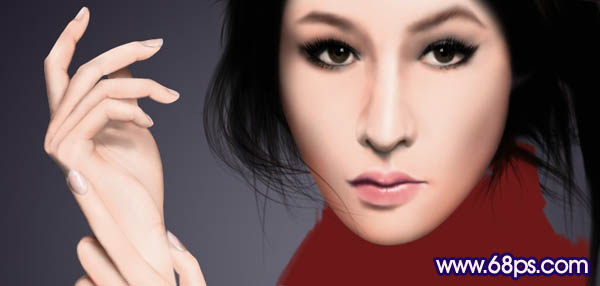
最终效果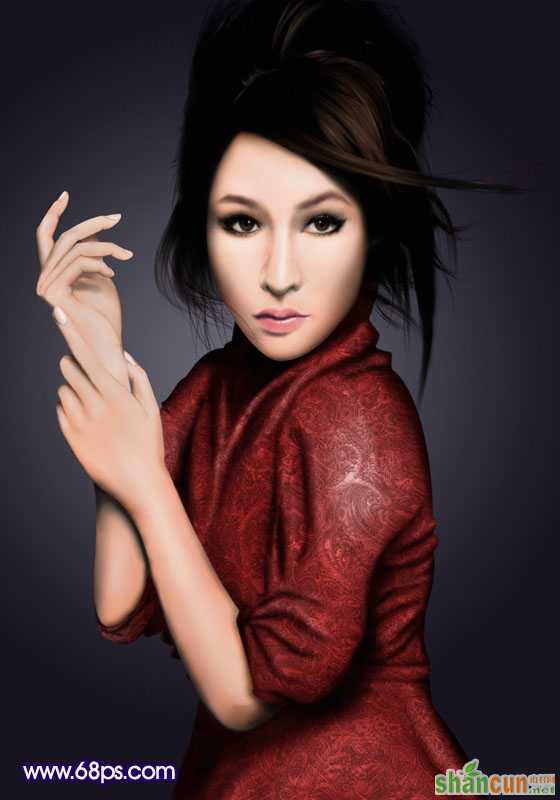 nmousewheel="return bbimg(this)" onload="javascript:resizepic(this)" border="0"/>
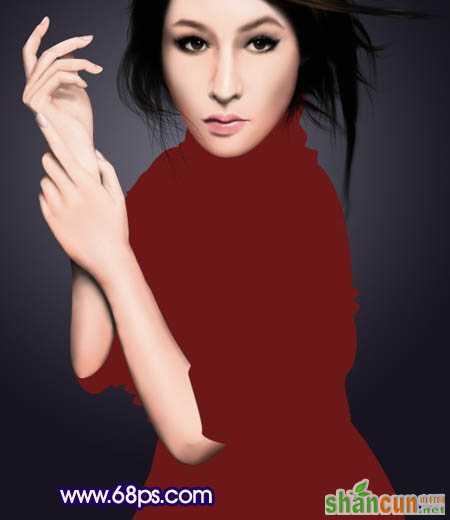
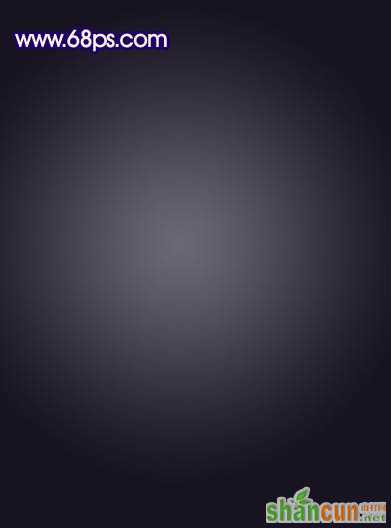
1、新建PSD文件,前景色设为#6a6875,背景色设为#17141f,用渐变工具(模式为径向渐变)拉出一个背景。
 nmousewheel="return bbimg(this)" onload="javascript:resizepic(this)" border="0"/>
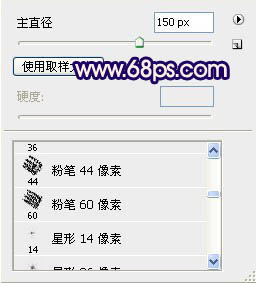
2、新建空白图层,按D键,把前景色设置为#f7d0bf;用画笔中的粉笔笔刷60画出人物脸部和手臂。
 nmousewheel="return bbimg(this)" onload="javascript:resizepic(this)" border="0"/>
 nmousewheel="return bbimg(this)" onload="javascript:resizepic(this)" border="0"/>
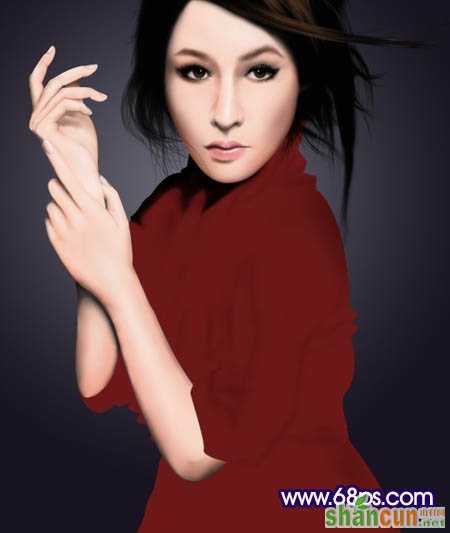
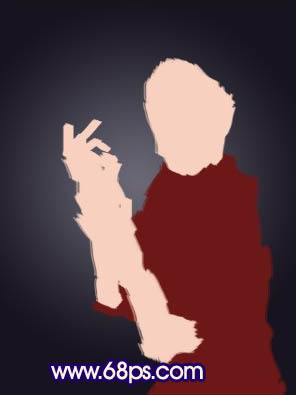
3、新建空白图层,前景色设为#6c1818,草画出衣服,并将衣服所在图层移动到面部图层的下面。
 nmousewheel="return bbimg(this)" onload="javascript:resizepic(this)" border="0"/>
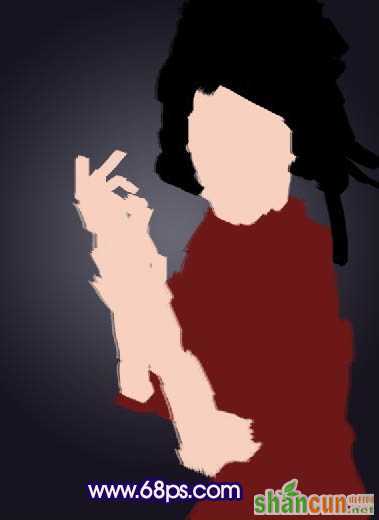
4、再新建空白图层,按D恢复前景色,画笔抹出头发区域。
 nmousewheel="return bbimg(this)" onload="javascript:resizepic(this)" border="0"/>
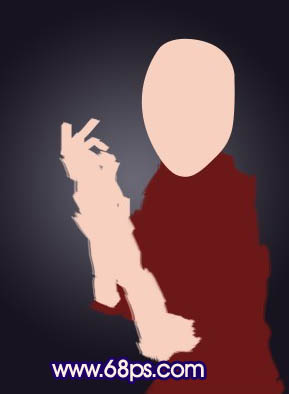
5、隐藏头发图层,用钢笔勾出脸部轮廓,转换成选区,去掉脸部多余的“脂肪”。
 nmousewheel="return bbimg(this)" onload="javascript:resizepic(this)" border="0"/>
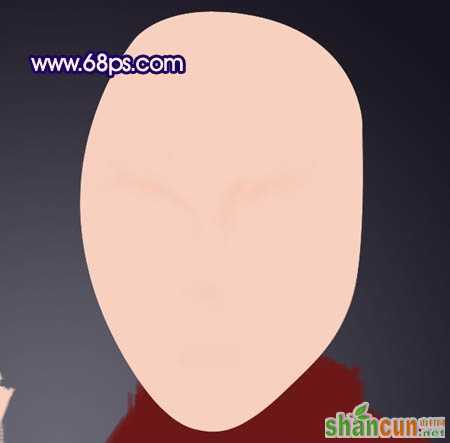
6、用5%曝光度的加深工具,范围为中间调轻轻的画出眼的位置。
 nmousewheel="return bbimg(this)" onload="javascript:resizepic(this)" border="0"/>
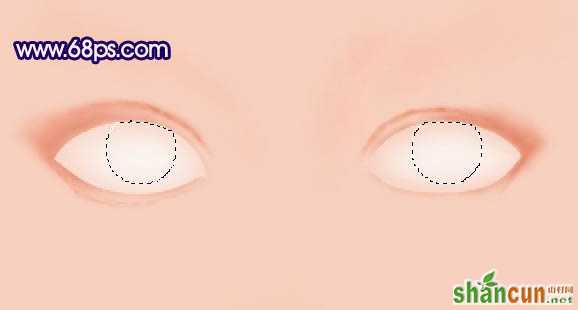
7、钢笔作出眼眶路径,转换为选区,ctrl+shift+I反选,用加深工具和涂抹工具涂抹出眼睛外框;再ctrl+shift+I反选,用减淡工具涂出眼白部分。
 nmousewheel="return bbimg(this)" onload="javascript:resizepic(this)" border="0"/>
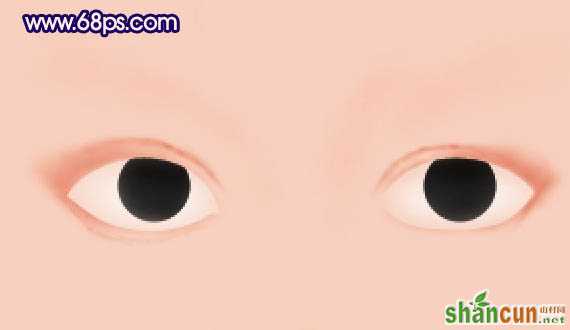
8、椭圆工具作出眼球路径并转换选区,ctrl+shift+alt左键点击之前的眼白路径。
 nmousewheel="return bbimg(this)" onload="javascript:resizepic(this)" border="0"/>
9、加深工具范围选择高光,曝光度自己斟酌,涂出眼球部分。
 nmousewheel="return bbimg(this)" onload="javascript:resizepic(this)" border="0"/>
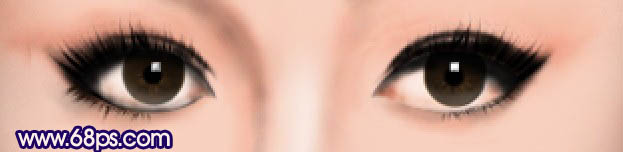
10、下面具体画眼珠了,步骤比较多,小醉我比较懒就不写了,主站上很多眼睛的教程。
 nmousewheel="return bbimg(this)" onload="javascript:resizepic(this)" border="0"/>
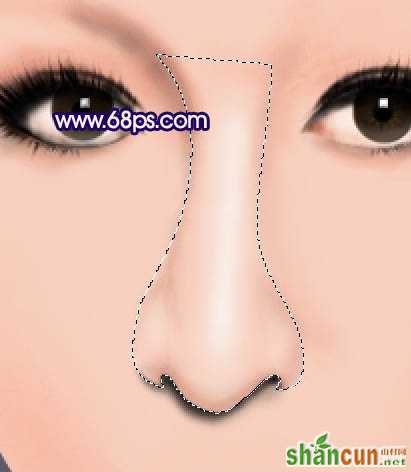
11、钢笔工具勾出鼻子路径,转换为选区,加深/减淡工具涂出鼻子立体感来。
 nmousewheel="return bbimg(this)" onload="javascript:resizepic(this)" border="0"/>
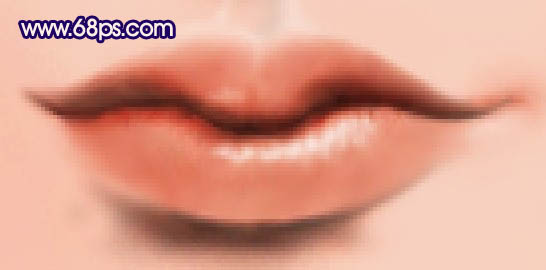
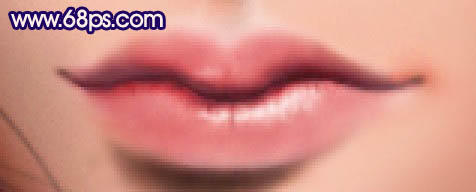
12、加深减淡工具擦出唇线,根据唇线走向擦出嘴巴(友情提示:注意加深/减淡工具中不同范围选择所呈现的不同效果,把涂抹工具配合起来使用效果更佳)。
 nmousewheel="return bbimg(this)" onload="javascript:resizepic(this)" border="0"/>
 nmousewheel="return bbimg(this)" onload="javascript:resizepic(this)" border="0"/>
13、看看整体效果,再对局部精细地方进行修葺。
 nmousewheel="return bbimg(this)" onload="javascript:resizepic(this)" border="0"/>
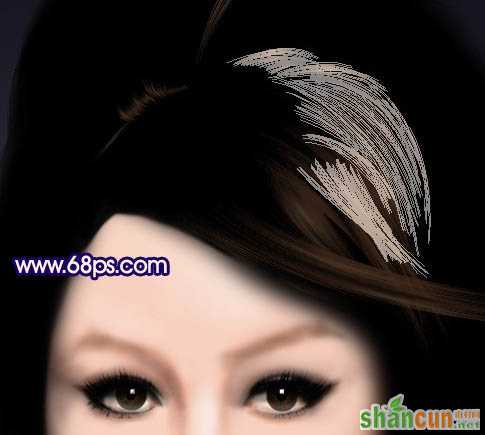
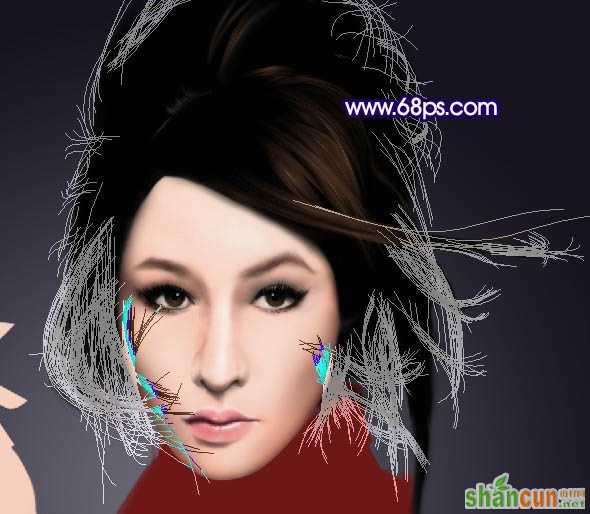
14、用涂抹工具涂抹,选择粗边圆形钢笔画笔100,抹出头发雏形;再用钢笔勾出高光发丝,选择颜色#2c1b0f描边发丝,高斯模糊,半径为1。
 nmousewheel="return bbimg(this)" onload="javascript:resizepic(this)" border="0"/>
15、勾出嘴巴轮廓选区,新建空白层,将嘴轮廓选区ctrl+alt+D羽化,羽化半径2,用#f9b6dc颜色填充选区,图层模式柔光。
 nmousewheel="return bbimg(this)" onload="javascript:resizepic(this)" border="0"/>
16、结合加深/减淡工具、涂抹工具和液化工具对脸部各个细节进行修正,来达到最理想的样子。不要忘了零散的发丝,飘逸点才更有感觉。用1像素的柔角画笔描边,高斯模糊,半径为1。
 nmousewheel="return bbimg(this)" onload="javascript:resizepic(this)" border="0"/>
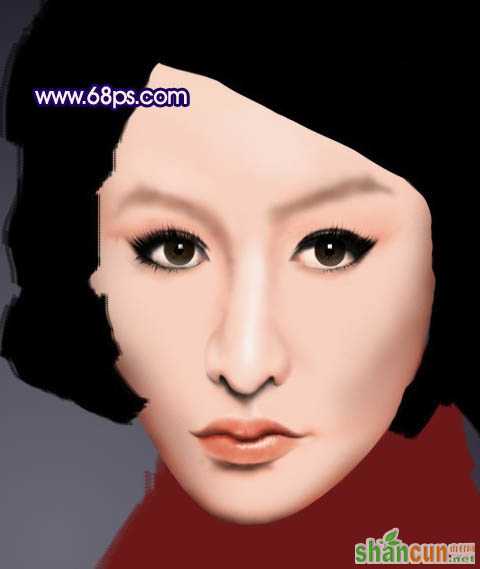
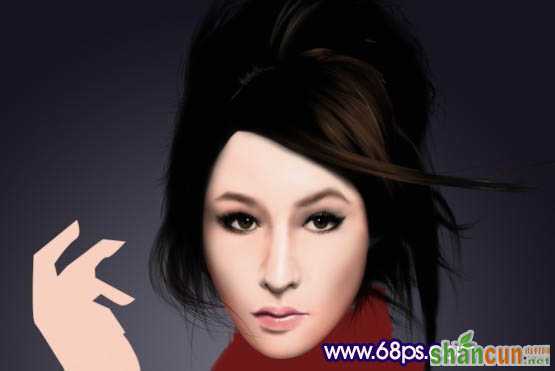
17、观察整体效果,继续修正不如意的地方。
 nmousewheel="return bbimg(this)" onload="javascript:resizepic(this)" border="0"/>
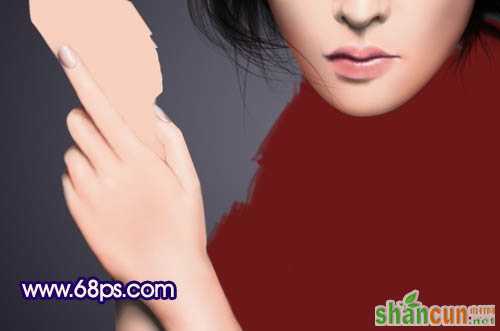
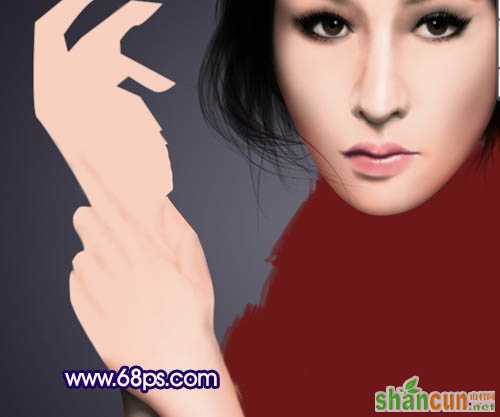
18、经过一系列繁琐的整修之后,人物头部基本完工,接下来要做手的效果了。按照头部同样方法,涂抹出人物手臂。注意明暗变化。
 nmousewheel="return bbimg(this)" onload="javascript:resizepic(this)" border="0"/>
19、选择加深工具,范围中间调,擦出指间位置。
 nmousewheel="return bbimg(this)" onload="javascript:resizepic(this)" border="0"/>
20、钢笔勾出左手轮廓,转换选区,用加深和减淡工具(继续友情提示:注意加深/减淡工具中不同范围选择所呈现的不同效果,把涂抹工具配合起来使用效果更佳),加深阴影效果。然后涂抹工具把皮肤涂抹均匀。
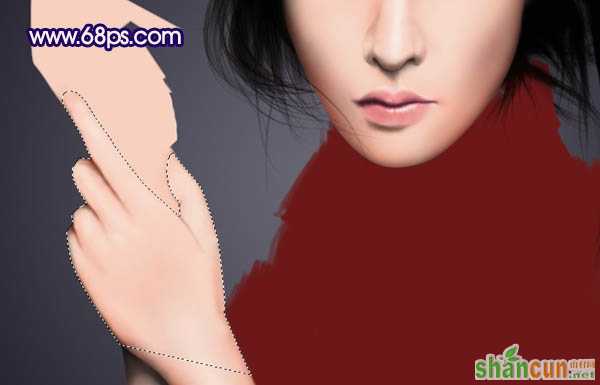 nmousewheel="return bbimg(this)" onload="javascript:resizepic(this)" border="0"/>
21、钢笔勾出食指指甲路径,转换为选区,填充颜色#e7bbb3,加深和减淡工具擦出阴影和高光。
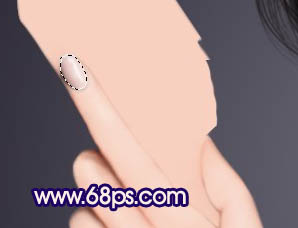 nmousewheel="return bbimg(this)" onload="javascript:resizepic(this)" border="0"/>
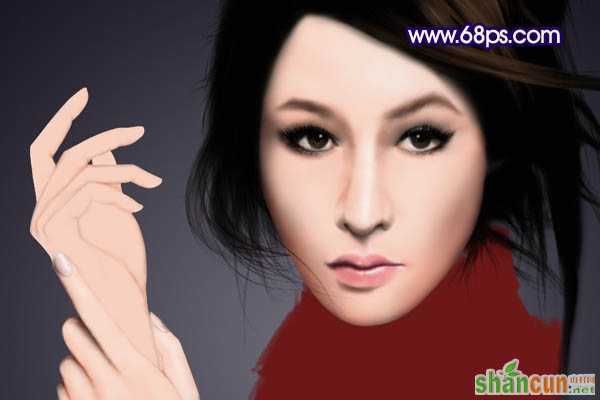
22、用同样方法作出拇指的指甲。
nmousewheel="return bbimg(this)" onload="javascript:resizepic(this)" border="0"/>
23、右手的方法与左手一样,就不再冗长叙述了。
 nmousewheel="return bbimg(this)" onload="javascript:resizepic(this)" border="0"/>
24、加深轮廓,明确细部。
 nmousewheel="return bbimg(this)" onload="javascript:resizepic(this)" border="0"/>
25、注意掌心中的手指阴影做个选区用高斯模糊虚化一下。
 nmousewheel="return bbimg(this)" onload="javascript:resizepic(this)" border="0"/>
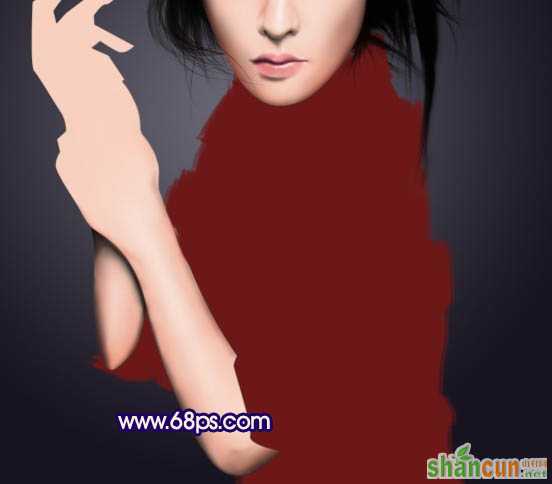
26、接下来就只剩下衣服了。还是老步骤钢笔勾出衣服轮廓,去点多余的,补上空缺的地方。
 nmousewheel="return bbimg(this)" onload="javascript:resizepic(this)" border="0"/>
27、继续加深减淡,初次铺色。
nmousewheel="return bbimg(this)" onload="javascript:resizepic(this)" border="0"/>
28、加强立体感。
nmousewheel="return bbimg(this)" onload="javascript:resizepic(this)" border="0"/>
29、完善阴影高光,追加衣服花纹,把人物肤色协调自然,进一步完善就可以收工了。
nmousewheel="return bbimg(this)" onload="javascript:resizepic(this)" border="0"/>


