
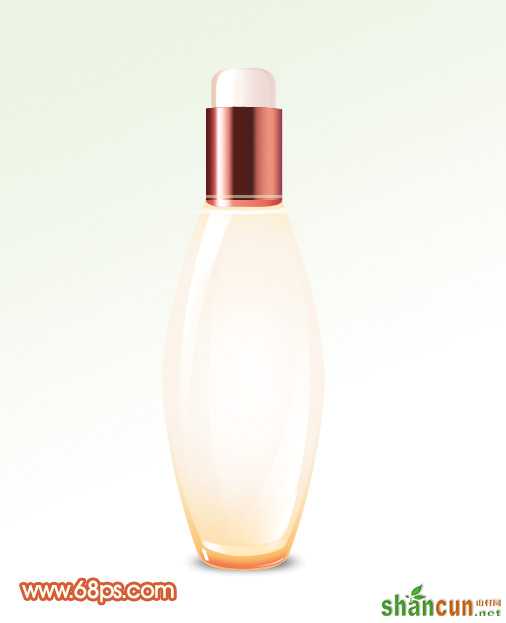
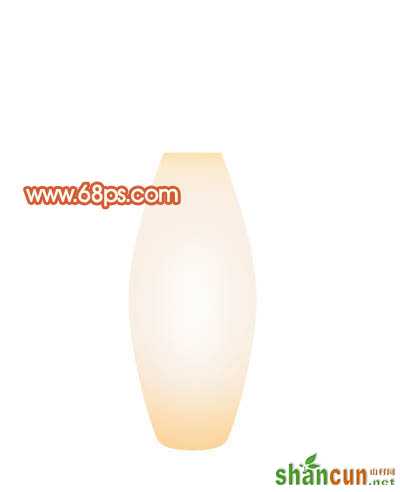
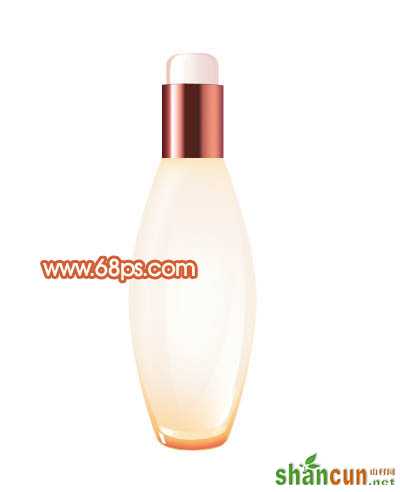
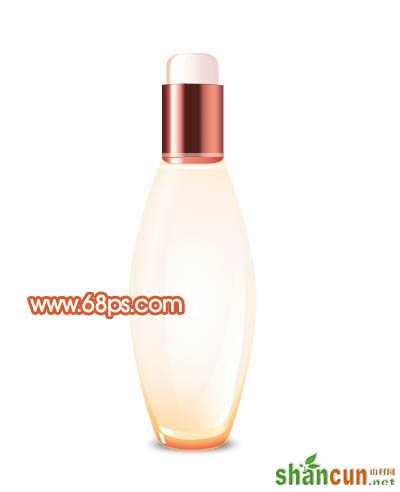
最终效果
 nmousewheel="return bbimg(this)" onload="javascript:resizepic(this)" border="0"/>
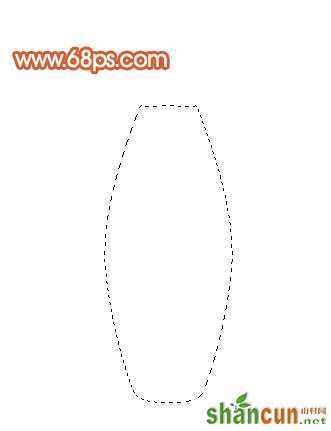
1、新建一个600 * 800 像素的文件,背景选择白色。新建一个图层,用钢笔勾出瓶身部分的选区如图1。
 nmousewheel="return bbimg(this)" onload="javascript:resizepic(this)" border="0"/>
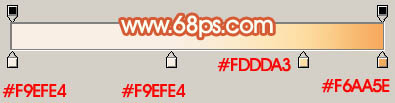
<图1> 2、选择渐变工具,颜色设置如图2,拉出图3所示的径向渐变。
 nmousewheel="return bbimg(this)" onload="javascript:resizepic(this)" border="0"/>
<图2>
 nmousewheel="return bbimg(this)" onload="javascript:resizepic(this)" border="0"/>
<图3>
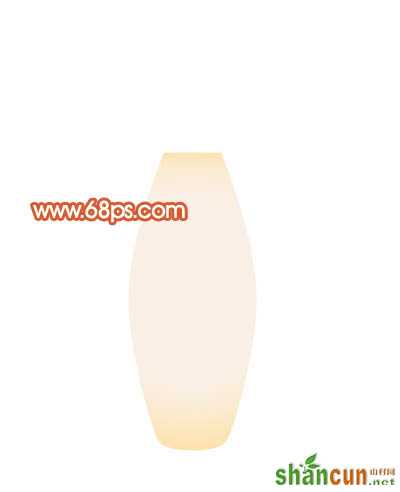
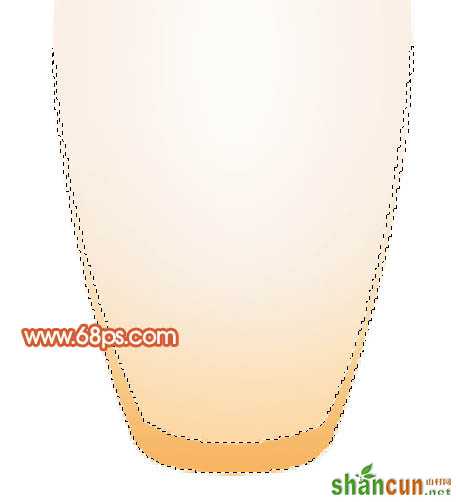
3、选择加深工具把底部加深一点,选择减淡工具把中间部分涂亮一点,效果如下图。
 nmousewheel="return bbimg(this)" onload="javascript:resizepic(this)" border="0"/>
<图4> 4、新建一个图层,用钢笔勾出下图所示的选区,填充颜色:#F8B765,加上图层蒙版,用黑白渐变拉出透明效果,如图6。
 nmousewheel="return bbimg(this)" onload="javascript:resizepic(this)" border="0"/>
<图5>
 nmousewheel="return bbimg(this)" onload="javascript:resizepic(this)" border="0"/>
<图6>
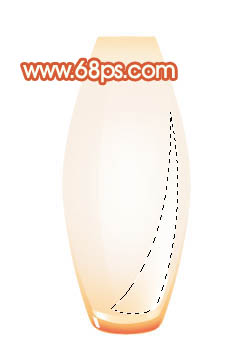
5、新建一个图层,用钢笔勾出下图所示的选区,填充颜色:#EB7351,取消选区后加上图层蒙版,用黑色画笔把上部分稍微羽化处理。
 nmousewheel="return bbimg(this)" onload="javascript:resizepic(this)" border="0"/>
<图7> 6、新建一个图层,用钢笔勾出底部高光部分选区,填充白色,如下图。
 nmousewheel="return bbimg(this)" onload="javascript:resizepic(this)" border="0"/>
<图8>
7、新建一个图层,用钢笔勾出下图所示的选区,填充颜色:#FCE5BB,再用白色画笔把顶部稍微涂亮一点,效果如下图。
 nmousewheel="return bbimg(this)" onload="javascript:resizepic(this)" border="0"/>
<图9>
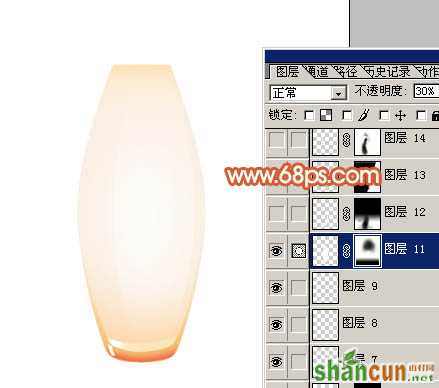
8、新建一个图层,用钢笔勾出图10所示的选区,填充白色。取消选区后把图层不透明度改为:30%,加上图层蒙版,用黑色画笔把底部及顶部擦掉,效果如图11。
 nmousewheel="return bbimg(this)" onload="javascript:resizepic(this)" border="0"/>
<图10>
 nmousewheel="return bbimg(this)" onload="javascript:resizepic(this)" border="0"/>
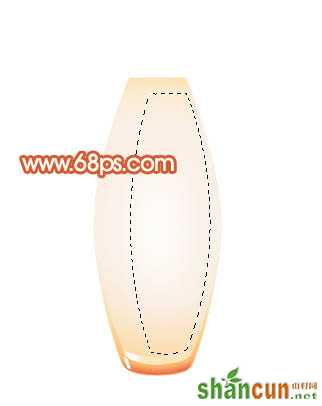
<图11> 9、同样的方法再制作瓶身其它部分的高光,如图12,13。
 nmousewheel="return bbimg(this)" onload="javascript:resizepic(this)" border="0"/>
<图12>
 nmousewheel="return bbimg(this)" onload="javascript:resizepic(this)" border="0"/>
<图13>
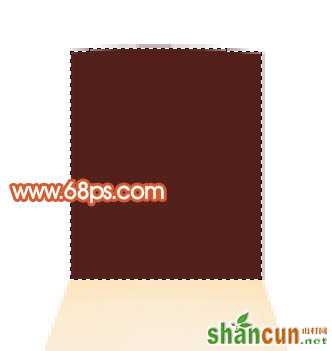
10、新建一个图层,用钢笔勾出瓶盖部分选区,填充颜色:#53201C,效果如下图。
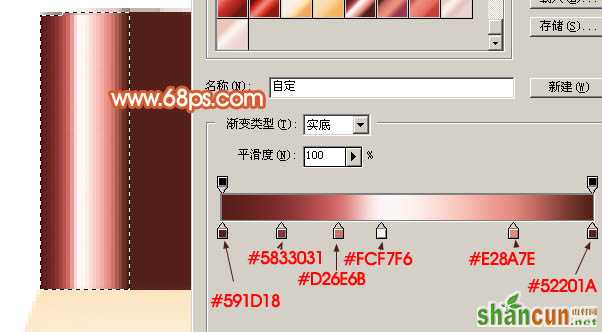
nmousewheel="return bbimg(this)" onload="javascript:resizepic(this)" border="0"/><图14> 11、锁定图层后,给瓶盖拉上渐变色,如图15,16。
 nmousewheel="return bbimg(this)" onload="javascript:resizepic(this)" border="0"/>
<图15>
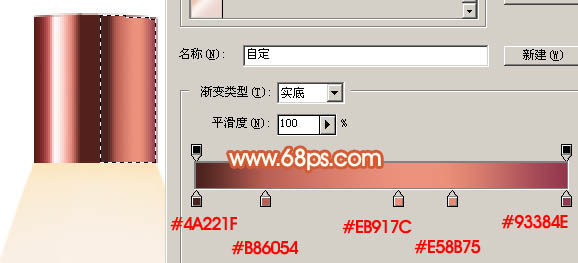 nmousewheel="return bbimg(this)" onload="javascript:resizepic(this)" border="0"/>
<图16>
12、在瓶盖图层下面新建一个图层,用钢笔勾出下图所示的选区,并拉上图右边所示的渐变色。
 nmousewheel="return bbimg(this)" onload="javascript:resizepic(this)" border="0"/>
<图17> 13、再加上高光,效果如下图。
nmousewheel="return bbimg(this)" onload="javascript:resizepic(this)" border="0"/><图18>
14、新建一个图层,加上其它部分的高光,效果如下图。
 nmousewheel="return bbimg(this)" onload="javascript:resizepic(this)" border="0"/>
<图19>
15、最后加上投影和背景颜色,完成最终效果。
nmousewheel="return bbimg(this)" onload="javascript:resizepic(this)" border="0"/><图20>


