素材下载
背景
纹理
图案下载
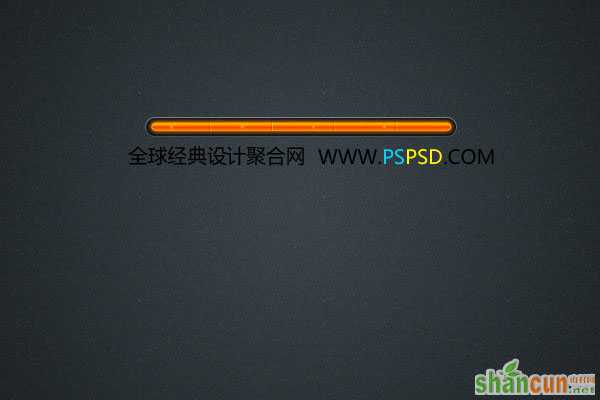
第一步:
新建一个600x400PX的画布,把我们提供的纹理丢进去
现在我们使用“圆角矩形工具”,设置半径为“10PX”,拉出一个长条矩形
第二步:
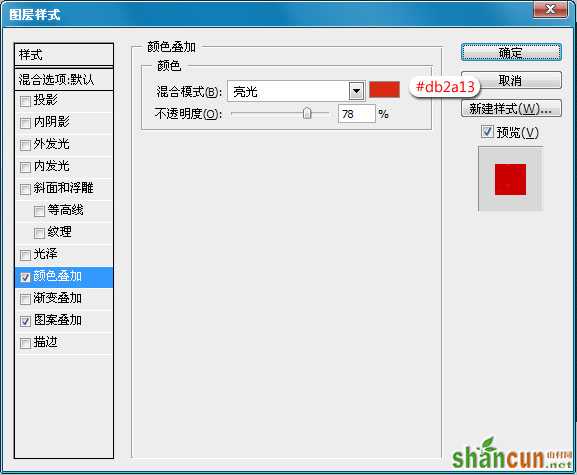
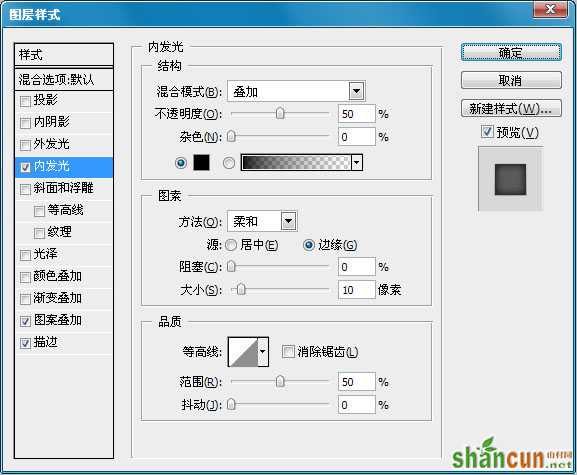
现在我们来设置矩形的混合样式,把它命名为:矩形1。然后双击图层,设置如下:
-内发光:颜色就是默认的黑色
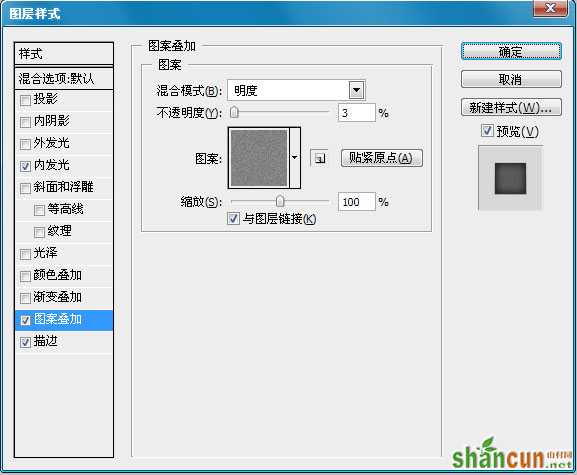
图案叠加: 这个图案需要加载“艺术表明”,默认的里面有
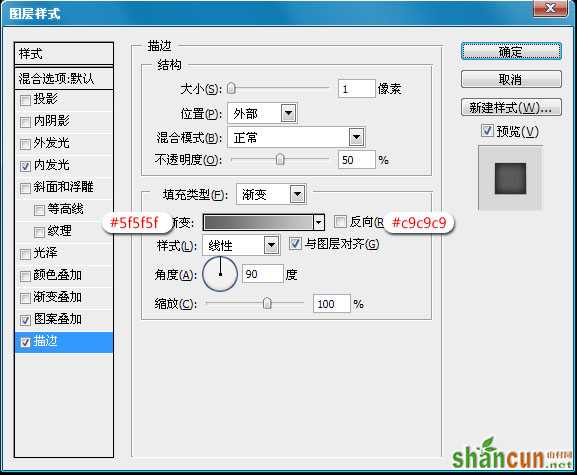
描边
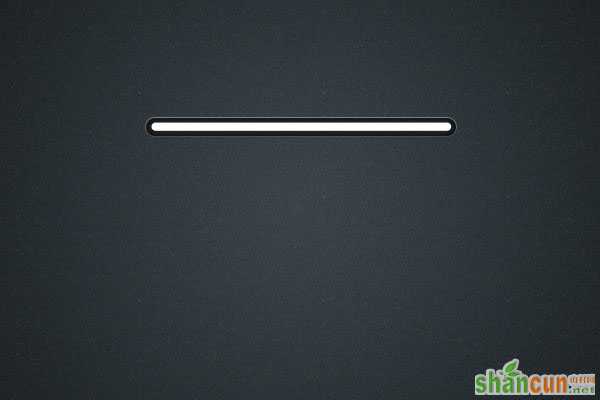
最完后应该是这样的效果

第三步:
现在我们在到“矩形1”,里面画一个小一点的矩形,命名为“矩形2”,如下:
然后双击设置混合样式:
-外发光:

渐变叠加
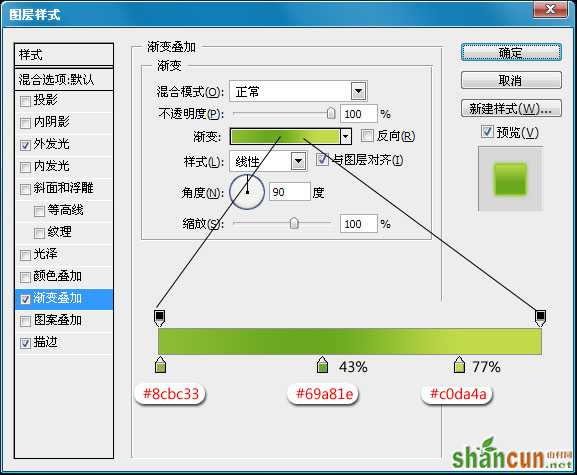
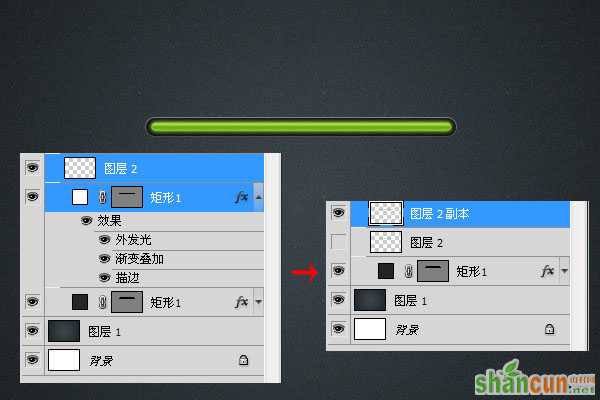
现在我们新建一个图层,然后把它和“矩形2”同时选上,然后合并。这样出来的图层会是“图层2”,然后我们把这个图层复制一个,把老的隐藏掉。因为我们后面还要做效果
第四步:
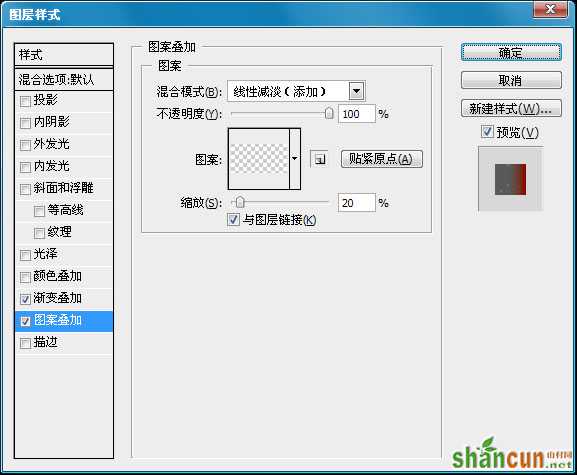
双击“图层2”,混合样式设置如下:
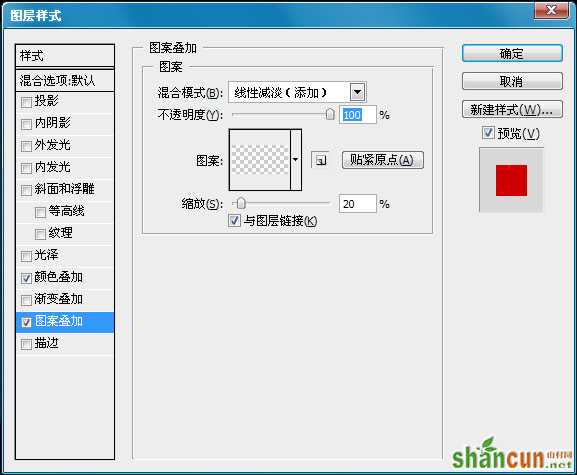
-颜色叠加
图案叠加:上面我们为你准备了,这里不制作了,因为有很多小菜们不知道制作图案
做完后应该是这样的效果

现在我们在用矩形工具,画两根短线条。颜色分别是黑色和白色
制作好后将它复制几个,依次摆好,然后移动到进度条中。如下
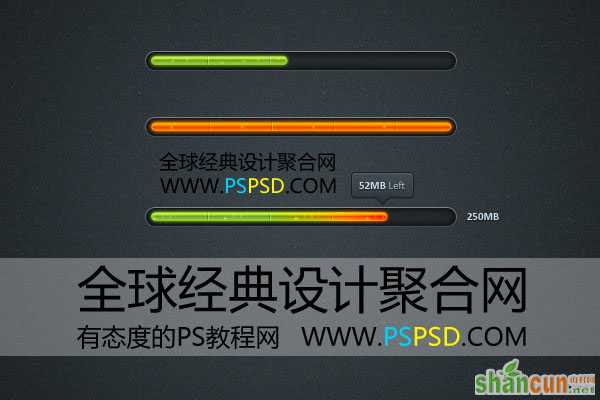
好了,我们第一个已经完成了,你觉得怎么样?下面是我们将这种效果的延伸,只需要几步就OK了。
第二种效果:第一步:
在“矩形1”绘制一个矩形,比上面的要短一点。然后按照上面的方法制作出下面的效果(和上面是一样的,这里我为什么在上面没有让大家保存,目的是想让大家多做一次,能记得住,哈哈)
-渐变叠加

图案叠加:
完成后应该是这样的效果:
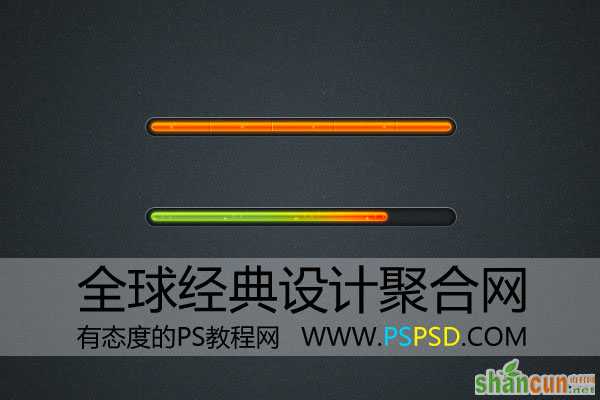
然后我们在到上面添加一些文字说明:
最终效果图