教大家用PhotoShop制作漂亮的立体3D橙色玻璃RSS Icon图标。呵呵,有一些时间没有好好写过PS教程了,不过也没有忘记继续学习PS哦,
坚持才能成功,亲,想学好PS,不动手是不行滴。
这篇教程是在国外网站上看的,效果图是挺漂亮的,简单的把教程翻译了一下,喜欢的可以参考下别人的做图思路。
我们可以拿来参考,分析,这样会对我们做图有帮助的。
先看 教程最终效果图:
1.新建文档,可以根据自己的需要设定。
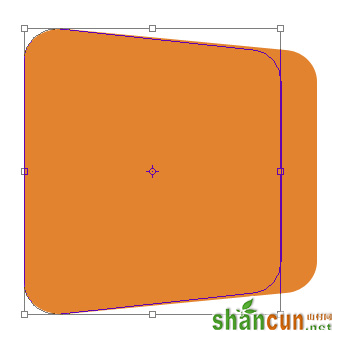
2.设置前景色为橙色(#e2832f),在工具箱中找到矢量圆角矩形工具,设置半径值为40px,按住Shift键绘制个带有圆角的正方形。

3.按CTRL+T对圆角正方形进行变形调整,使其产生立体效果,如图。
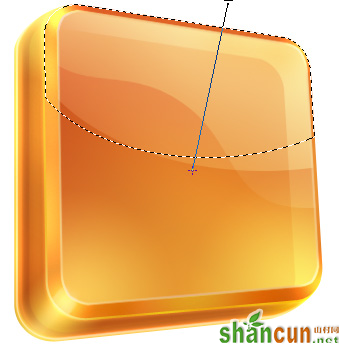
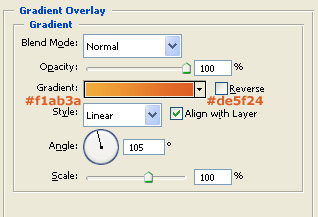
4.为其添加径向渐变,前景色为:#fac042 ,背景色为:#d75927 。新建空白图层,再使用钢笔工具勾出高光路径,如图。
5.按CTRL+回车键,将路径转换成选区,并为其拉出由橙色到浅橙的渐变,并更改其不透明度,效果如图。

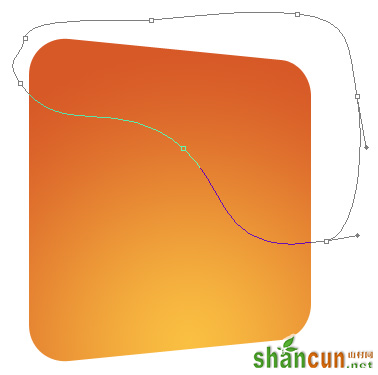
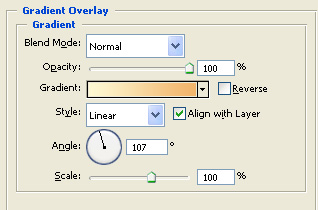
6.我们用同样的方法去制作其它部分,并按CTRL+T进行调整,效果如图。
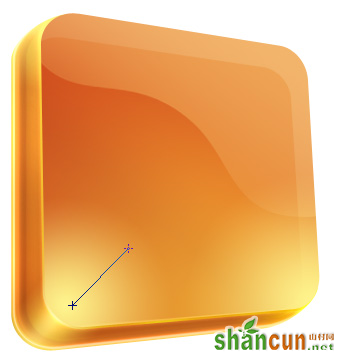
7.继续向下进行调整,这样看起来更加的有立体感,如图。

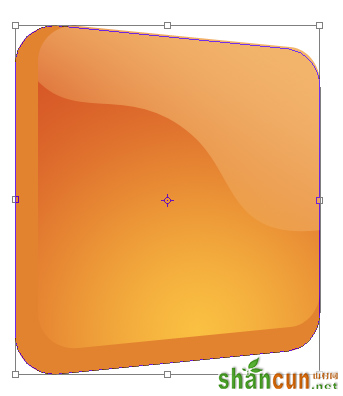
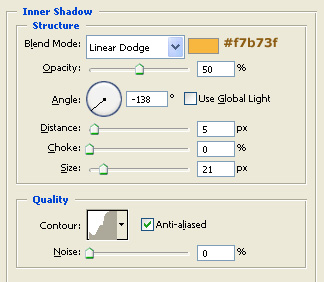
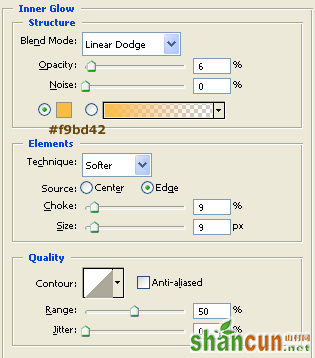
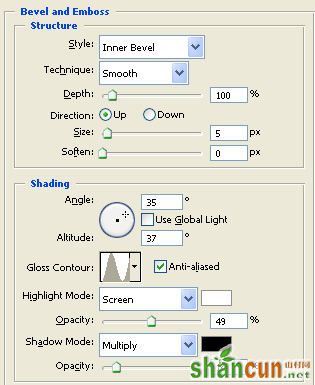
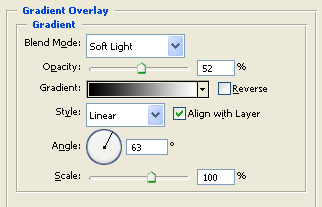
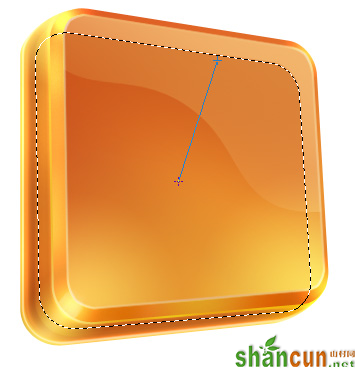
8.调整好后,为其添加图层样式,参数如图,效果如图。

9.新建空白图层,注意图层顺序,使用渐变工具结合画笔工具,为其增加高光效果,如图。

10.用同样的方法继续制倾斜的正方形,并为其添加渐变样式,效果如图。

11.继续调整其高光,中间调,阴影效果,如图。

12.继续使用渐变工具对其进行高光区域进行加强调整,如图。

13.调出图层选区,新建空白图层,使用渐变工具,设置颜色由透明到橙色(#c35c18),由中心向右上角拉出,效果如图。

14.注意四个角的高光加强,如图。
15.新建空白图层,使用钢笔工具绘制选区,选择渐变工具,设置颜色由透明到白色,拉出渐变,并调整其不透明度,效果如图。


16.继续用同样的方法去制作,设置图层混合模式的强光和降低其填充至25%左右。

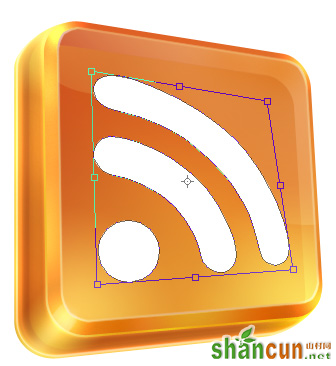
17.使用钢笔工具结合矢量工具中的一些图形,来制作RSS符号,并按CTRL+T对其进行调整,如图。
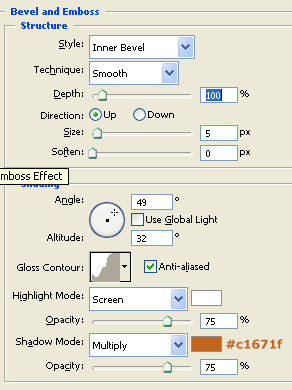
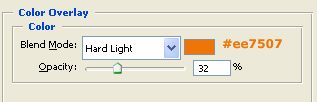
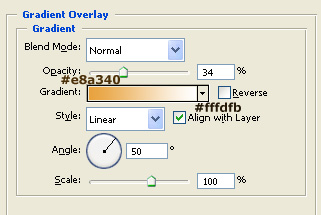
18.为RSS符号添加图层样式,效果如图。
19.为RSS符号继续添加阴影效果,这样看起来更加的立体,如图。

20.调整其阴影不透明度,修饰细节,完成最终效果。