
本教程介绍如何使用Photoshop软件将一些普通的景观图片快速合成出超现实主义的幻想场景。本例制作的步骤比较多,但是方法并不难。我们将会用到Photoshop的图层混合选项、图层、蒙版、各种调整、云彩滤镜以及各种工具。主要步骤包括渐变背景、增加草地、塔、漂浮岛屿,表现云朵中洒下的光柱以及光环等特效。
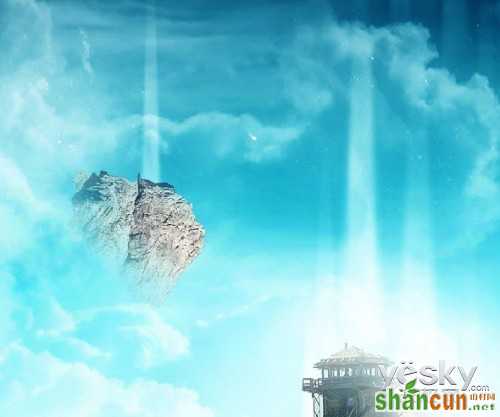
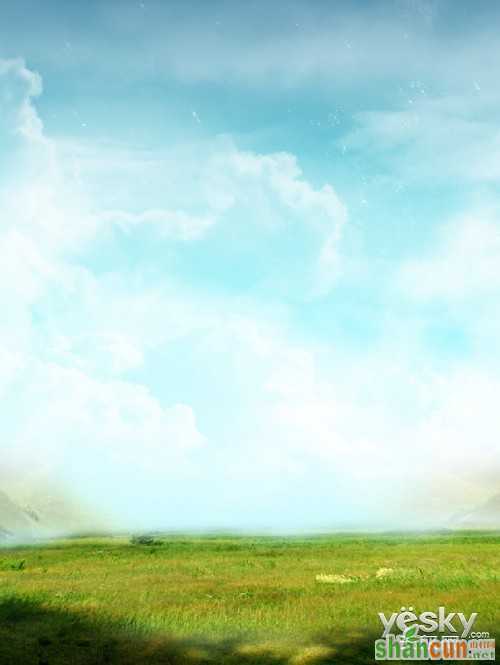
下图是最终完成的效果图。
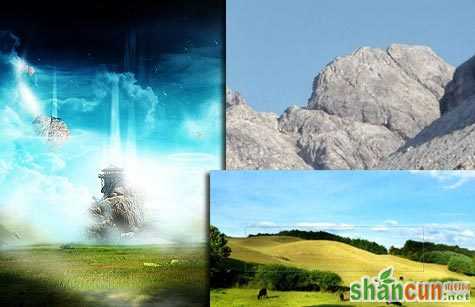
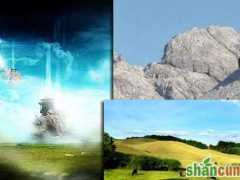
本Photoshop图像合成需要用到的素材包括:云朵、杂点、瞭望塔、草地、山丘、石块等。
步骤一 创建渐变背景
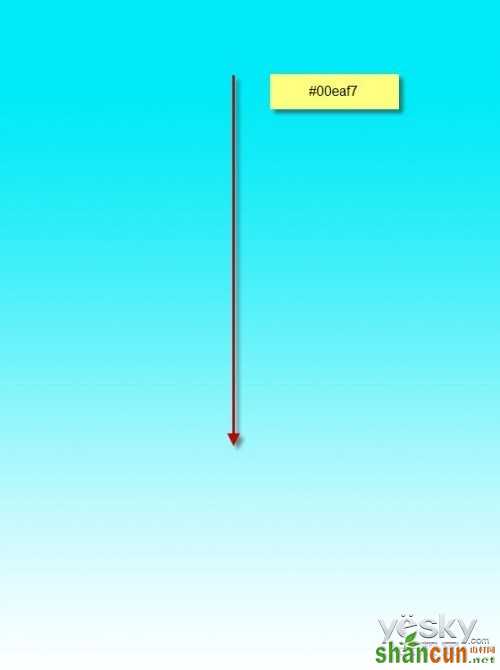
1、 创建一个新文件,大小为900像素×1200像素,将背景图层为填充白色,创建新图层,使用渐变工具由上至下拖动鼠标,填充一个从#00eaf7到透明的线性渐变效果,如图所示。
再创建一个新图层,使用更深的蓝色(#227398)做渐变填充,效果如下图所示。
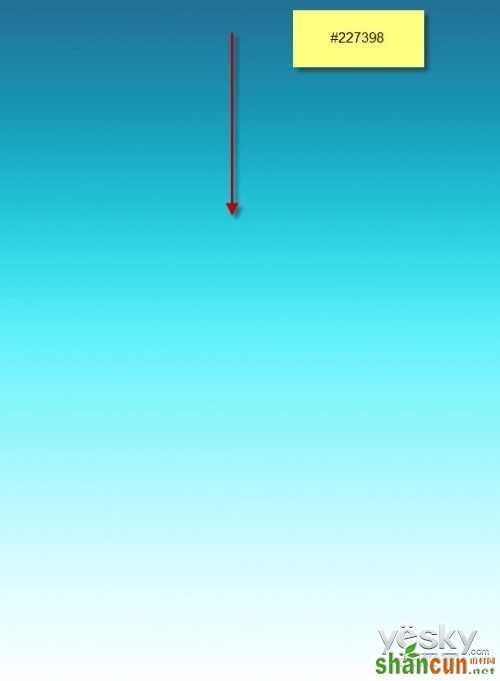
之所以使用两个渐变图层来表现,主要是为了更方便地对每种渐变效果进行调整,可以单独对每一个图层做调整,更加灵活。完成效果如图。
现在创建一个新图层,取名为“云”,用之前下载好的云朵笔刷在刚才的渐变背景上画一些云。
创建一个新图层命名为“杂点”,使用污迹笔刷在下图所示的位置中绘制一些杂点。注意不要画太多,参数调节至20%左右。

按下Ctrl+J复制一次杂点图层,然后设置运动模糊效果(滤镜—模糊—运动模糊),如图所示。
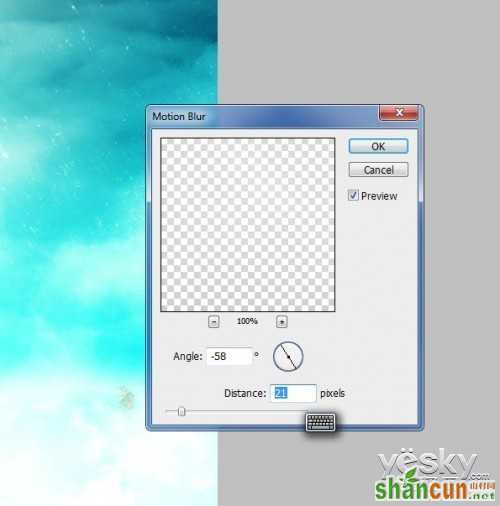
设置运动模糊后杂色的效果如下。
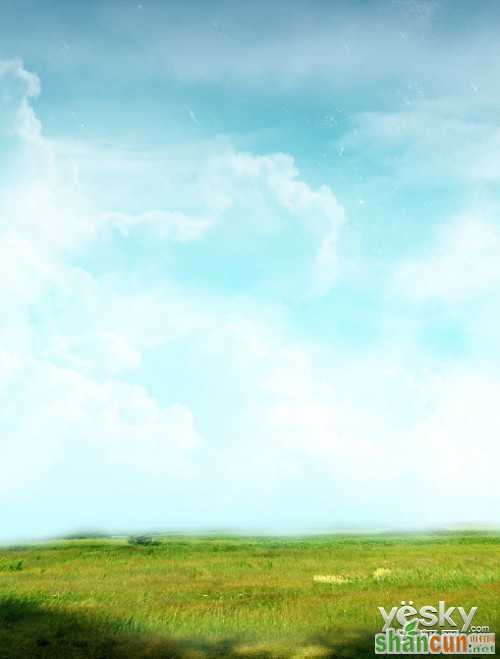
完成后整体效果如下。
步骤二 增加草地
现在,让我们添加一些草地元素,在photoshop中打开草地素材,使用选择工具选择下图所示的草地部分。
将剪切下来的草地部分粘贴到背景中,将位置调整到画面底部,并用大尺寸的柔软橡皮擦工具清理顶部边缘,使它们和背景融合。
完成后效果如下:
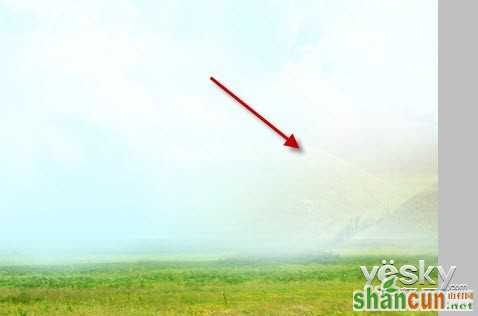
在photoshop中打开山丘素材,使用选择工具选择山岳部分,然后复制,如图所示。和前面选择草地的步骤类似。
将复制的山岳素材复制到画面,调整位置到整个画面的右侧,同样使用大尺寸的柔软的橡皮擦工具模糊边缘,如图所示。
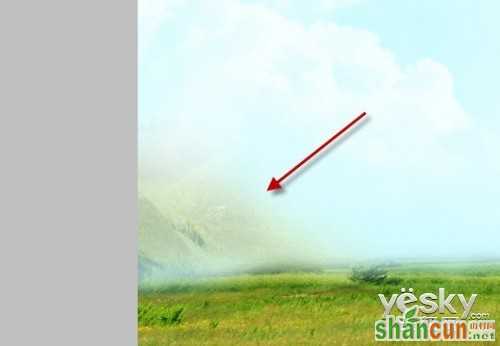
复制山岳图层,设置水平翻转,选择菜单“编辑—调整—水平翻转”,移动到画面左侧,如图所示。
完成后效果如下:
步骤三 添加塔素材
在Photoshop中打开“瞭望塔”素材,选择合适的部分剪切粘贴到画面的中间位置,如图所示。

创建一个新图层,填充白色,用黑色的柔角画笔画出下图所示的阴影,然后设置图层的混合模式为“滤色”。
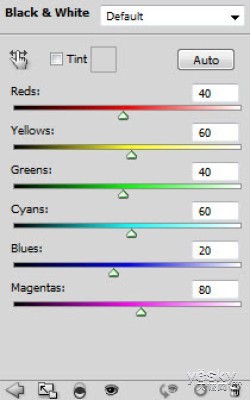
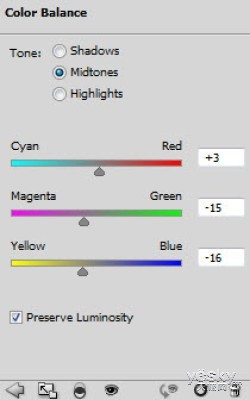
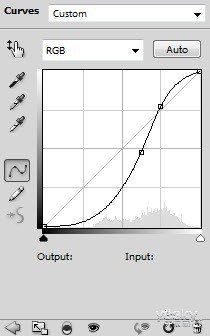
选择含有塔元素的图层,在图层面板中单击“创建新的填充或调整图层”按钮,选择“黑白”,参数设置参考下左图所示。创建“色彩平衡”调整图层,参数设置参考下右图所示。
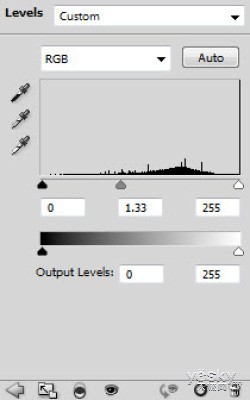
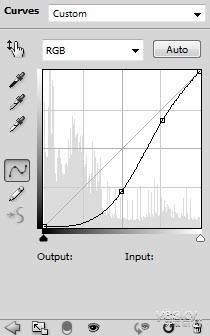
创建“曲线”调整图层,参数设置参考下左图所示;创建“色阶”调整图层,参数设置参考下右图所示。

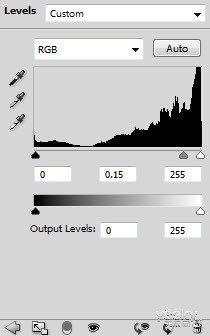
将得到下图所示效果。
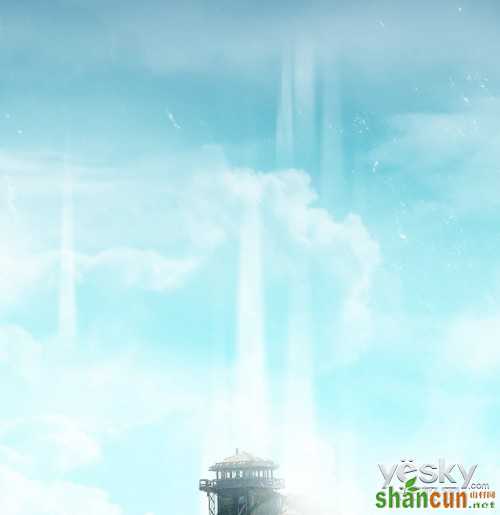
步骤四 表现从云中射下的阳光
创建一个新层,使用矩形工具绘制一个选区并填充白色,如图所示。
选择菜单“滤镜—模糊—高斯模糊”,设置高斯模糊滤镜特效,参数设置如图所示。
选择菜单“编辑—变换—透视”,将白色模糊的光柱设置为透视效果,如图所示。
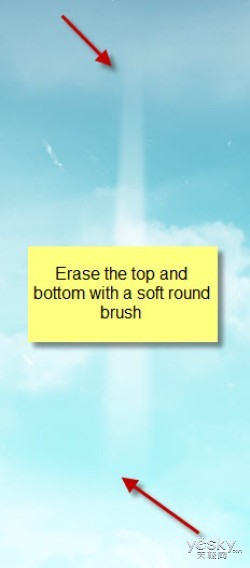
使用柔和的橡皮擦工具涂抹光柱的顶部和底部,设置图层的不透明度为80%,如图所示。
将此图层复制多次,调整不同光柱图层的大小和位置,效果如图所示。
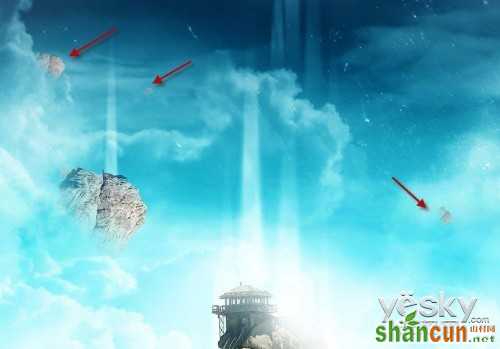
步骤五 添加浮动岛屿
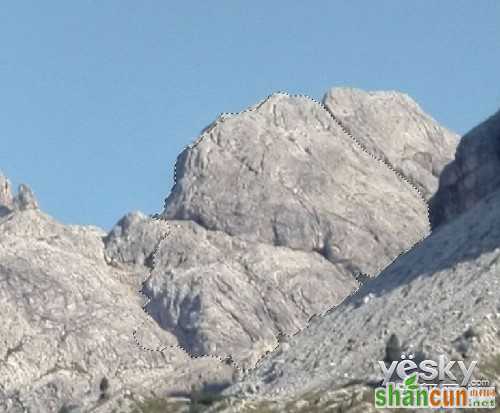
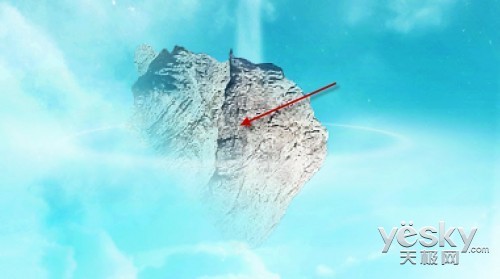
在Photoshop中打开山石素材,使用套索工具选择其中的一部分并复制,如图所示。
将其粘贴到图中,将这个新层命名为“大石头”,移动位置到画面的左上方,用于制作漂浮的岛屿,如图所示。
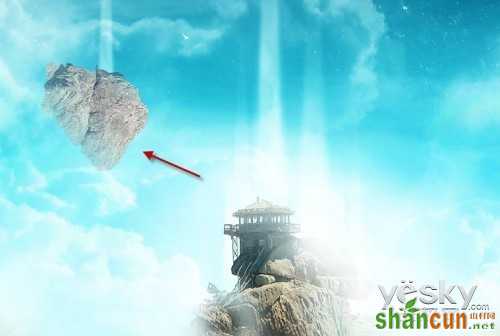
擦除左下角部分的岩石,用柔软的橡皮擦将其融入云朵中。
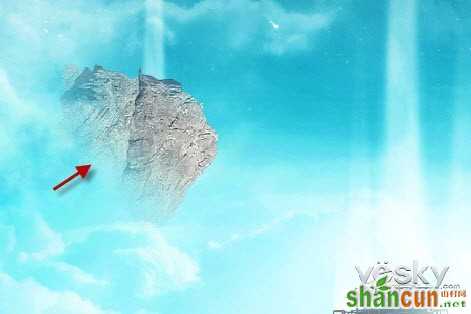
在这个“大石头”图层上添加两个调整图层,分别是“色阶”调整图层和“曲线”调整图层,调整参数如下图。
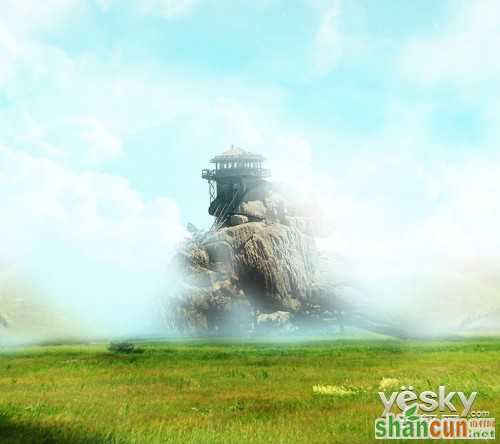
得到如下效果,看起来有一个非常炫的漂浮岛屿。
重复拷贝这个“大石头”图层,设置它们的大小和位置,分布在天空的各个位置,如图所示。
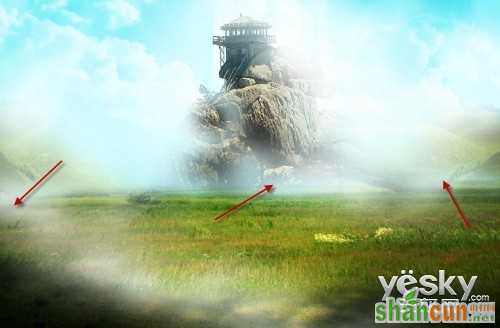
接下来需要要在草地上制作一些云雾效果。选择套索工具绘制一个区域,在属性栏中设置羽化值为50,创建一个选区。设置前景色为白色,背景色为浅灰色,在选区中画出一些云雾,如图所示。

这个云雾图层拷贝几次,调整尺寸和位置,将它们在画面中分散排列。
步骤六 添加光环
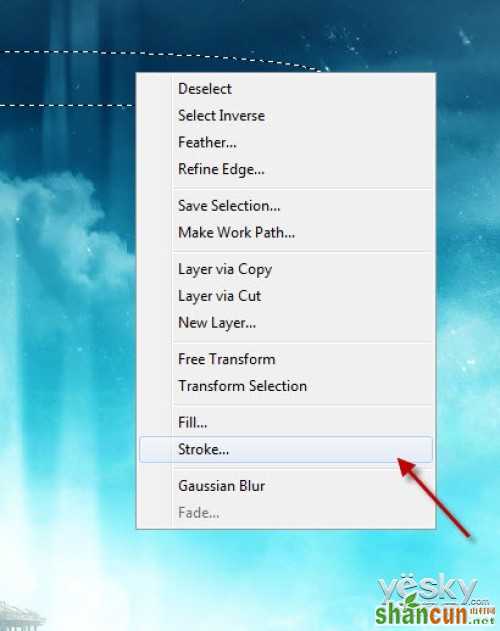
如下图所示,创建一个新图层,使用羽化值为10px的椭圆选框工具创建一个椭圆选区,如图所示。

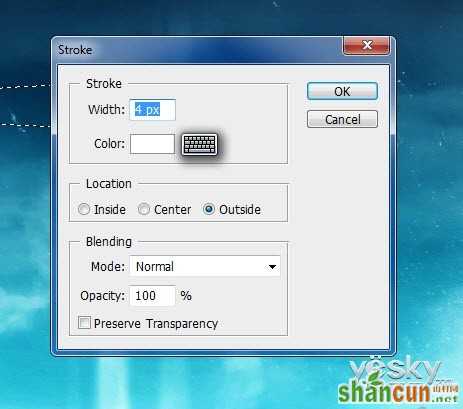
单击鼠标右键,在菜单中选择“描边”,如图所示。
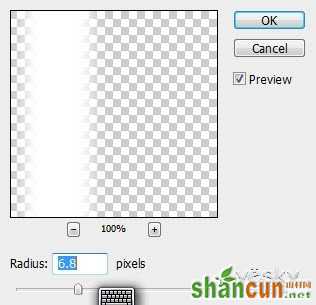
在弹出的描边对话框中,使用下图所示的设置,宽度:4px、颜色:白色、位置:居外。
效果如下。
将这个光环移动到漂浮岛屿位置上方,用自由变换工具来调整大小,并删除应该被岛屿遮蔽的部分,如图所示。
在图层的最顶部创建一个曲线调整图层,设置参考下左图。
在曲线调整的蒙版中填充一个白色到黑色的线性渐变。下右图是蒙版效果。

这样画面的天空就变成左上方比较暗的效果了,有一些黑夜的感觉。
最后调整细节,完成效果如下。


