如果有看不懂的地方可以随时留言。
一、思路分析
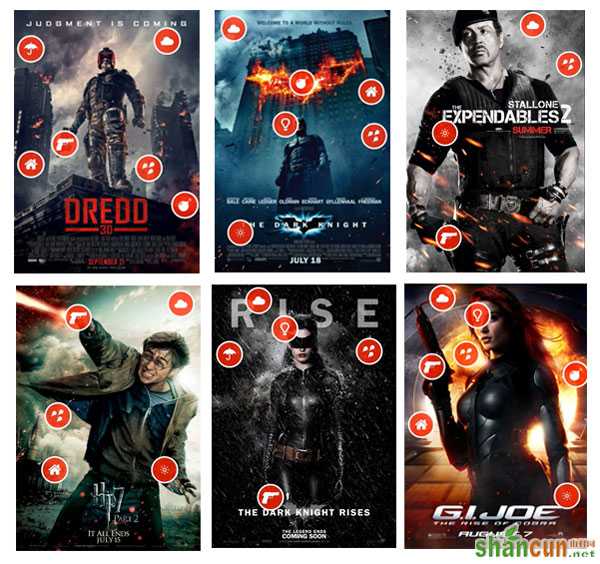
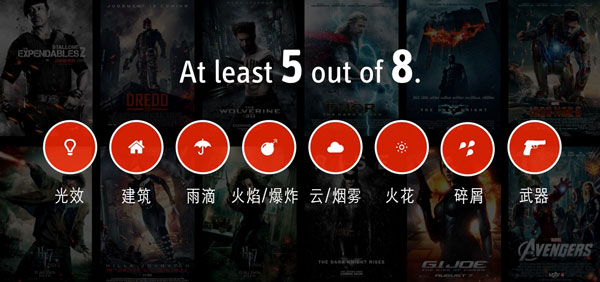
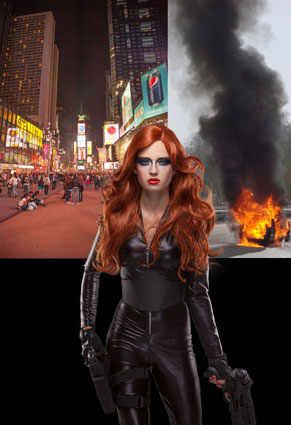
首先我们搜集了一些关于超级英雄这类主题的电影海报,分析这些海报的特点,我们总结出这类海报一般都包括种8种元素:武器、建筑物、火焰或者爆炸、雨滴、烟雾或者云、飞溅的碎屑、火花、光效。而每个海报中至少包括其中的5个。下图中已经标出。
二、搜集素材
本教程所用素材我们选择了一个持枪的女模特,一个建筑图片,燃烧的火焰,火花和烟雾笔刷,光效后期自己来制作。
三、教程开始
先介绍一下本教程的具体内容,分为4个部分,第一部分场景的合成,第二部分人物的融入,第三部分手枪的光效制作,第四部分火花和光效的制作。
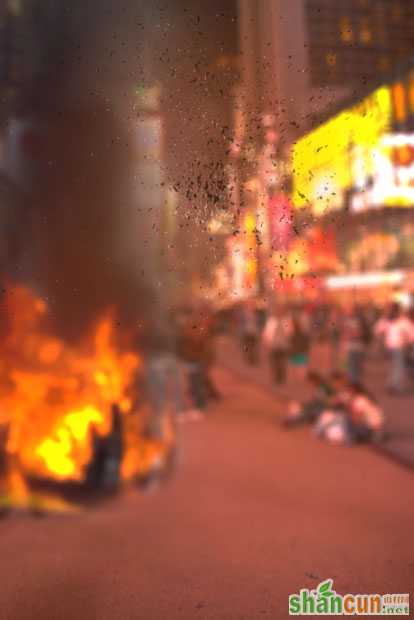
1、背景合成
首先,新建一个文件,把建筑物和火焰图片导入photoshop中,在火焰图层上添加一个蒙版,用黑色画笔把不需要的地方涂抹掉。
盖印图层(Ctrl+Alt+Shift+E),对盖印的新图层执行滤镜>模糊>移轴模糊。位置如下:
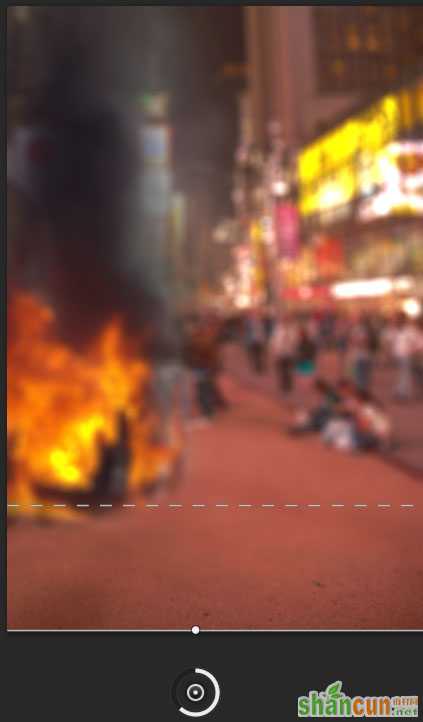
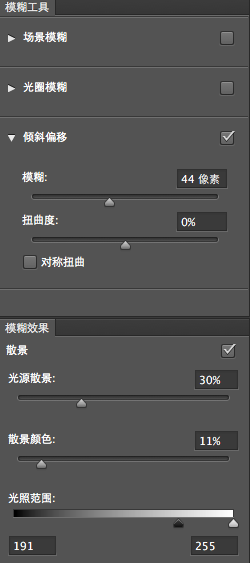
移轴模糊参数如下:
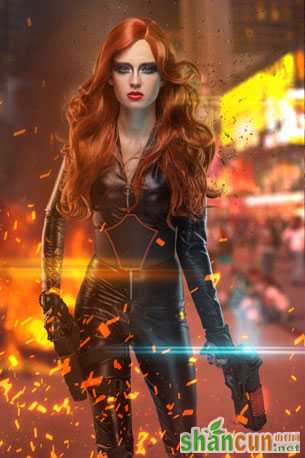
这一步的效果图:

新建图层,下载并安装碎屑笔刷,选择画笔,前景色设置为白色,用画笔在图中位置绘制白色飞溅的碎屑。并降低图层不透明度。
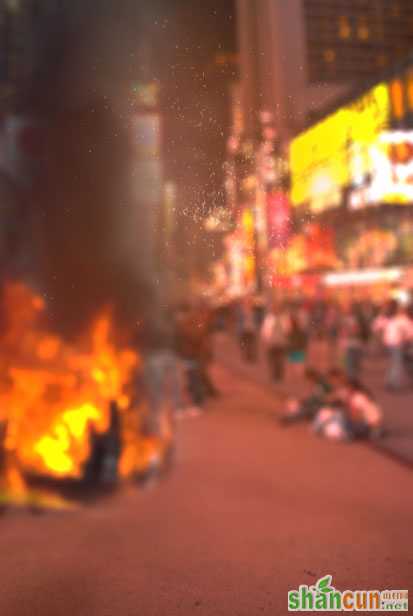
前景色设置为黑色,用画笔在图中位置绘制黑色碎屑。
新建图层,用吸管吸取火焰的颜色,并降低画笔不透明度,在火焰周围建筑物上涂抹颜色。将以上所有图层放在一个组里,命名组为background。
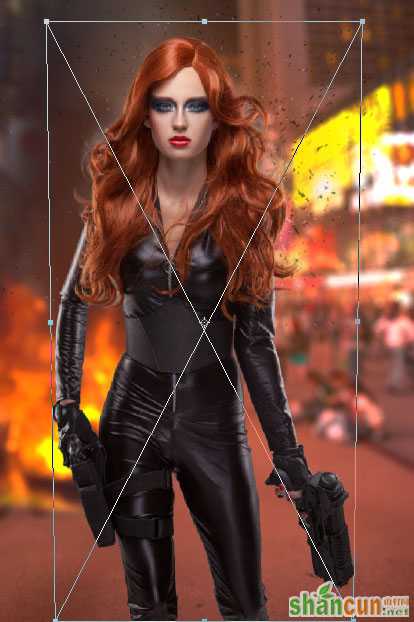
2、导入人物图片并与背景融合
导入模特图片,自由变换(Ctrl+T)调整大小和透视。
为人物添加环境光效果,由于我们要在手枪上添加红色和蓝色光效,就要注意这些光对人物的影响。优设的教程中,许多都用到了这一技巧。
新建图层,混合模式改为颜色,选择画笔工具,降低不透明度,吸管吸取火焰颜色,用画笔涂抹人物右侧。
再新建图层,混合模式为颜色,前景色设置为浅蓝色,降低画笔不透明度,在人物左侧脸颊、脖子、左臂以及左腿处涂抹。
再新建图层,混合模式为颜色,前景色设置为红色,降低画笔不透明度,在左腿下部绘制一些红光。
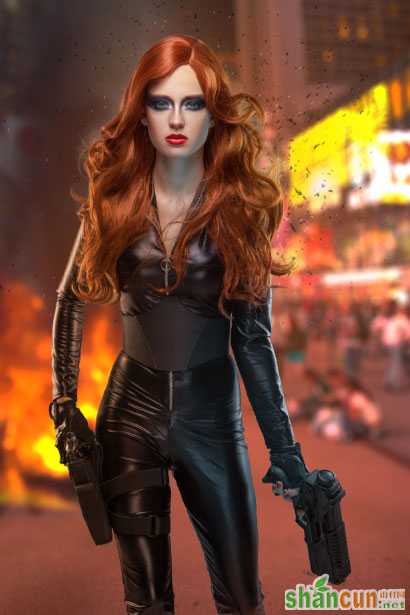
按住alt键点击环境色图层和人物图层中间,以人物作为选区,并将这些图层分到一个组里。如图:
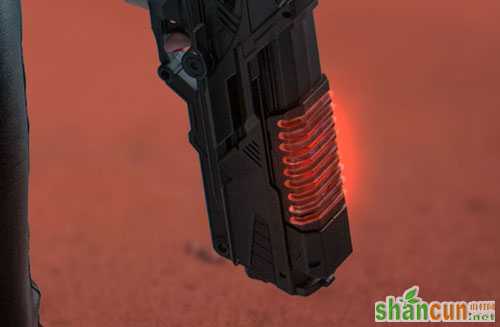
3、制作武器光效
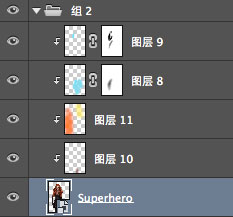
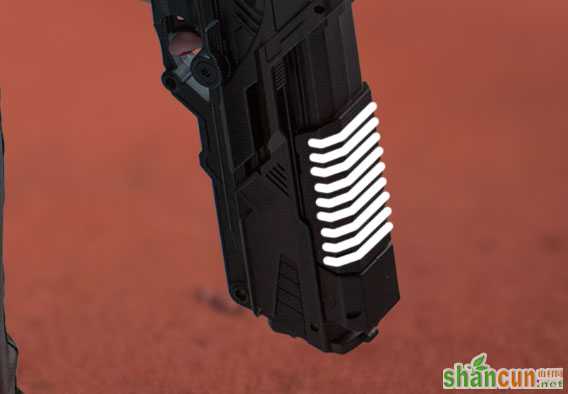
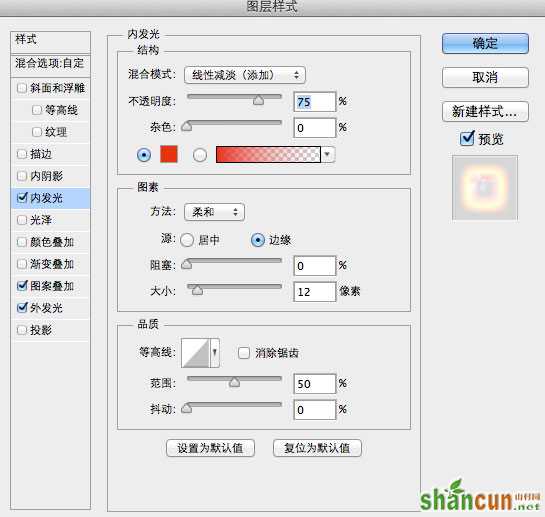
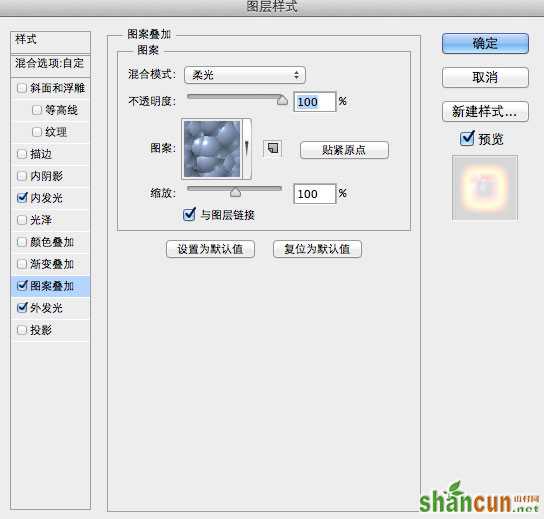
新建图层,在手枪位置处用画笔工具绘制如图形状,画线段的方法:鼠标点击第一个点,按住shift键,然后点击第二个点。把图层的填充改为0%,然后双击图层添加图层样式。
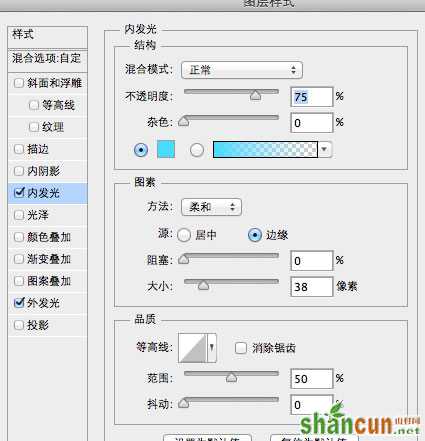
内发光:
图案叠加:
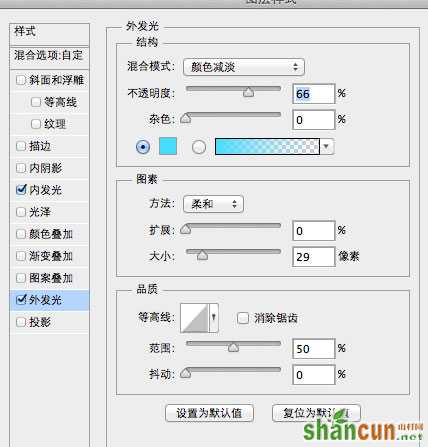
外发光:
这一步的效果图:
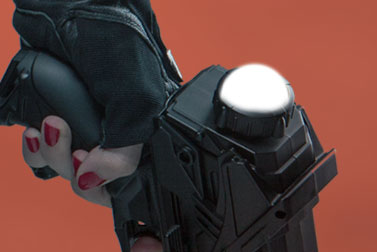
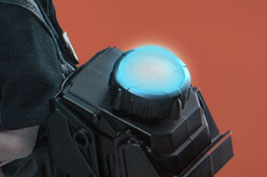
新建图层,在下图位置绘制大半个圆,填充改为77%,添加图层样式。
内发光:
外发光:
效果图:
下载并安装烟雾笔刷,添加烟雾效果,颜色为浅蓝色,再加一点外发光效果。
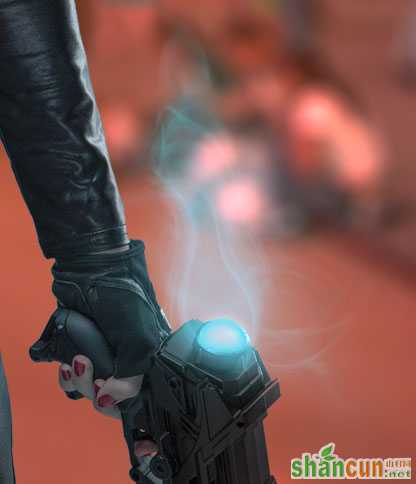
将以上图层分到一个组里,命名组为weapon。

4、添加飞溅的火花和光效
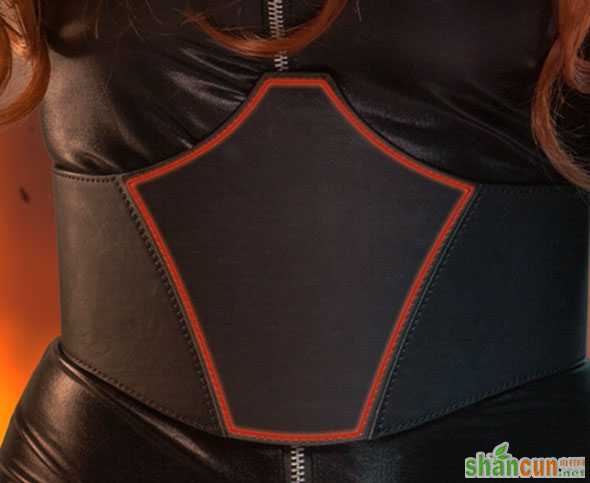
先为服装添加一点立体感,具体方法:新建图层,用钢笔工具勾出下图所示形状(不要选路径,选择形状),然后添加一些红色的内发光和外发光效果。
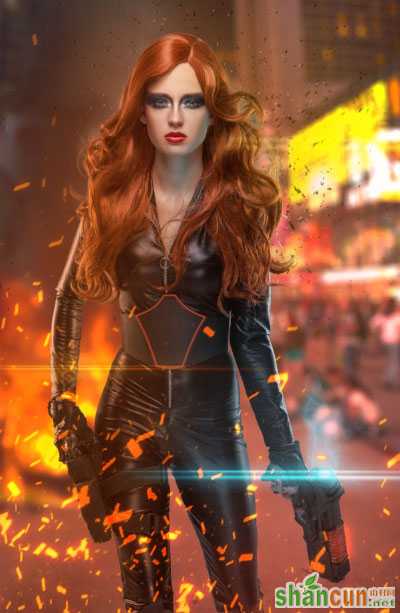
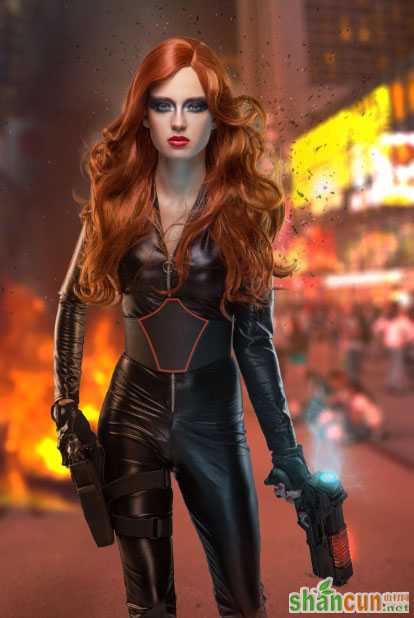
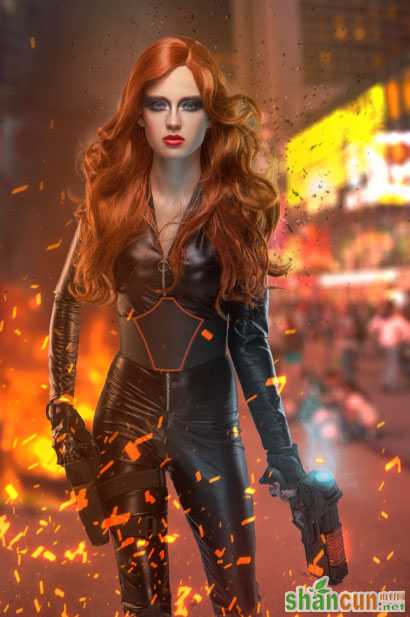
目前为止我们的效果图:
新建图层,降低画笔不透明度,吸取火焰颜色,用大画笔在人物和背景处涂抹,使人物与画面更加融合。

这一步添加火花效果,还是用到之前的碎屑笔刷,选择这组笔刷的另外一个,新建图层,在图中左下角处涂抹,颜色随意,填充改为0%,然后添加图层样式,内发光为橙色,颜色叠加为橙色偏黄,外发光为橙色偏红。
最后添加一些光效提升氛围。光效的制作方法:用画笔画两条线,两端细一些,添加动感模糊效果(角度为0),在添加图层样式外发光、颜色叠加。