PS制作色彩透明水泡的方法
本教程介绍制作水泡的方法非常特别。主要是利用蒙版和选区等来制作,方法非常简单,效果也相当不错。制作的时候注意好图层的顺序,和蒙版选区的调用等。
最终效果 nmousewheel="return bbimg(this)" onload="javascript:resizepic(this)" border="0"/>
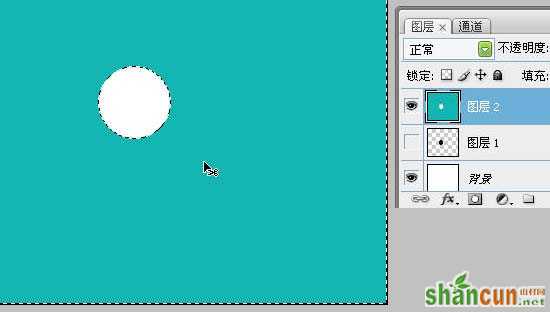
1、先用椭圆选框工具,画个黑色的圆得到图层,点图层1眼睛使其隐蔽。再新建图层2,载入图层1选区,执行反向(Ctrl + Shift + I),填充一种颜色(随意)。如图。
 nmousewheel="return bbimg(this)" onload="javascript:resizepic(this)" border="0"/>
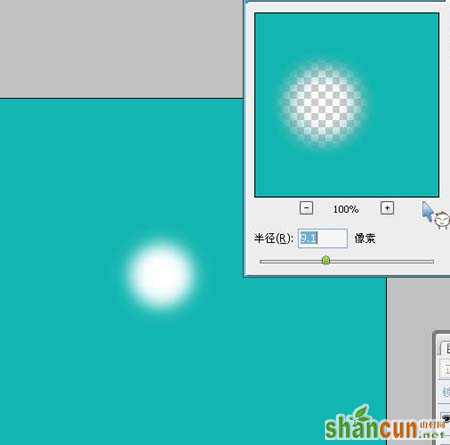
2、选图层2进行高斯模糊(值可跟据球体大小而为 9)如图。
 nmousewheel="return bbimg(this)" onload="javascript:resizepic(this)" border="0"/>
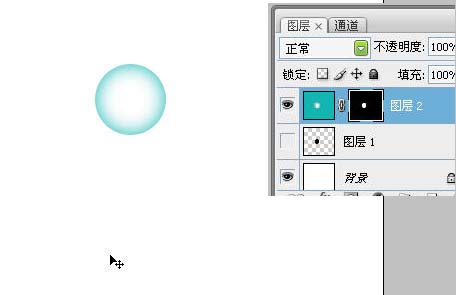
3、再载入图层1选区,在图层2上添加蒙版。如图。
 nmousewheel="return bbimg(this)" onload="javascript:resizepic(this)" border="0"/>
4、在图层上取消图层与蒙版的链接,单击图层缩图,再用移动工具向下移动,效果如图。
 nmousewheel="return bbimg(this)" onload="javascript:resizepic(this)" border="0"/>
5、再次载入图层1选区,然后新建图层3,填充一种颜色(与图层2一样)。将其执行高斯模糊,然后移到球体的下方,如图。
 nmousewheel="return bbimg(this)" onload="javascript:resizepic(this)" border="0"/>
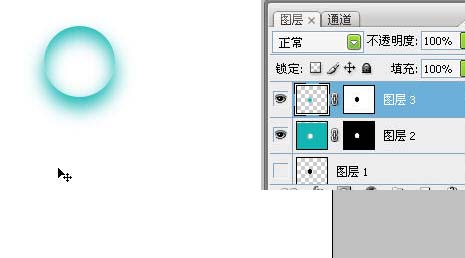
6、再次载入图层1选区,图层3上执行菜单—图层蒙版〉隐藏选区命令,得到球体阴影,如图。
 nmousewheel="return bbimg(this)" onload="javascript:resizepic(this)" border="0"/>
7、新建图4,然后载入图层1选区,填充颜色为白色,如图。
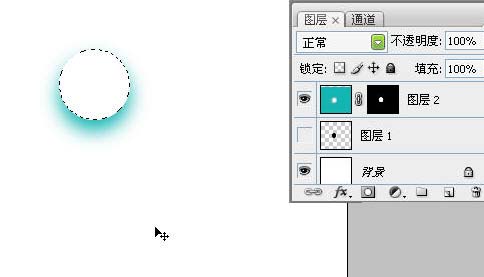 nmousewheel="return bbimg(this)" onload="javascript:resizepic(this)" border="0"/>
8、把图4执行高斯模糊,再将其缩小,移到球体的下方,行成高光。如图。
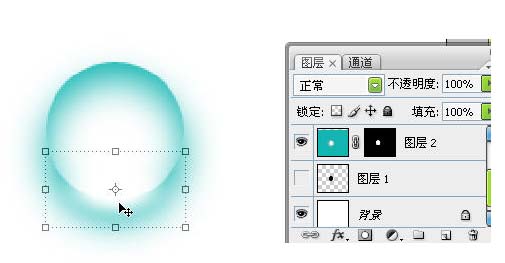 nmousewheel="return bbimg(this)" onload="javascript:resizepic(this)" border="0"/>
9、复制图4,生成图层4副本,将其缩小后执行高斯模糊后(值可跟据球体大小而为 2)移到球体的顶部,再将混合模式设为叠加。效果如图。
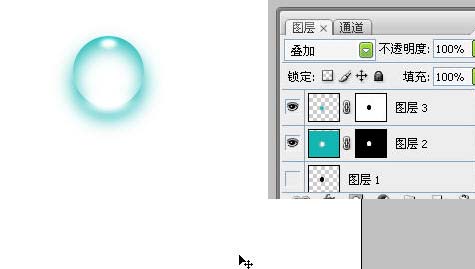 nmousewheel="return bbimg(this)" onload="javascript:resizepic(this)" border="0"/>
10、将图层4副本复制两次(逐步约为缩小,使其更亮)。玻璃透明球体作成了!!!
11、作成后再用滤镜〉波浪〉命令,设置参数如图(或用切变)。多复制几个球体,这样就形成不同大小,形状不同的球体了,再用色相调整出不同颜色。
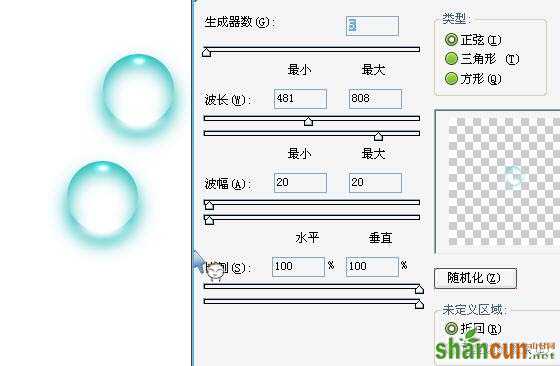 nmousewheel="return bbimg(this)" onload="javascript:resizepic(this)" border="0"/>


