最终效果图 nmousewheel="return bbimg(this)" onload="javascript:resizepic(this)" border="0"/>
1、新建一个文件,在工具箱中选择圆角矩形工具,如下图所示设置:
 nmousewheel="return bbimg(this)" onload="javascript:resizepic(this)" border="0"/>
2、新建一个图层后,在画布上拉出一个长方形,就得到这样的结果。(为了更好的给大家讲解,这个图放大了400%显示)
 nmousewheel="return bbimg(this)" onload="javascript:resizepic(this)" border="0"/>
如果大家得到这样的结果。
 nmousewheel="return bbimg(this)" onload="javascript:resizepic(this)" border="0"/>
就需要将“对齐像素”的选项给勾上。
 nmousewheel="return bbimg(this)" onload="javascript:resizepic(this)" border="0"/>
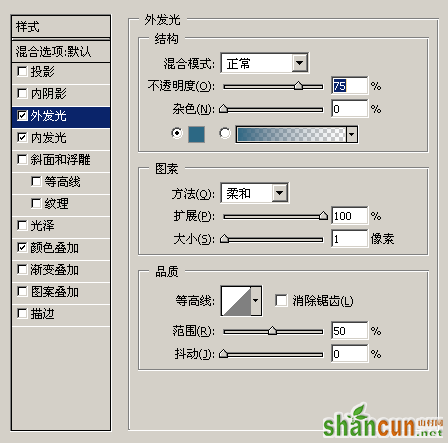
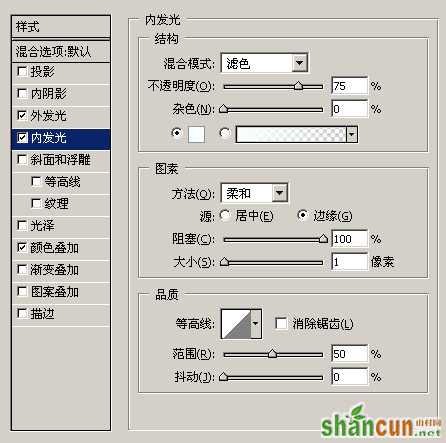
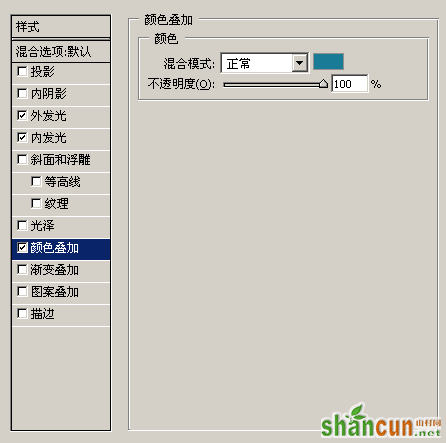
3、为这个图层添加图层样式。
 nmousewheel="return bbimg(this)" onload="javascript:resizepic(this)" border="0"/>
 nmousewheel="return bbimg(this)" onload="javascript:resizepic(this)" border="0"/>
 nmousewheel="return bbimg(this)" onload="javascript:resizepic(this)" border="0"/>
得到结果如图所示,顺便在样式调板中存储着这个样式。
 nmousewheel="return bbimg(this)" onload="javascript:resizepic(this)" border="0"/>
4、使用矩形选框工具,绘制出一个矩形的选区。
 nmousewheel="return bbimg(this)" onload="javascript:resizepic(this)" border="0"/>
5、新建图层后,填充黑色到白色的径向渐变。
 nmousewheel="return bbimg(this)" onload="javascript:resizepic(this)" border="0"/>
6、并将该图层的混合模式改为:柔光,不透明度:60%。
 nmousewheel="return bbimg(this)" onload="javascript:resizepic(this)" border="0"/>
7、新建图层,再绘制出一个矩形选区。
 nmousewheel="return bbimg(this)" onload="javascript:resizepic(this)" border="0"/>
8、填充成白色。
 nmousewheel="return bbimg(this)" onload="javascript:resizepic(this)" border="0"/>
9、并将该图层的混合模式改为:线性减淡,不透明度:30%。
 nmousewheel="return bbimg(this)" onload="javascript:resizepic(this)" border="0"/>
10、使用文字工具写上要的文字,3lian.com,注意在这里要将字体的边缘设置为:无。
 nmousewheel="return bbimg(this)" onload="javascript:resizepic(this)" border="0"/>
11、之前我们创建过一个样式,还记得吗,给文字应用这个样式就可以了。
后面的工作就是换换颜色,改改文字就可以了。
 nmousewheel="return bbimg(this)" onload="javascript:resizepic(this)" border="0"/>


