第一步:创建一个新的文档
在Photoshop中创建一个300x300像素大小,白色背景的文档。你可以改变文档的大小,但是要保证高度和宽度之比为1:1。
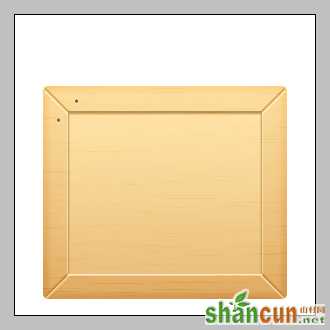 nmousewheel="return bbimg(this)" onload="javascript:resizepic(this)" border="0"/>
小贴士:使用图层组可以将一组图层放在一起便于一起移动和更改大小。这样避免了对多个图层进行移动和更改大小的操作的单调性。
第二步:创建正面
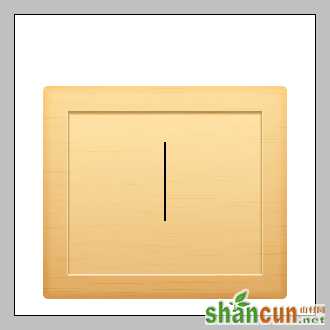
创建一个新的图层组(将其命名为”Front-Face”)。在图层组中,创建一个新的图层(将其命名为”Front”),选择矩形选区工具,作出如下图的选区,并将其填充为黑色。
 nmousewheel="return bbimg(this)" onload="javascript:resizepic(this)" border="0"/>
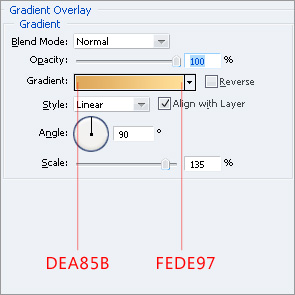
选择图层>图层样式>混合模式命令,并使用如下设置:
 nmousewheel="return bbimg(this)" onload="javascript:resizepic(this)" border="0"/>
 nmousewheel="return bbimg(this)" onload="javascript:resizepic(this)" border="0"/>
 nmousewheel="return bbimg(this)" onload="javascript:resizepic(this)" border="0"/>
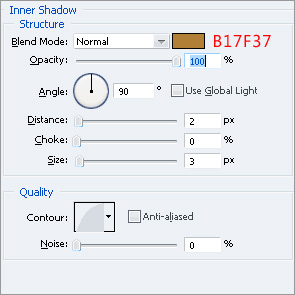
按住Ctrl键,点击”Front”图层将其载入选区,然后选择选择>编辑>平滑命令,选择3个像素,点击确定。按下Ctrl+Shift+I反选选区,然后点击Delete。
按住Ctrl键,点击图层,选择选择>编辑>收缩,键入25个像素点击确定。创建一个新的图层(命名为”Front-Etch”),将选区填充为黑色。给新创建的图层应用混合选项,使用如下设置:
 nmousewheel="return bbimg(this)" onload="javascript:resizepic(this)" border="0"/>
 nmousewheel="return bbimg(this)" onload="javascript:resizepic(this)" border="0"/>
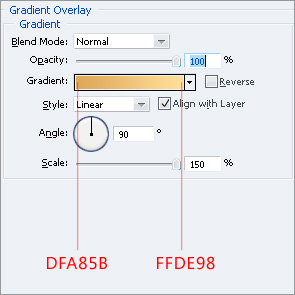 nmousewheel="return bbimg(this)" onload="javascript:resizepic(this)" border="0"/>
第三步:创建木纹材质
创建一个新的图层(命名为”Texture”),将其填充为白色。选择滤镜>杂色>添加杂色,应用如下设置:
 nmousewheel="return bbimg(this)" onload="javascript:resizepic(this)" border="0"/>
选择滤镜>模糊>动态模糊并且应用如下设置:
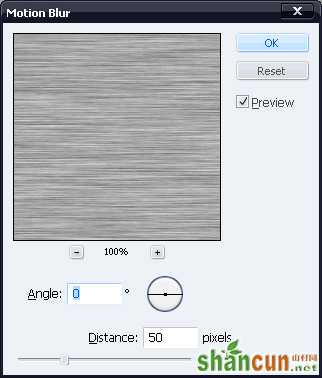 nmousewheel="return bbimg(this)" onload="javascript:resizepic(this)" border="0"/>
选择”Texture”图层,按住Ctrl键,点击”Front”图层,按下Ctrl+Shift+I键,按下Delete。这样,超出”Front”图层的材质部分就会被清除掉。
在图层仍然被选择的情况下,按下Ctrl+L键,应用如下设置:
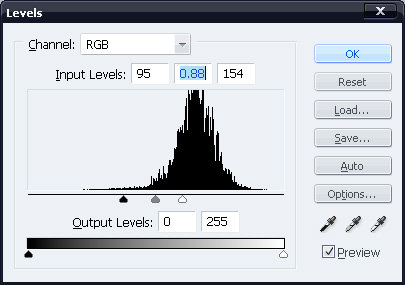 nmousewheel="return bbimg(this)" onload="javascript:resizepic(this)" border="0"/>
将图层混合模式更改为柔光,透明度降低为30%。
第四步:给正面增加细节
创建一个新的图层(命名为”Line”),使用矩形选区工具,如下图那样画一个2个像素宽的垂直线条:
 nmousewheel="return bbimg(this)" onload="javascript:resizepic(this)" border="0"/>
按下Ctrl+T,逆时针方向将线条旋转45度。将线条移动到”Front”图层的左上方。在图层面板中,将”Line”图层放置于”Front-Etch”图层下方,结果看上去应该是这样:
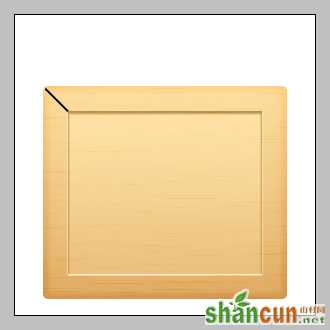 nmousewheel="return bbimg(this)" onload="javascript:resizepic(this)" border="0"/>
打开混合选项,应用如下设置:
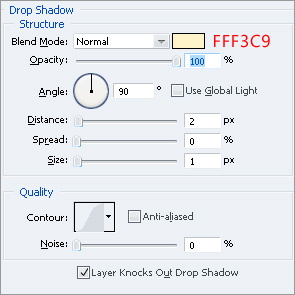 nmousewheel="return bbimg(this)" onload="javascript:resizepic(this)" border="0"/>
 nmousewheel="return bbimg(this)" onload="javascript:resizepic(this)" border="0"/>
复制图层(Ctrl+J),选择编辑>变换>垂直翻转。将复制好的图层向下移动,直到它的边缘和”Face”图层的左下角对齐。
你可能注意到复制的图层不像它在上方时候那样颜色上能很好的融合,要解决这个问题,打开混合选项,应用如下设置:
 nmousewheel="return bbimg(this)" onload="javascript:resizepic(this)" border="0"/>
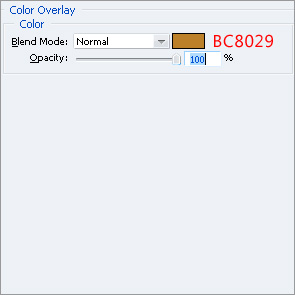 nmousewheel="return bbimg(this)" onload="javascript:resizepic(this)" border="0"/>
复制那两个线条,将它们水平翻转并向右移动,这样你会得到如下的结果:
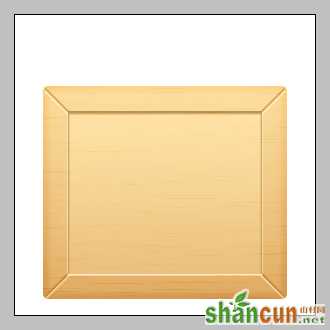 nmousewheel="return bbimg(this)" onload="javascript:resizepic(this)" border="0"/>
第五步 进一步给正面增加细节
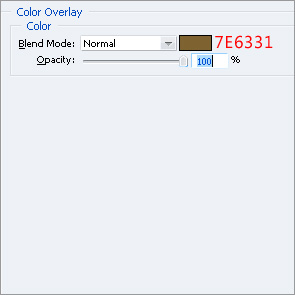
选择形状工具,在画布的任何地方画一个小的圆圈。打开它的混合选项使用如下设置:
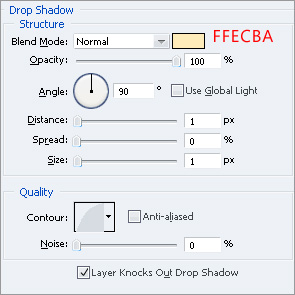 nmousewheel="return bbimg(this)" onload="javascript:resizepic(this)" border="0"/>
 nmousewheel="return bbimg(this)" onload="javascript:resizepic(this)" border="0"/>
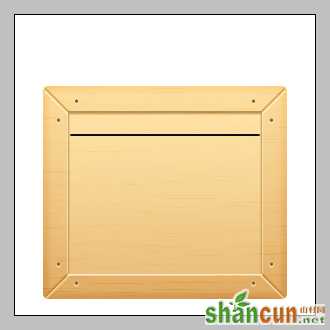
复制此图层(Ctrl+J),然后将这两个圆圈移动到如下位置:
 nmousewheel="return bbimg(this)" onload="javascript:resizepic(this)" border="0"/>
复制这两个圆圈,将它们移动到另外的三个角上。
 nmousewheel="return bbimg(this)" onload="javascript:resizepic(this)" border="0"/>
创建一个新的图层(命名为”Ridges”),作出两个像素宽的水平选区,将其填充为黑色。确保线条要比”Face-Etch”图层的两端短两个像素。
 nmousewheel="return bbimg(this)" onload="javascript:resizepic(this)" border="0"/>
按住Ctrl键点击此图层,将选区向下移动20个像素(按下Shift+Down两次),将选区填充为黑色,重复做出7条这样的水平线条。
 nmousewheel="return bbimg(this)" onload="javascript:resizepic(this)" border="0"/>
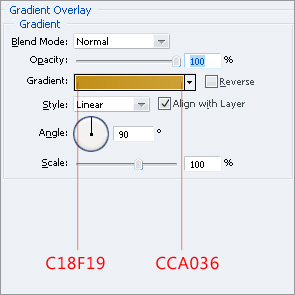
打开混合选项使用如下设置:
 nmousewheel="return bbimg(this)" onload="javascript:resizepic(this)" border="0"/>
 nmousewheel="return bbimg(this)" onload="javascript:resizepic(this)" border="0"/>
第六步 给正面增加箭头标志
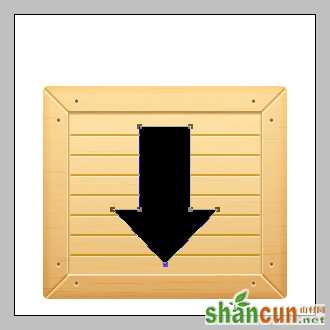
使用钢笔工具,3lian.com作出如下箭头形状:
 nmousewheel="return bbimg(this)" onload="javascript:resizepic(this)" border="0"/>
将箭头图层放置于”Texture”图层和”Ridges”图层下方。将其混合模式设置为叠加,不透明度降低为45%。
第七步 给底部增加阴影
创建一个图层(命名为”Shadow”),在图层面板中将它放置于所有图层的下方。将选区填充为6个像素厚的黑色,比正面要略宽一些。
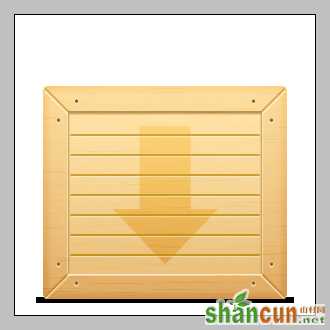 nmousewheel="return bbimg(this)" onload="javascript:resizepic(this)" border="0"/>
选择滤镜>模糊>高斯模糊,输入2个像素,点击确定。现在选择滤镜>模糊>动感模糊,输入:角度=0,距离=30像素,现在的结果如下:
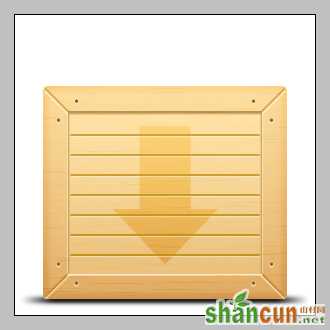 nmousewheel="return bbimg(this)" onload="javascript:resizepic(this)" border="0"/>
第八步 创建顶部
创建一个新的图层组(命名为”Upper-Face”),创建一个新的图层(命名为”Up”),如下所示那样画出一个矩形,填充为黑色:
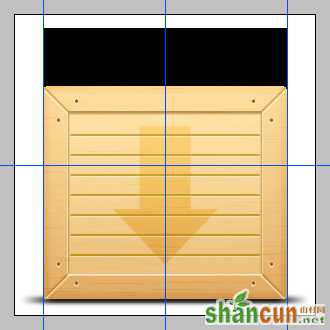 nmousewheel="return bbimg(this)" onload="javascript:resizepic(this)" border="0"/>


