原图和最终效果图的对比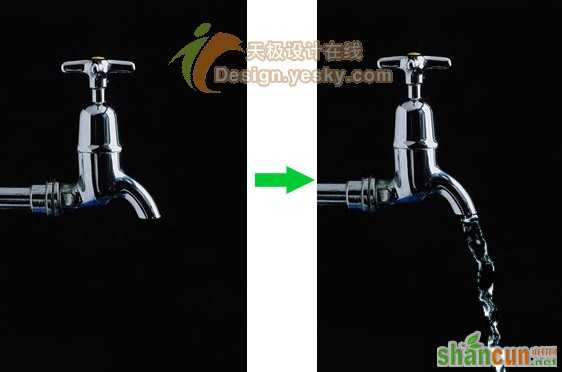 nmousewheel="return bbimg(this)" onload="javascript:resizepic(this)" border="0"/>
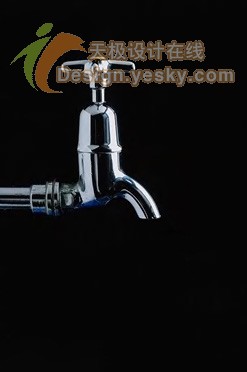
1.先将图1这副图片保存到某个位置。
 nmousewheel="return bbimg(this)" onload="javascript:resizepic(this)" border="0"/>
图1
2.在Photoshop中将保存的图片打开。
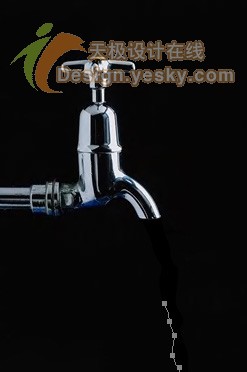
3.新建一个图层,选择工具箱中的“钢笔工具”,绘制水流路径,如图2所示。
 nmousewheel="return bbimg(this)" onload="javascript:resizepic(this)" border="0"/>
图2
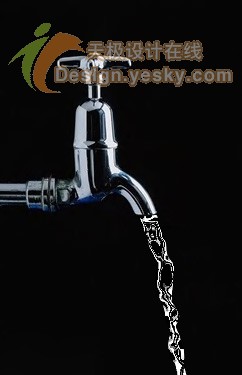
继续绘制。
 nmousewheel="return bbimg(this)" onload="javascript:resizepic(this)" border="0"/>
图3
完成绘制。
 nmousewheel="return bbimg(this)" onload="javascript:resizepic(this)" border="0"/>
图4
4.在“路径”调板中按住Ctrl键的同时单击路径层,得到如图5所示的路径选区。
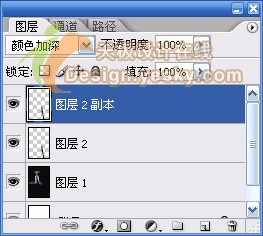 nmousewheel="return bbimg(this)" onload="javascript:resizepic(this)" border="0"/>
图5
5.按D键将前景色和背景色设置为默认的黑色和白色,然后按Ctrl+Del将选区填充为白色,如图6所示。
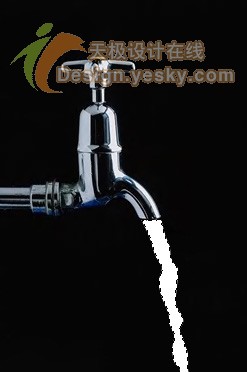 nmousewheel="return bbimg(this)" onload="javascript:resizepic(this)" border="0"/>
图6
6.选择菜单命令“选择>修改>收缩”,如图7所示。
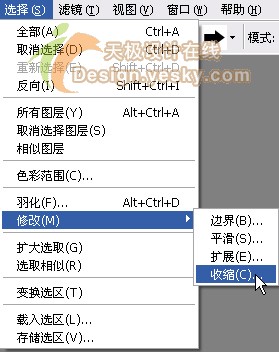 nmousewheel="return bbimg(this)" onload="javascript:resizepic(this)" border="0"/>
图7
在“收缩选区”对话框中将“收缩量”设置为2像素,如图8所示。设置完毕单击“确定”按钮。
 nmousewheel="return bbimg(this)" onload="javascript:resizepic(this)" border="0"/>
图8
然后按Alt+Del将选区填充为黑色,如图9所示。
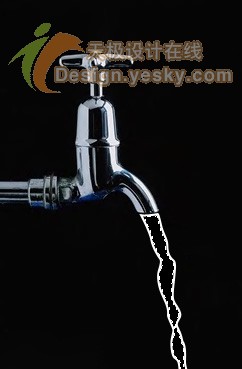 nmousewheel="return bbimg(this)" onload="javascript:resizepic(this)" border="0"/>
图9
7.再用类似的方法收缩,并填充为白色,如图10所示。
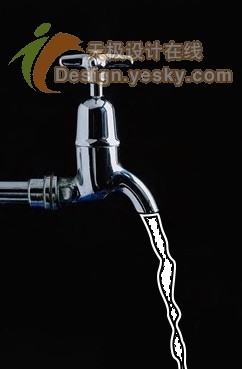 nmousewheel="return bbimg(this)" onload="javascript:resizepic(this)" border="0"/>
图10
8.仍然采用这样的方法,填充为黑色,3lian素材,最后按Ctrl+D取消选择,如图11所示。
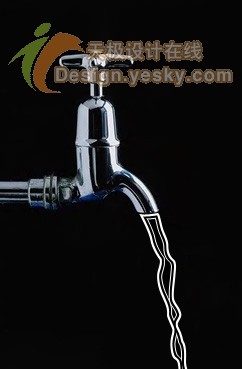 nmousewheel="return bbimg(this)" onload="javascript:resizepic(this)" border="0"/>
图11
9.选择“滤镜>扭曲>玻璃”,如图12所示。
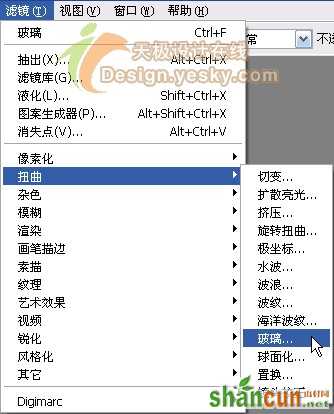 nmousewheel="return bbimg(this)" onload="javascript:resizepic(this)" border="0"/>
图12
按图13所示进行设置。
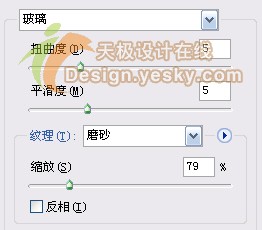 nmousewheel="return bbimg(this)" onload="javascript:resizepic(this)" border="0"/>
图13
设置完毕单击“确定”按钮,得到如图14所示的结果。
 nmousewheel="return bbimg(this)" onload="javascript:resizepic(this)" border="0"/>
图14
10.按Ctrl+J复制一个副本图层,并将副本图层的混合模式改为“颜色加深”,如图15所示。
 nmousewheel="return bbimg(this)" onload="javascript:resizepic(this)" border="0"/>
图15
现在已经有点儿水流的意思了,如图16所示。
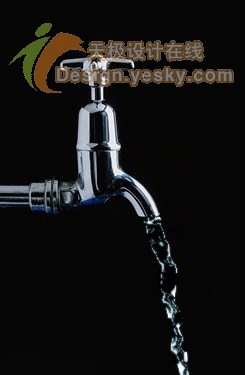 nmousewheel="return bbimg(this)" onload="javascript:resizepic(this)" border="0"/>
图16
11.选择工具箱中的“涂抹工具”,在选项栏中将“强度”值设置得小一点儿,如6%,如图17所示。
 nmousewheel="return bbimg(this)" onload="javascript:resizepic(this)" border="0"/>
图17
仔细地涂抹几下,不宜过多,心里想着水流的真实样子,可以得到如图18所示的效果。
 nmousewheel="return bbimg(this)" onload="javascript:resizepic(this)" border="0"/>
图18
12.按Ctrl+U打开“色相/饱和度”对话框,按图19所示进行设置。
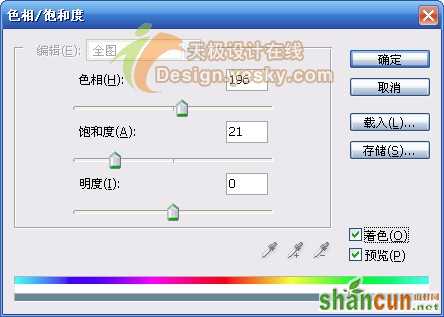 nmousewheel="return bbimg(this)" onload="javascript:resizepic(this)" border="0"/>
图19
设置完毕单击“确定”,得到最终的流水特效,如图20所示。
 nmousewheel="return bbimg(this)" onload="javascript:resizepic(this)" border="0"/>
图20


