
花是高透明不规则的物体,刻画起来可能比较复杂。首先要用钢笔勾出大致轮廓,填色后再用液化,涂抹等工具把边缘涂自然。然后就是加高光部分,做到有层次效果才逼真
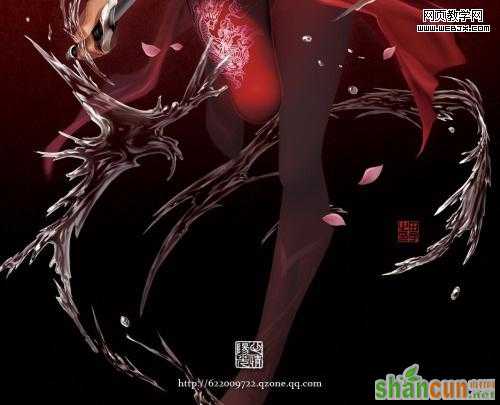
最终效果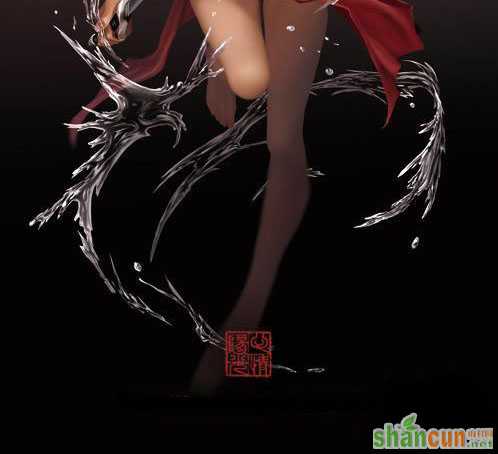 nmousewheel="return bbimg(this)" onload="javascript:resizepic(this)" border="0"/>
1、打开PS,首先新建文件,大小自定,再设定一个底色。
 nmousewheel="return bbimg(this)" onload="javascript:resizepic(this)" border="0"/>
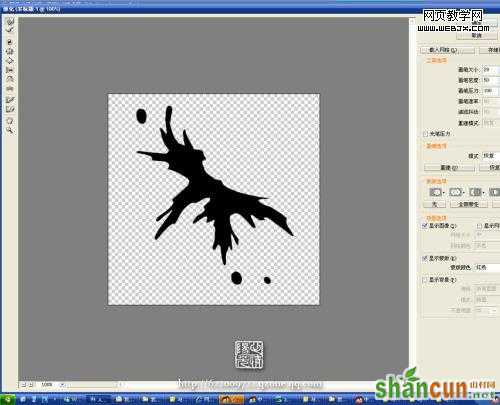
2、用黑色画出水花的基本形状。
 nmousewheel="return bbimg(this)" onload="javascript:resizepic(this)" border="0"/>
3、用滤镜里液化功能将水花轮廓修正。
 nmousewheel="return bbimg(this)" onload="javascript:resizepic(this)" border="0"/>
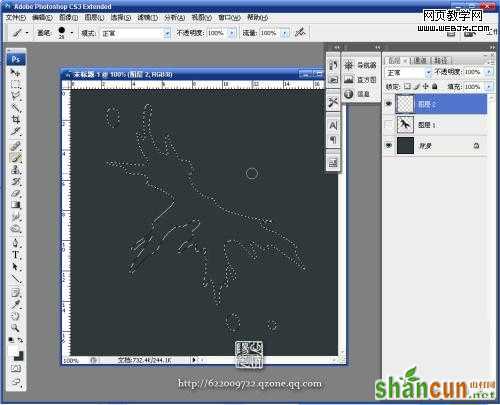
4、选取水花轮廓,保留选取区域,新开图层。
 nmousewheel="return bbimg(this)" onload="javascript:resizepic(this)" border="0"/>
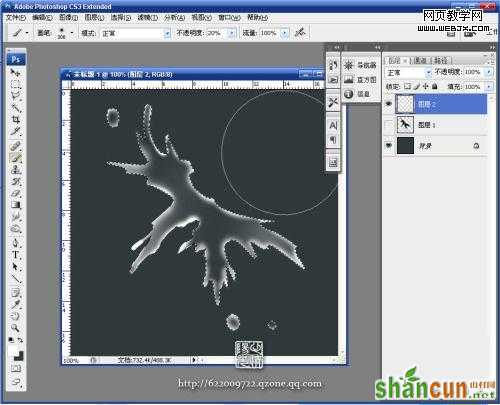
5、选择画笔工具,用软笔刷选白色喷涂水花外轮廓,不用每个地方都很均匀,自然就好。
 nmousewheel="return bbimg(this)" onload="javascript:resizepic(this)" border="0"/>
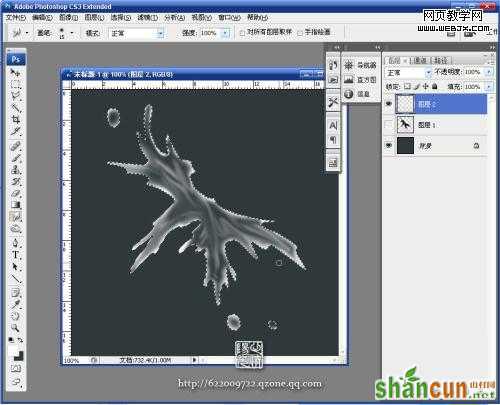
6、用小笔刷在选区范围内按水花走势画一些曲线,3lian素材,力求自然随意。
 nmousewheel="return bbimg(this)" onload="javascript:resizepic(this)" border="0"/>
7、用手指工具涂抹,使得线条自然有流动感。
 nmousewheel="return bbimg(this)" onload="javascript:resizepic(this)" border="0"/>
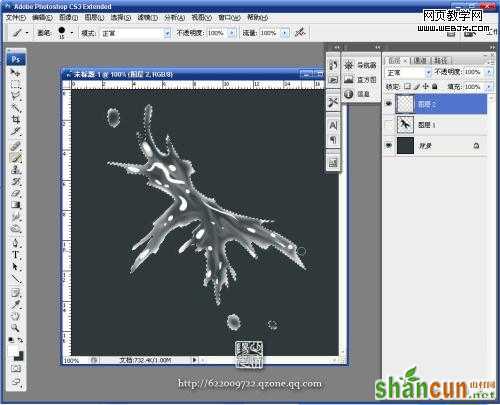
8、再用硬笔头画高光部分。
 nmousewheel="return bbimg(this)" onload="javascript:resizepic(this)" border="0"/>
9、重复用手指工具涂抹,把高光形状休整自然。
 nmousewheel="return bbimg(this)" onload="javascript:resizepic(this)" border="0"/>
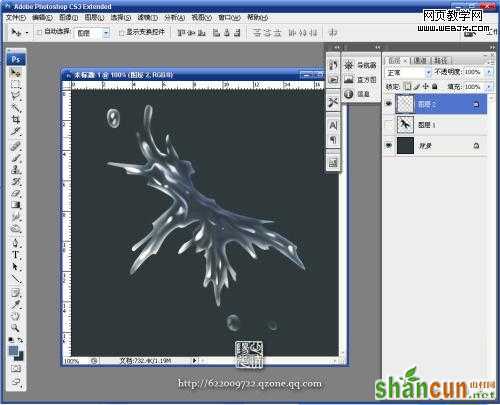
10、为了让水更真实有层次,上面的步骤可以重复多次,我在这里只是示范,所以仅作一次。之后锁定图层用灰兰色给水花浅浅上色,这样水花基本就完成了。
 nmousewheel="return bbimg(this)" onload="javascript:resizepic(this)" border="0"/>
11、打开一张素材图,把做好的水珠拖进来适当改变图层混合模式就可以看到效果了。
水花看起来纹理复杂,其实有很多部分是随意,不用特意计较型和线条纹理的扭曲走势,所以只要知道方法制作起来是很简单的。
 nmousewheel="return bbimg(this)" onload="javascript:resizepic(this)" border="0"/>


