最终效果图 nmousewheel="return bbimg(this)" onload="javascript:resizepic(this)" border="0"/>
1、首先启动功能强大的Photoshop,新建一个合适大小的画布,并且将背景色设置为灰色。如图1所示。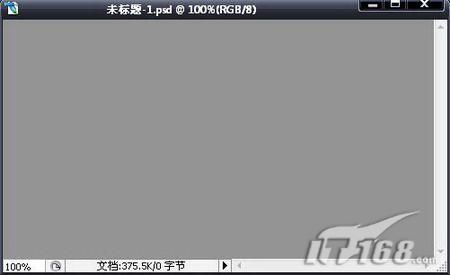 nmousewheel="return bbimg(this)" onload="javascript:resizepic(this)" border="0"/>
2、接着使用圆角矩形工具,将半径设置为10像素,绘制出一个圆角矩形。如图2所示。 nmousewheel="return bbimg(this)" onload="javascript:resizepic(this)" border="0"/>
3、选择渐变工具,打开渐变编辑器,模拟真实金属的光泽,设置黑白灰的渐变。如图3所示。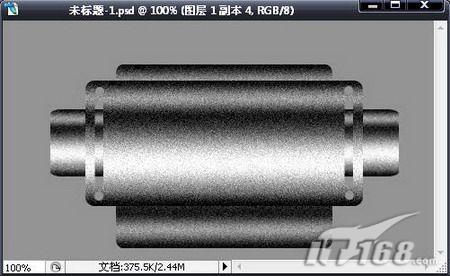 nmousewheel="return bbimg(this)" onload="javascript:resizepic(this)" border="0"/>
4、按下Ctrl+Enter将路径转化为选区,新建图层,使用渐变工具将刚刚设置好的渐变由上而下拉出。如图4所示。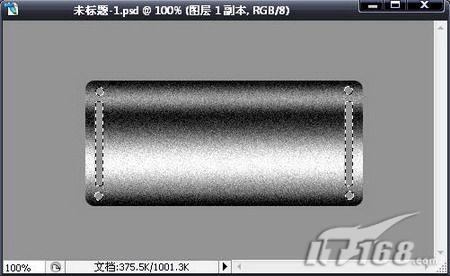 nmousewheel="return bbimg(this)" onload="javascript:resizepic(this)" border="0"/>
5、从菜单栏中选择“滤镜/杂色/添加杂色”,打开“添加杂色”对话框,将“数量”设置为7%,分布设置为“高斯分布”并选择“单色”。设置完成后单击确定按钮。如图5所示。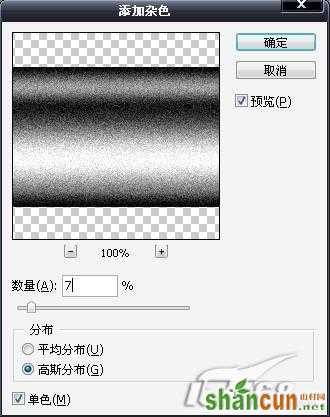 nmousewheel="return bbimg(this)" onload="javascript:resizepic(this)" border="0"/>
6、复制一个金属面板,将其总一个隐藏,对另一个进行操作。使用矩形选区工具和椭圆选区工具相结合在金属面板的两侧建立选区。并按下Delete将选中的区域删除。如图6所示。 nmousewheel="return bbimg(this)" onload="javascript:resizepic(this)" border="0"/>
7、将刚才复制的面板显示出来,按下Ctrl+T进行变形,调整为一个长条状的形态,并放置于金属面板得下方。如图7所示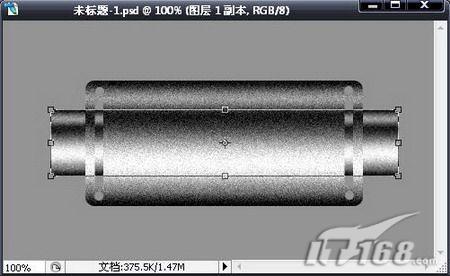 nmousewheel="return bbimg(this)" onload="javascript:resizepic(this)" border="0"/>
8、再次复制一个金属面板调整其形体,并放置于最底层,如图8所示。 nmousewheel="return bbimg(this)" onload="javascript:resizepic(this)" border="0"/>
9、给最上方的金属面板进行图层样式的添加,首先添加投影效果,不透明度设置为100%,距离7像素,大小5像素。如图9所示。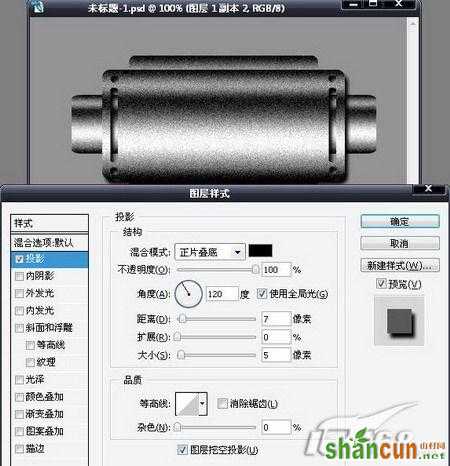 nmousewheel="return bbimg(this)" onload="javascript:resizepic(this)" border="0"/>
10、设置斜面和浮雕特效,样式为“枕状浮雕”,深度150%,方向为“上”,大小3像素,软化0像素。如图10所示。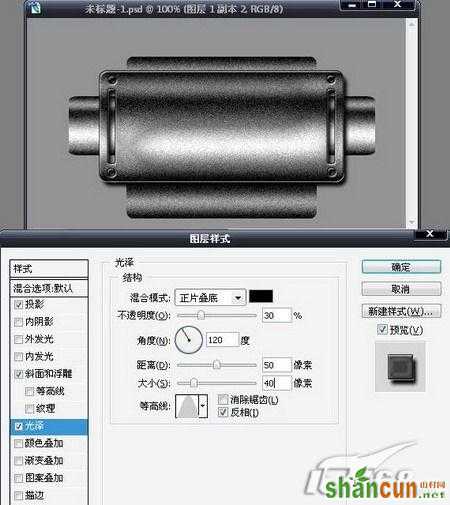 nmousewheel="return bbimg(this)" onload="javascript:resizepic(this)" border="0"/>
11、添加光泽特效,不透明度30%,距离50像素,大小40像素。如图11所示。 nmousewheel="return bbimg(this)" onload="javascript:resizepic(this)" border="0"/>
12、接着给金属面板下方的两个部件进行图层样式的添加,首先是添加外发光特效,混合模式为正常,选区黑色,不透明度100%,大小为15像素。如图12所示。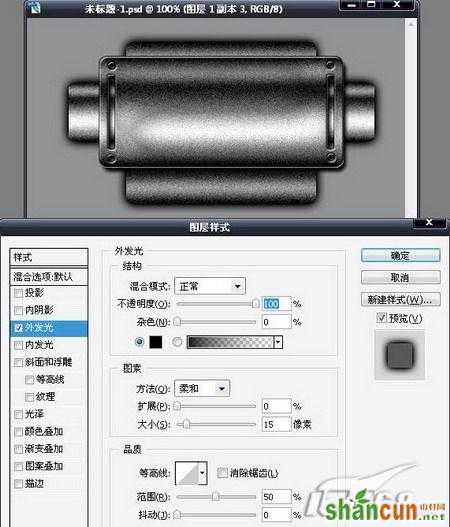 nmousewheel="return bbimg(this)" onload="javascript:resizepic(this)" border="0"/>
13、添加图案叠加样式,这样做是为了与前面的面板区别开,更加突出前面的面板。选择好叠加的图案,将不透明度设置为15%。如图13所示。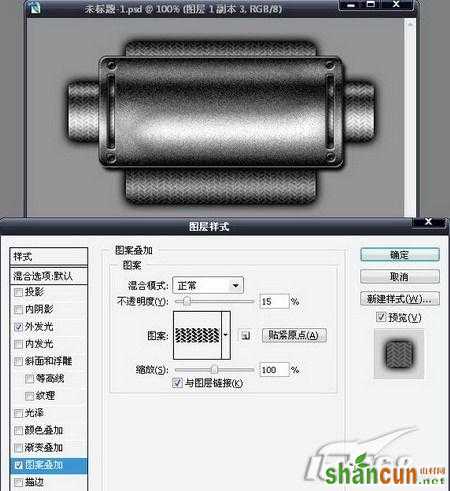 nmousewheel="return bbimg(this)" onload="javascript:resizepic(this)" border="0"/>
14、将面板下方的部件两个图层合并为一个图层,并复制一个将其变形。如图14所示。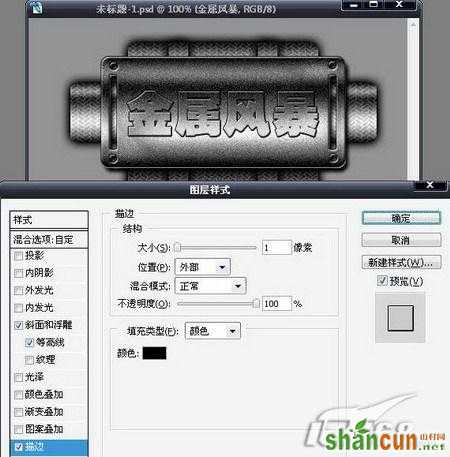 nmousewheel="return bbimg(this)" onload="javascript:resizepic(this)" border="0"/>
15、将其变形为纵向条状物,并复制为两个。如图15所示。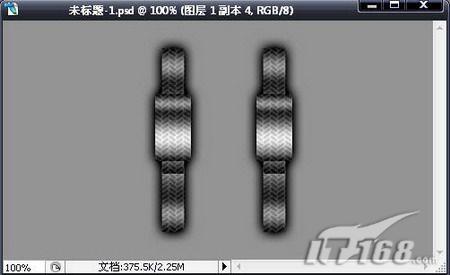 nmousewheel="return bbimg(this)" onload="javascript:resizepic(this)" border="0"/>
16、将这两个竖条状物放置于金属面板和背后的部件之间,这样看上去更具有金属感。如图16所示。 nmousewheel="return bbimg(this)" onload="javascript:resizepic(this)" border="0"/>
17、这样金属面板整体制作就完成了。接下来就需要给按钮上面添加文字。选择文字工具,在金属面板上打入“金属风暴”四个字设置为超粗黑,并将填充设置为30%。接着进行斜面和浮雕样式的添加,使用内侧面样式,大小和软化皆为0像素,其他数值保持默认。如图17所示。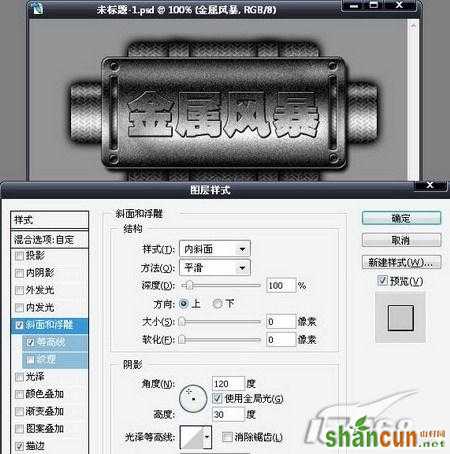 nmousewheel="return bbimg(this)" onload="javascript:resizepic(this)" border="0"/>
18、最后再给位子描一个像素的黑边。如图18所示。 nmousewheel="return bbimg(this)" onload="javascript:resizepic(this)" border="0"/>
19、OK,金属风暴按钮就制作完成了。希望对大家有些帮助。谢谢。 nmousewheel="return bbimg(this)" onload="javascript:resizepic(this)" border="0"/>


