
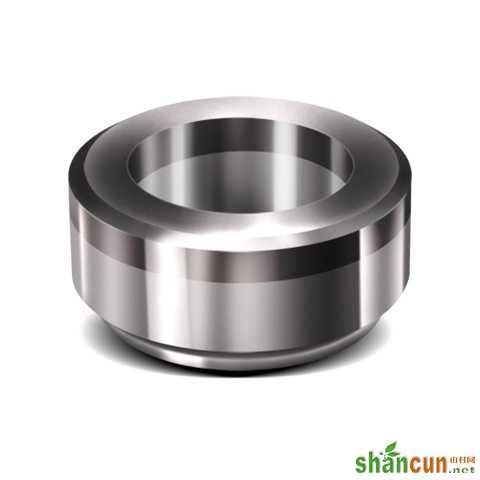
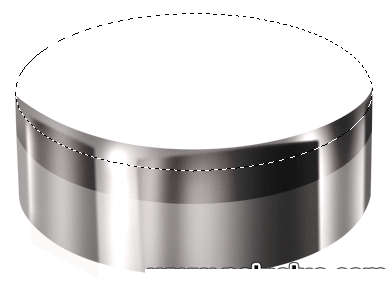
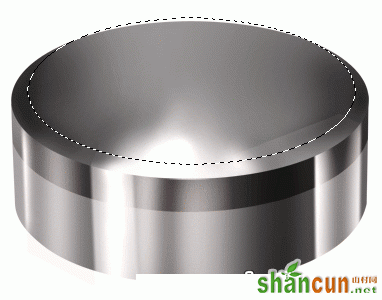
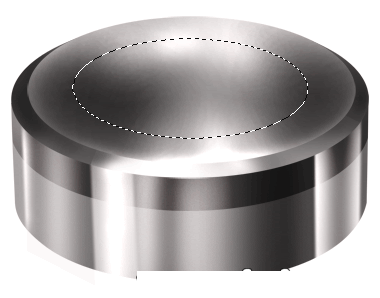
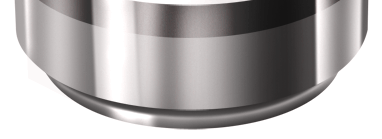
最终效果
 nmousewheel="return bbimg(this)" onload="javascript:resizepic(this)" border="0"/>
[1]-新建一个500x500的文件,大小也可以自定。
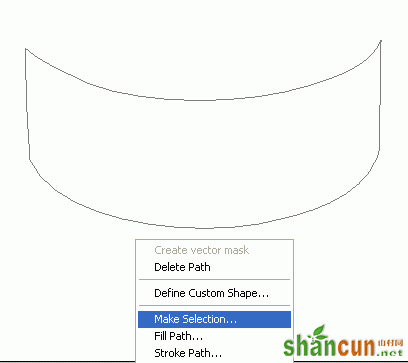
[2]-新建一层,用钢笔工具画出下图形状 ,并右键“建立选区”
 nmousewheel="return bbimg(this)" onload="javascript:resizepic(this)" border="0"/>
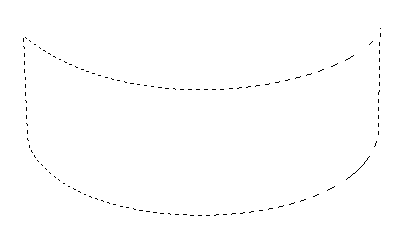
[3]-羽化半径“0像素”,如下图
 nmousewheel="return bbimg(this)" onload="javascript:resizepic(this)" border="0"/>
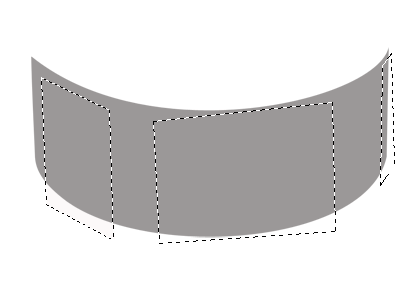
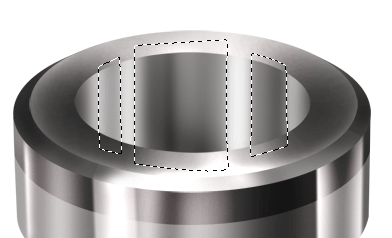
[4]-填充颜色“#c6d4e8”,再用钢笔工具画出如下图的三个选区,方法参考上面
 nmousewheel="return bbimg(this)" onload="javascript:resizepic(this)" border="0"/>
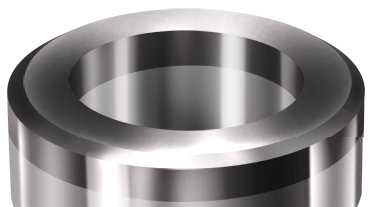
[5]-现在用加深工具 nmousewheel="return bbimg(this)" onload="javascript:resizepic(this)" border="0"/> 在相应的选区里加上阴影
 nmousewheel="return bbimg(this)" onload="javascript:resizepic(this)" border="0"/>
[6]-然后用减淡工具  nmousewheel="return bbimg(this)" onload="javascript:resizepic(this)" border="0"/> 涂出内部光感,在反向选择“Ctrl+Shift+I”涂出外部光感
 nmousewheel="return bbimg(this)" onload="javascript:resizepic(this)" border="0"/>
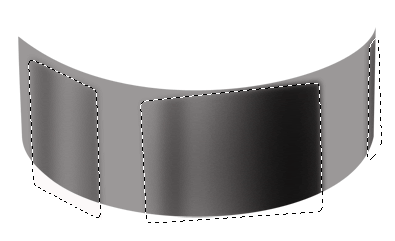
[7]-新建一层,用钢笔工具,画出如下图的路径
 nmousewheel="return bbimg(this)" onload="javascript:resizepic(this)" border="0"/>
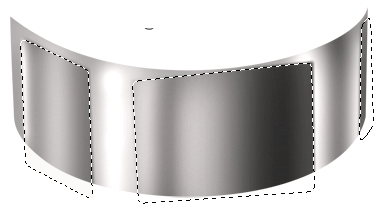
[8]-在比路径里填充颜色“#383838”,混合模式改为“叠加”
 nmousewheel="return bbimg(this)" onload="javascript:resizepic(this)" border="0"/>
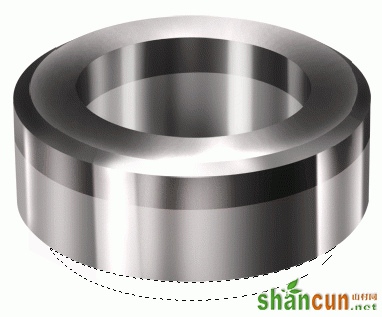
[9]-新建一层,用“椭圆选框工具”画出如下图
 nmousewheel="return bbimg(this)" onload="javascript:resizepic(this)" border="0"/>
[10]-填充颜色“#9b9898” 后,再在该层用“椭圆选框工具”画出如下图的圆,用“加深和减淡工具”涂出阴影和光感,如下图
 nmousewheel="return bbimg(this)" onload="javascript:resizepic(this)" border="0"/>
[11]-新建一层,用“椭圆选框工具”画出下图的圆,并填充相同的颜色“#9b9898”,用“加深和减淡工具”涂出阴影和光感,如下图
 nmousewheel="return bbimg(this)" onload="javascript:resizepic(this)" border="0"/>
[12]-涂完后,复制一层“CTRL+J”用“钢笔工具”画出如下图的三个选区,然后用“加深和减淡工具”添加内部阴影和光感,在“反向选择 CTRL+SHIFT+I”涂出外部光感
 nmousewheel="return bbimg(this)" onload="javascript:resizepic(this)" border="0"/>
[13]-新建一层,用钢笔工具勾出如下图的选区
nmousewheel="return bbimg(this)" onload="javascript:resizepic(this)" border="0"/>
[14]-填充颜色“#383838”混合模式改为“叠加”
 nmousewheel="return bbimg(this)" onload="javascript:resizepic(this)" border="0"/>
[15]-新建一层,用钢笔工具画出底部如下图的选区
 nmousewheel="return bbimg(this)" onload="javascript:resizepic(this)" border="0"/>
[16]-填充颜色“#9b9898”,同样方法,用加深和减淡工具处理,阴影和反光
 nmousewheel="return bbimg(this)" onload="javascript:resizepic(this)" border="0"/>
[17]-新建一层,设置笔刷工具,像素为 1 PX,用“钢笔工具”或“椭圆选框工具”给形状描边
 nmousewheel="return bbimg(this)" onload="javascript:resizepic(this)" border="0"/>
[20]-在相应部位描边后的效果,如下
nmousewheel="return bbimg(this)" onload="javascript:resizepic(this)" border="0"/>


