教程其实都是一些最基础的操作。如用滤镜来制作圆环,用图层样式来制作漂亮的浮雕效果等。运用的都是一些基础,不过能够灵活运用就可以做出非常不错的效果图。
最终效果 nmousewheel="return bbimg(this)" onload="javascript:resizepic(this)" border="0"/>
1、新建一个600 * 600 像素的文件,背景选择透明。
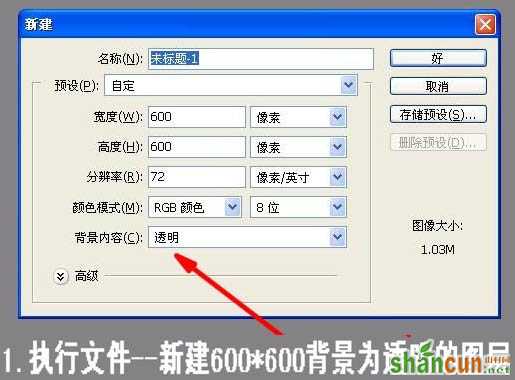 nmousewheel="return bbimg(this)" onload="javascript:resizepic(this)" border="0"/>
、用矩形选框工具在图层的中央画一个方框,方框的宽窄决定了玉环的宽度。注意左右一定要到边,否则玉环有缺口。
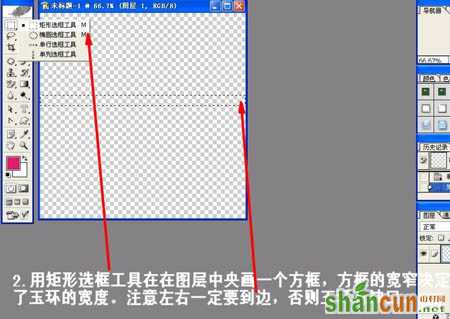 nmousewheel="return bbimg(this)" onload="javascript:resizepic(this)" border="0"/>
3、把选区填充颜色,选择自己喜欢的颜色。
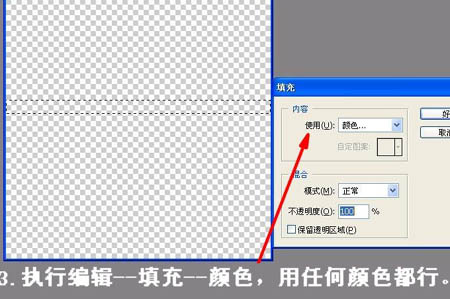 nmousewheel="return bbimg(this)" onload="javascript:resizepic(this)" border="0"/>
4、按Ctrl + D 取消选区。
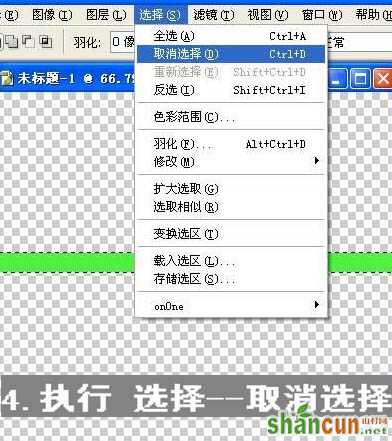 nmousewheel="return bbimg(this)" onload="javascript:resizepic(this)" border="0"/>
5、执行:滤镜 > 扭曲 > 极坐标。
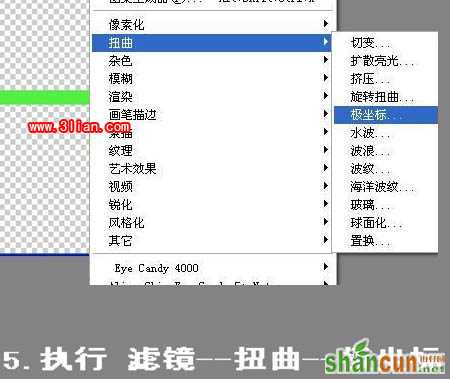 nmousewheel="return bbimg(this)" onload="javascript:resizepic(this)" border="0"/>
6、在弹出的窗口选择“平面坐标到极坐标”。
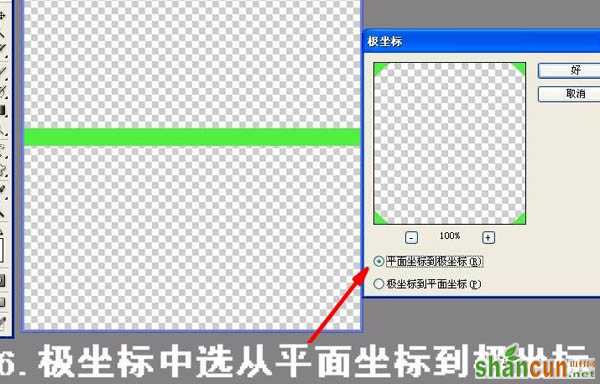 nmousewheel="return bbimg(this)" onload="javascript:resizepic(this)" border="0"/>
7、执行滤镜后的效果如下图。
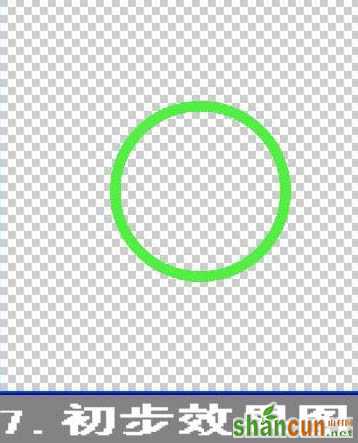 nmousewheel="return bbimg(this)" onload="javascript:resizepic(this)" border="0"/>
8、执行:图像 > 图层样式 > 内阴影,参数设置如下图。
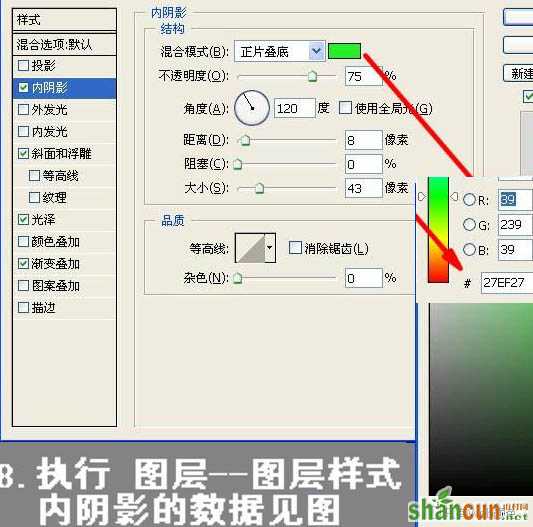 nmousewheel="return bbimg(this)" onload="javascript:resizepic(this)" border="0"/>
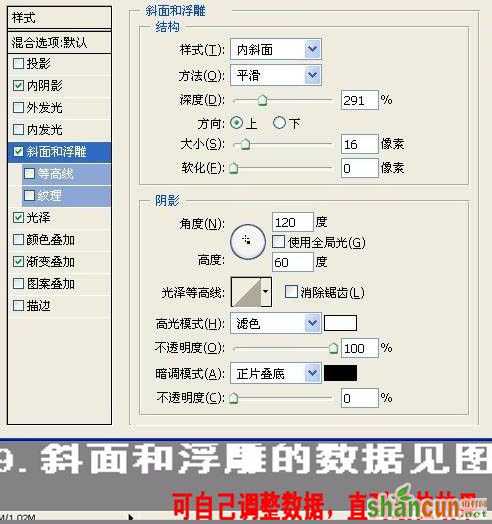
9、选择斜面和浮雕,参数设置如下图。
 nmousewheel="return bbimg(this)" onload="javascript:resizepic(this)" border="0"/>
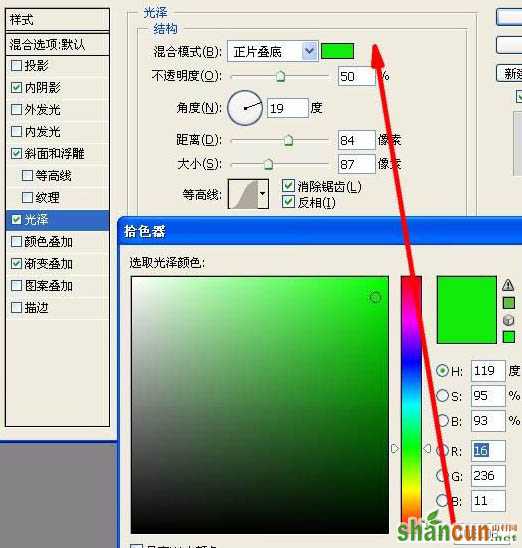
10、光泽的参数设置。
 nmousewheel="return bbimg(this)" onload="javascript:resizepic(this)" border="0"/>
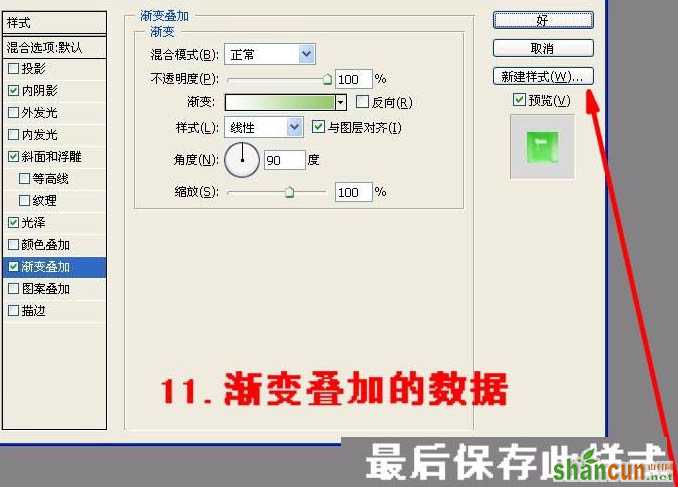
11、选择渐变叠加,参数设置如下图,确定后选择右边的“新建样式”按钮,添加到样式面板。
 nmousewheel="return bbimg(this)" onload="javascript:resizepic(this)" border="0"/>
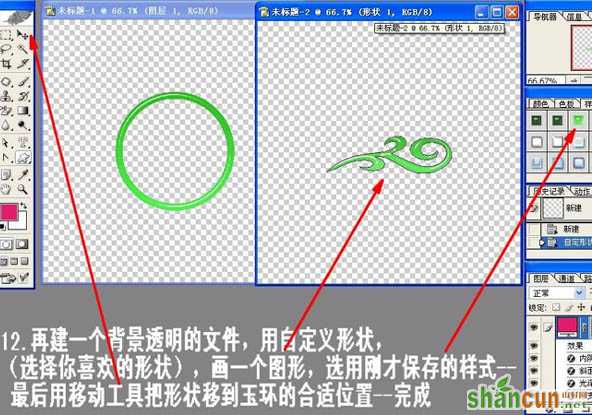
12、再建一个背景透明的文件,用自定义形状,画一个图形。加上刚才保存的图层样式。可以适当改变里面的数值。然后移到玉环的文件里面,适当放好位置,完成最终效果。
 nmousewheel="return bbimg(this)" onload="javascript:resizepic(this)" border="0"/>
最终效果: nmousewheel="return bbimg(this)" onload="javascript:resizepic(this)" border="0"/>


