最终效果图:
 nmousewheel="return bbimg(this)" onload="javascript:resizepic(this)" border="0"/>
原图
 nmousewheel="return bbimg(this)" onload="javascript:resizepic(this)" border="0"/>一、将一张美女图片打开,按CTRL+J复制一层,再执行半径为六个像素左右的高斯模糊。
 nmousewheel="return bbimg(this)" onload="javascript:resizepic(this)" border="0"/>
二、再按CTRL+SHIFT+U对图层去色,然后把该层的混合模式设为叠加。
 nmousewheel="return bbimg(this)" onload="javascript:resizepic(this)" border="0"/>
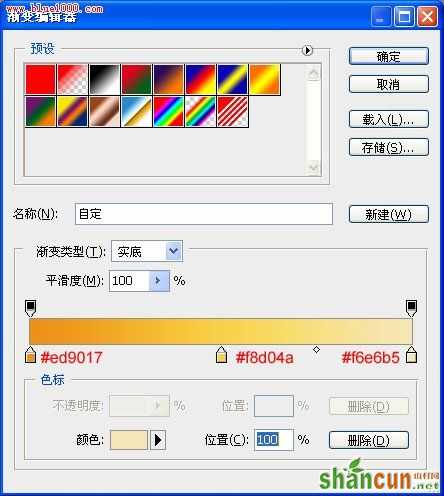
 三、新建一个图层,再执行CTRL+SHIFT+ALT+E盖印可见图层,接着再添加一个渐变映射调整图层,设置完参数以后,再把该调整层的混合模式设为柔光。
 nmousewheel="return bbimg(this)" onload="javascript:resizepic(this)" border="0"/>
四、这时如果你发现图片比较亮的情况下,我们可以更改图层的不透明度来达到自己需要效果。
 nmousewheel="return bbimg(this)" onload="javascript:resizepic(this)" border="0"/>
五、再次新建图层,并执行盖印可见图层,然后再创建一个新的图层执行编辑-填充,为该层填充50%的灰色,再将该层的混合模式设为叠加。
 nmousewheel="return bbimg(this)" onload="javascript:resizepic(this)" border="0"/>
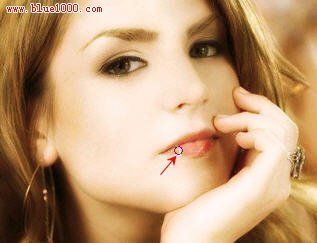
六、选择使用工具栏上面的加深工具对人物的嘴巴进行一些细微的处理。
 nmousewheel="return bbimg(this)" onload="javascript:resizepic(this)" border="0"/>
 七、效果已经调整得差不多了,3lian素材,现在我们只需要再在图片上添加一些文字来进行修饰就OK了!
 nmousewheel="return bbimg(this)" onload="javascript:resizepic(this)" border="0"/>


