photoshop对头发抠图的方法
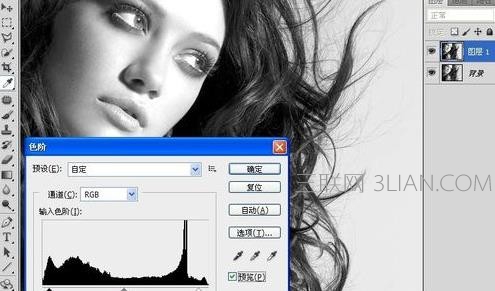
打开一张需要抠出头发的图像。如图:
Ctrl+J,复制一层,Ctrl+L,调整色阶,参数如图:点确定。
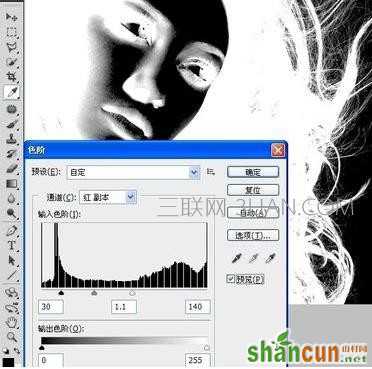
切换到通道面板,选对头发边缘黑白对比最强烈的一个颜色通道,此图为红色通道,复制它,并Ctrl+I反相。
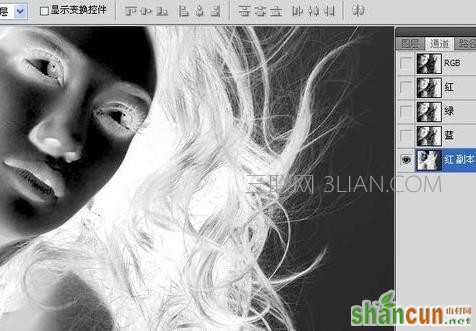
调整刚才复制通道的色阶,参数如图:点确定。
用多边形选择工具,选中左边的部分,范围根据头发了实际情况来定,此张范围如图:
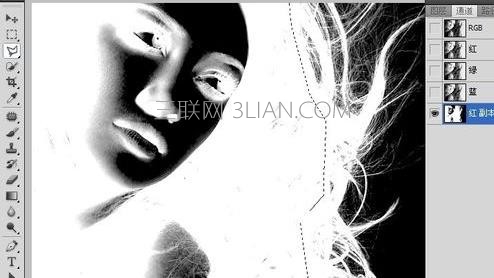
将选区填充为白色,取消选择,Ctrl+单击“红副本”通道。载入选区(实际上是人物面部和头发的图像范围)。
回到图层面板,隐藏“图层1”,选中“背景层”。
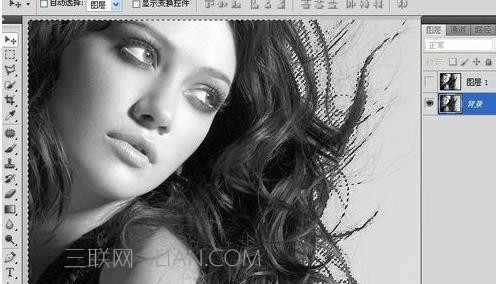
Ctrl+J,复制图像,人物和头发就抠出来了,在下方新建一绿色“图层3”,就能清楚的看清头发的抠图效果了。