
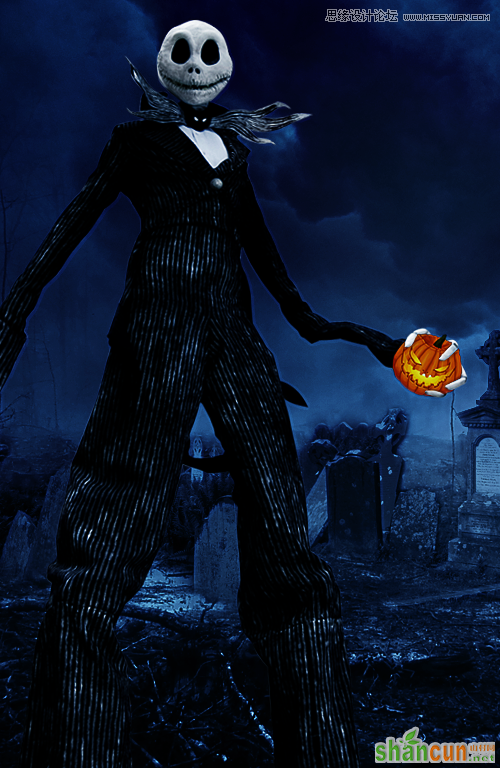
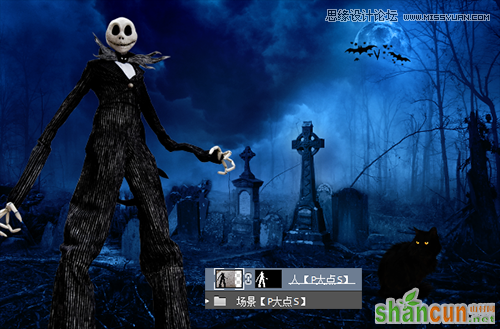
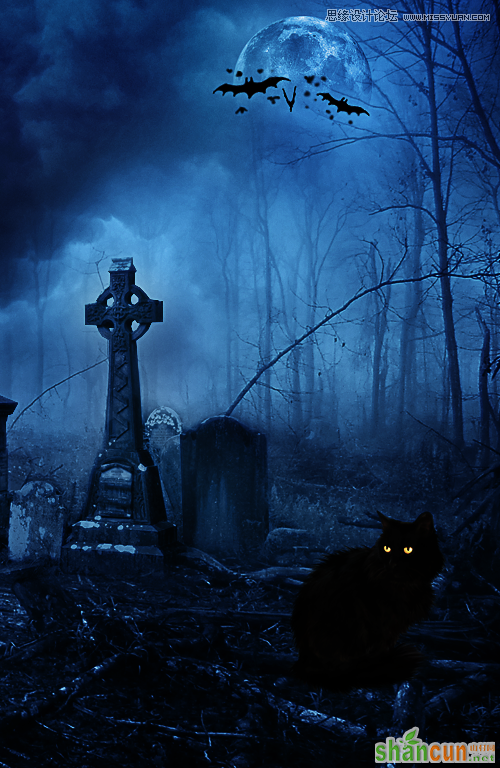
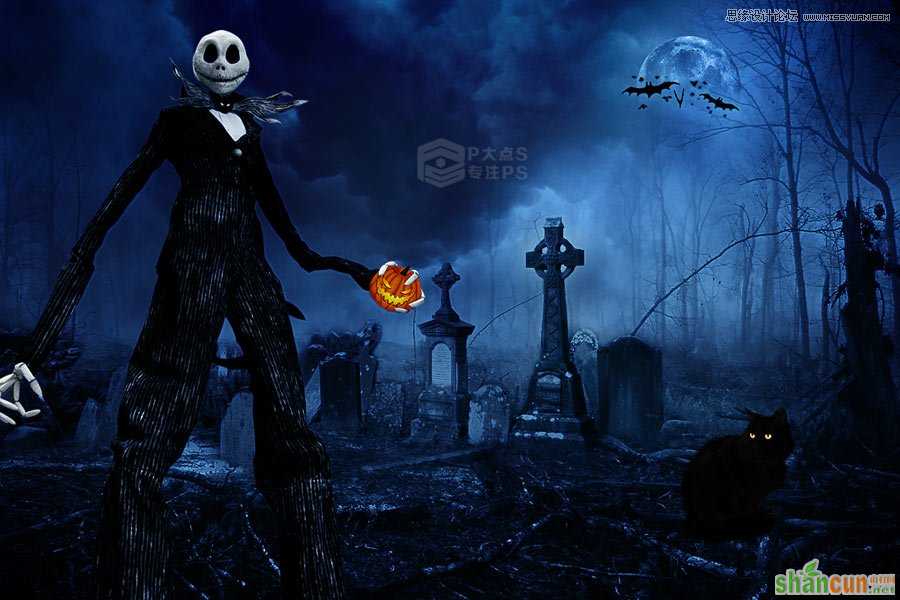
效果图:

言归正传,我用的画布大小是1200x800

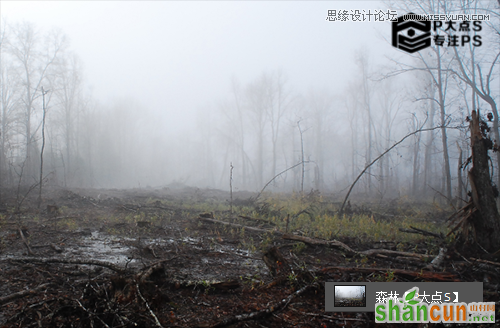
首先放入森林图片

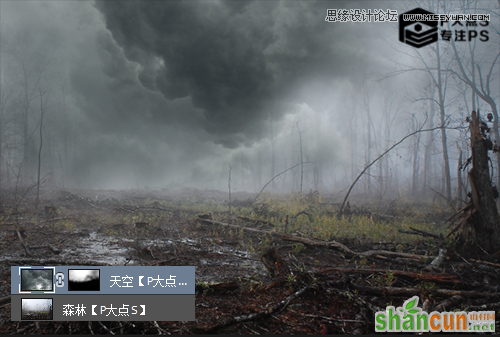
接下来,放入天空素材,并添加一个蒙版,融合森林和天空
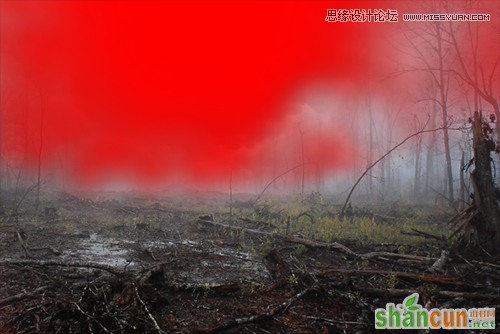
下图红色部分为我所创建的蒙版部分
接下来,放入墓地素材,同样的,用蒙版来融合整个画面

效果图:
言归正传,我用的画布大小是1200x800

首先放入森林图片
接下来,放入天空素材,并添加一个蒙版,融合森林和天空
下图红色部分为我所创建的蒙版部分

接下来,放入墓地素材,同样的,用蒙版来融合整个画面

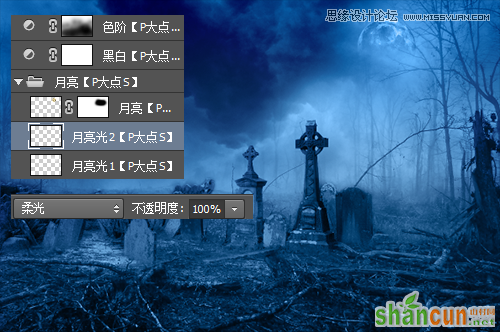
下面,添加月亮素材,将月亮图层置于黑白调整层底下,创建蒙版,把月亮的下部擦一下
在月亮下层新建图层,给月亮添加光,直接使用白色,用画笔刷几下,设置混合模式为柔光,搞定
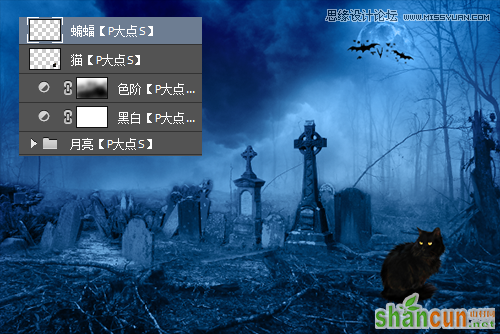
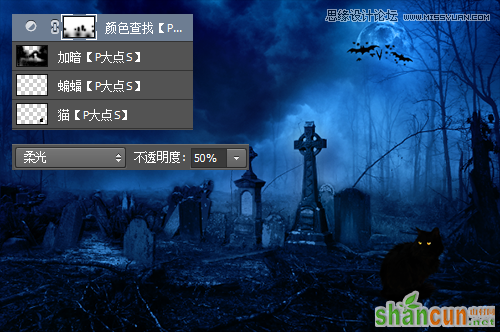
添加猫和蝙蝠素材,没啥好说的
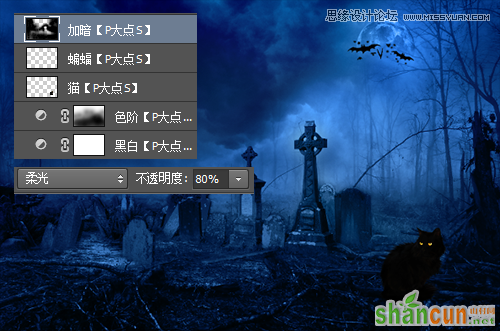
新建一个图层,设置前景色为黑色,在画布上适当的涂抹,为整个画面添加一些暗调,设置图层混合模式为柔光,不透明度80
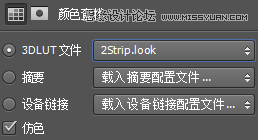
添加一个颜色查找调整层,【CS6以上才有颜色查找】,并添加蒙版,适当涂抹,强化一下对比,设置颜色查找调整层混合模式为柔光,不透明度为50,颜色查找调整层设置请看下图
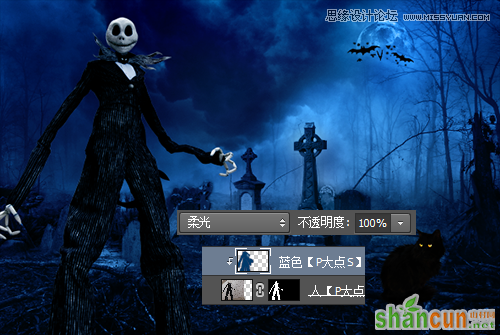
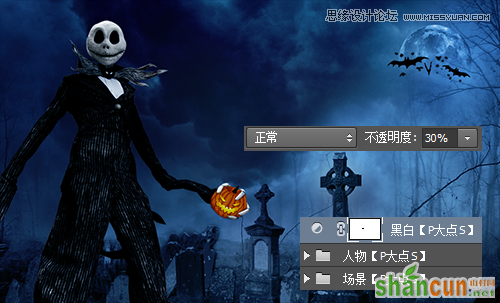
抠出人物,放置到画面中,调整位置及大小, 据熊哥说,这货是一个片子里的人物,虽然我用了这货做主角,但是我不认识他阿,我还以为只是单纯的COS玩的,没想到还是有原型的,膜拜之。
OK,下面,为人物添加蓝色调,新建一层,设置前景色为#00396a,使用画笔,疯狂的涂抹,创建剪贴蒙版,更改图层混合模式为柔光
添加黄瓜素材, 擦,错了,南瓜, 把南瓜弄到手上,添加蒙版,把手显示出来
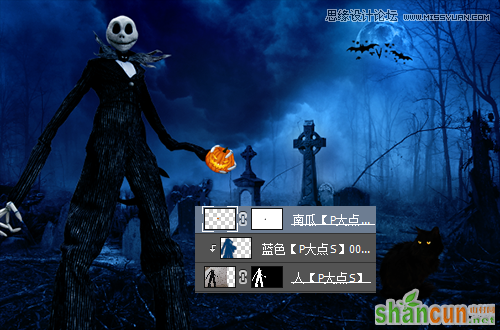
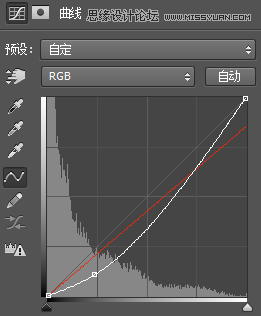
南瓜好像太亮了,添加一个曲线调整层,创建剪贴蒙版,压暗一点
设置前景色为黑色,用画笔配合蒙版,涂出握住南瓜的手的阴影,再调节不透明度
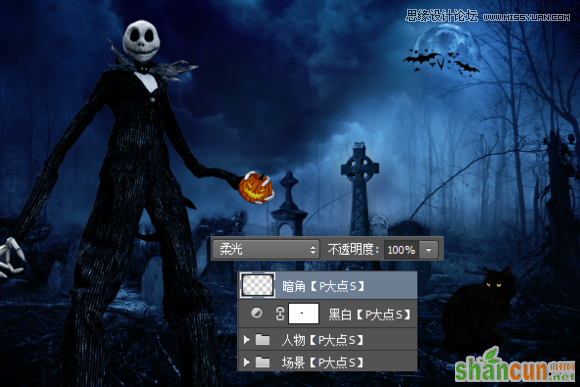
感觉整个画面好像蓝过头了,添加一个黑白调整层,设置不透明度为30,用蒙版还原南瓜的颜色
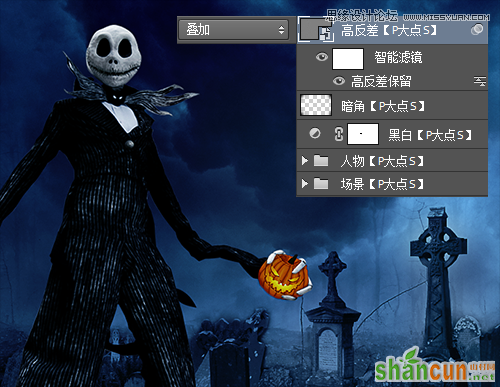
新建图层,设置前景色为黑色,直接使用画笔工具把画布四个角的位置撸黑,设置图层混合模式为柔光
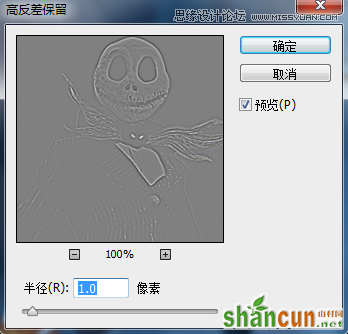
盖印图层,执行高反差保留滤镜,半径设置1像素,图层混合模式设置为叠加
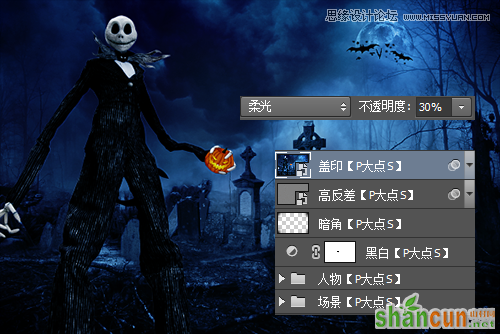
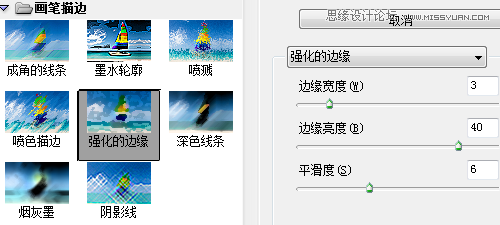
再次盖印图层,执行滤镜库—画笔描边—强化的边缘,设置图层混合模式为柔光,不透明度30
OK,大功告成。
细节图:
注:更多精彩教程请关注山村photoshop教程栏目,山村PS群:182958314欢迎你的加入


