
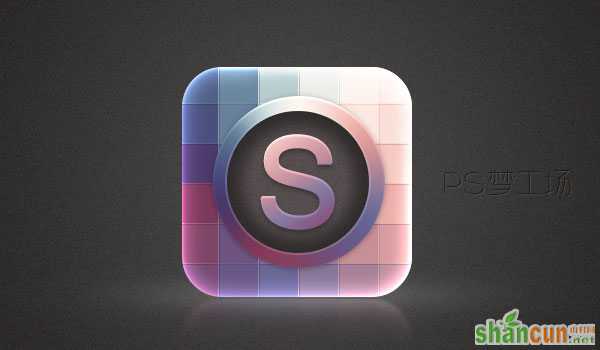
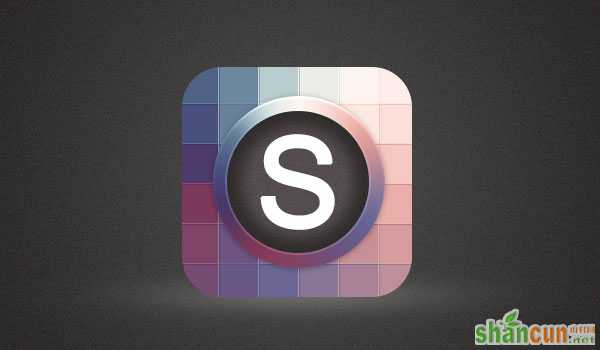
今天的教程特别适合UI新手练手用,效果好看,作者对图层样式和渐变的理解也特别到位,同学们临摹过程多加揣摩,进步会很快。操作界面全中文,不怕看不懂,小编已跟着练习了一遍,现在该你啦。
第1步:
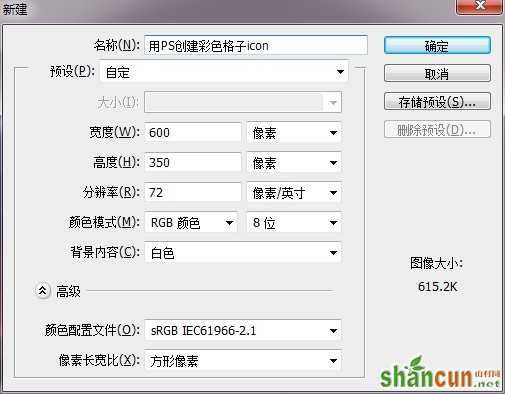
打开Photoshop,Ctrl+N新建一个文档,文档尺寸可自定义。
第2步:
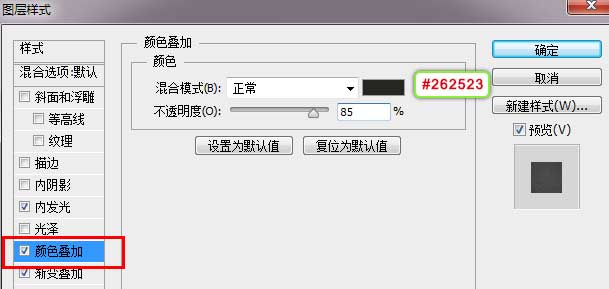
按住Alt键双击背景图层,使其转换为普通图层。然后再次双击,打开图层样式面板,为其添加颜色叠加样式,颜色为#262523。
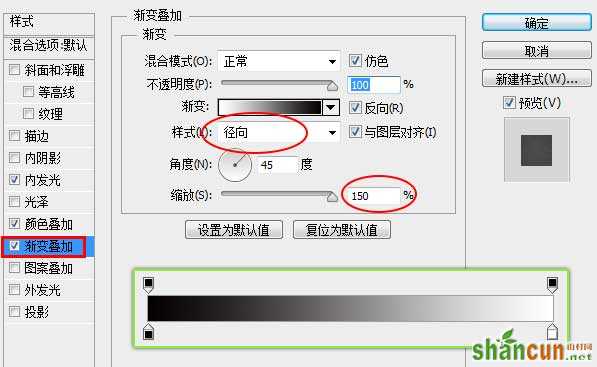
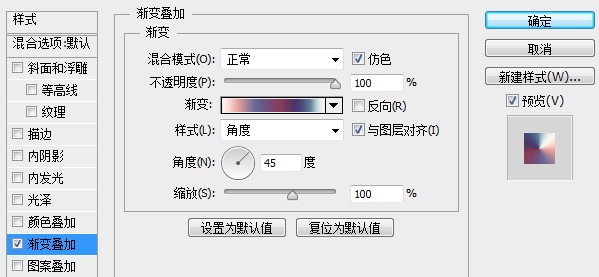
继续为其添加渐变叠加,数值如下:
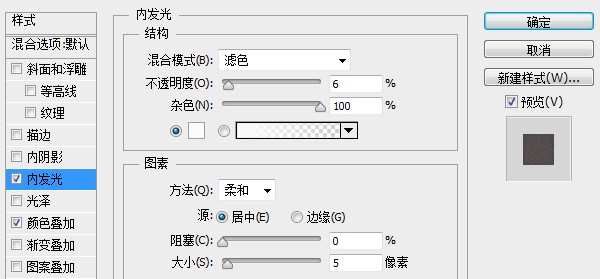
再利用内发光中的杂色功能来给背景添加一些杂色,当然你也可以使用滤镜中的添加杂色功能。
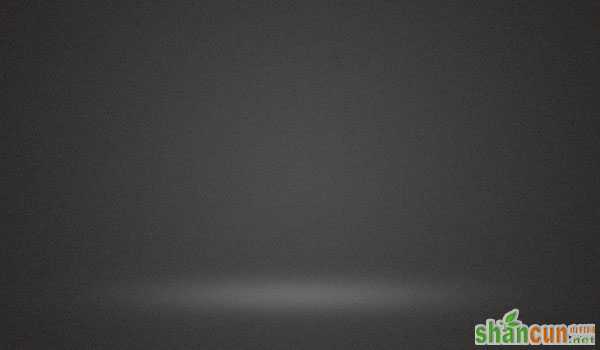
此时的背景:
第3步:
新建一层,用白色大号柔边画笔在画布中心点击出白色亮光。
Ctrl+T将其拉宽压扁,如下图所示。
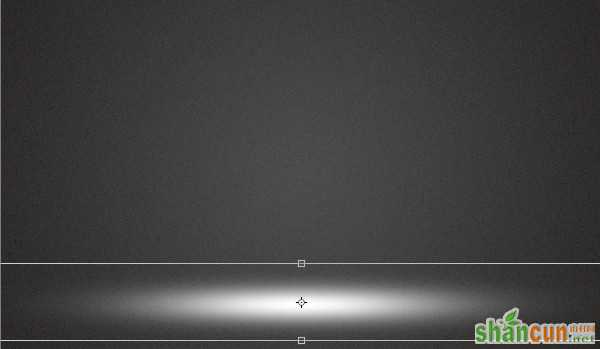
将图层不透明度调整为10-30%,这里可以根据自己的感觉来调整。
第4步:
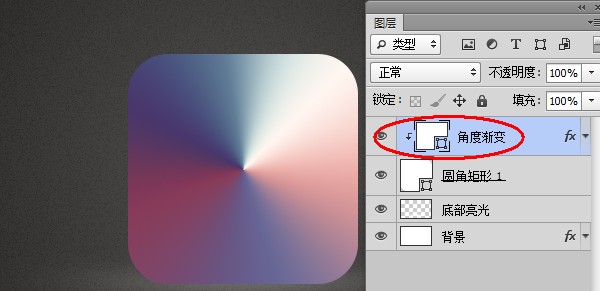
接下来我们创建icon主体。利用圆角矩形工具在画布中心点击,在弹出的对话框中设置数值如下:
第5步:
在圆角矩形上方随意绘制一个比其尺寸大一些的形状,因为我们后面会将其转换为剪贴蒙版,因此形状可随意绘制。
为创建的形状添加角度渐变。
然后按住Alt键在角度渐变与圆角矩形中间点击鼠标左键,将其转换为剪贴蒙版。然后在图层名称上点击右键,将其转换为智能对象。
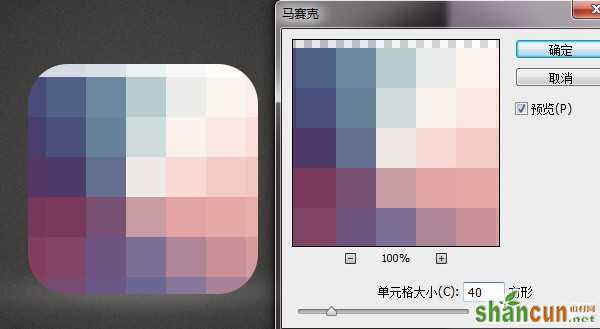
第6步:
利用马赛克滤镜(滤镜>像素化>马赛克)对其进行分块处理。
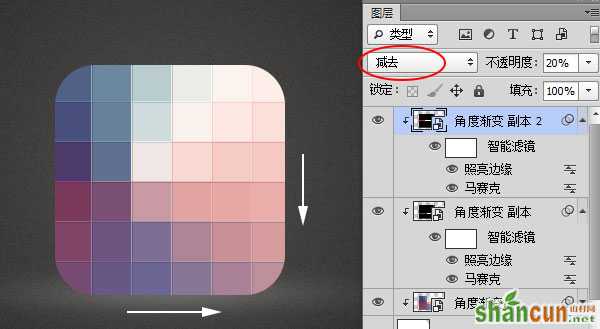
第7步:
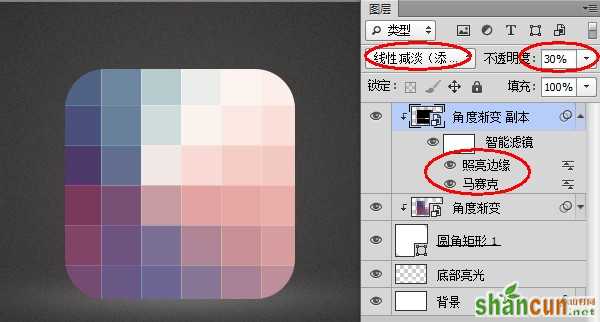
将执行了马赛克滤镜的图层Ctrl+J复制一层,同样转换为剪贴蒙版。然后点击滤镜>风格化>照亮边缘。
将其图层混合模式设置为线性减淡(添加),图层不透明度设置为30%。此时每个格子间都被细线分割开了。
第8步:
将上一步创建的图层Ctrl+J再次进行复制。将图层混合模式设置为减去,图层不透明度设置为20%。
选择移动工具,利用键盘上的方向键将其位置向下方与右方分别移动1像素。这样格子的间隔部分便形成了凹槽的效果。
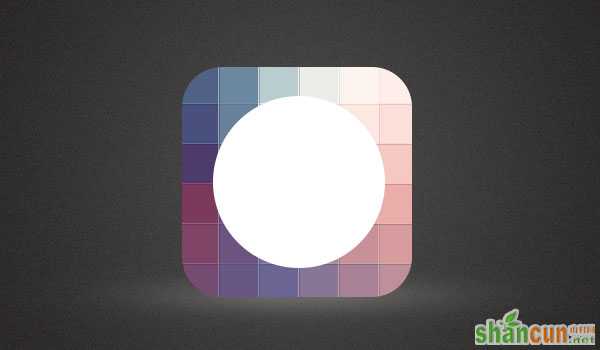
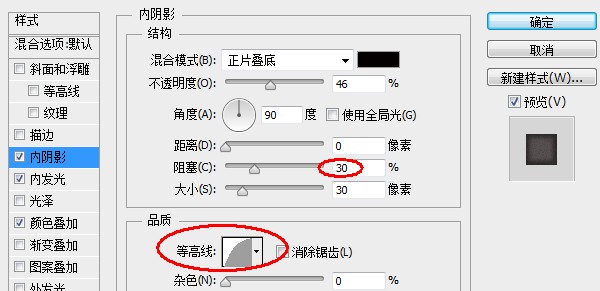
第9步:
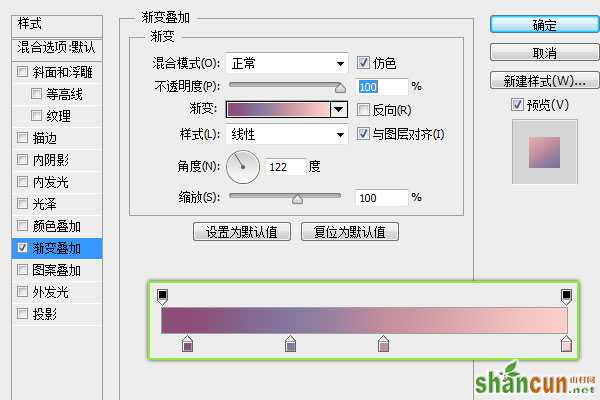
利用椭圆工具在icon中心绘制出一个正圆形。
然后为其添加角度渐变。
继续添加内阴影
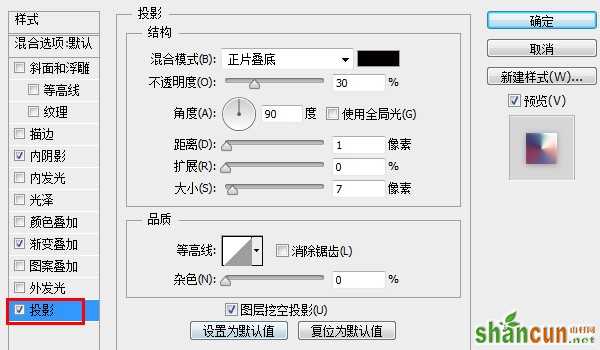
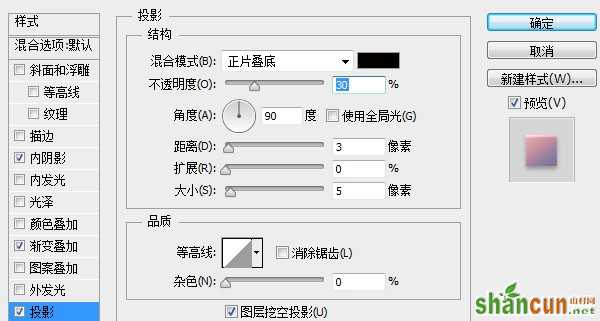
为了表现立体感还要为其添加投影
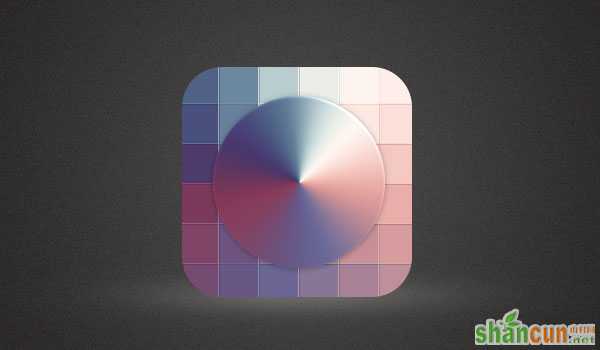
我们来看一下此时的圆形样式
第10步:
利用椭圆工具在icon中心再次创建一个较小的正圆形。
为其添加颜色叠加样式。此处颜色选择接近黑色的深灰色。
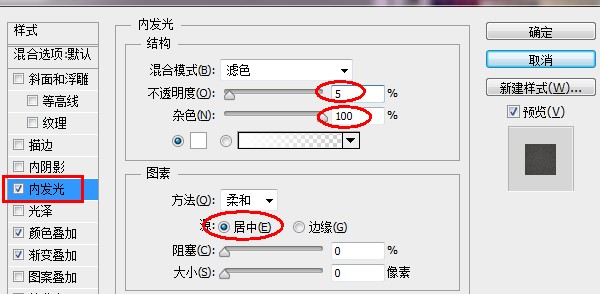
继续添加内发光。与第2步相同,我们这里利用内发光来添加杂色。
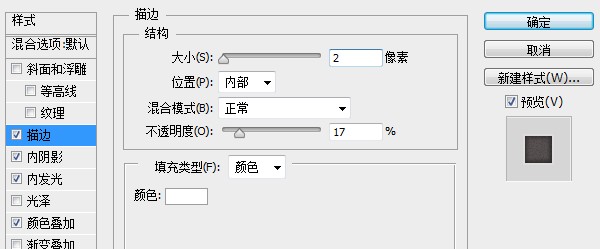
然后为其添加内阴影。
再来个内部描边以使其轮廓更加明显。
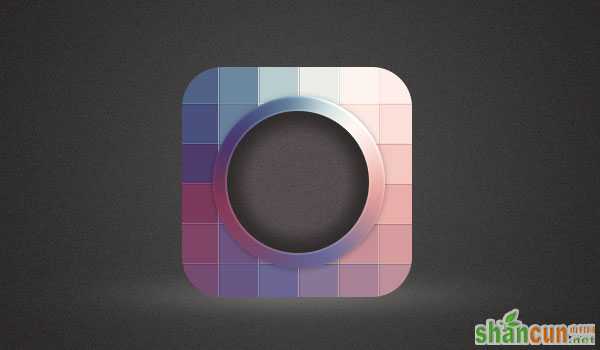
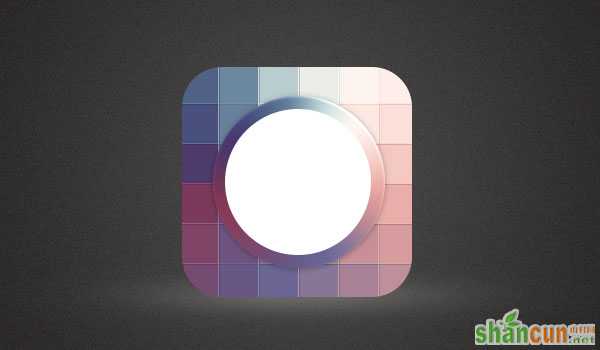
来看看我们处理后的结果。
第11步:
下面我们来添加文字。
然后为文字添加渐变。这里我就不给出具体数值了,你可以根据自己的感觉来。当然你也可以使用其他色系的颜色。
添加内阴影以模拟边缘的高光。
当然了,要表现立体感,阴影还是不能缺少的。
第12步:
做到这里,总觉得icon平平淡淡,缺少点感觉。好吧,使出我们的杀手锏,添加发光!你立刻就会感受的奇迹的发生了。
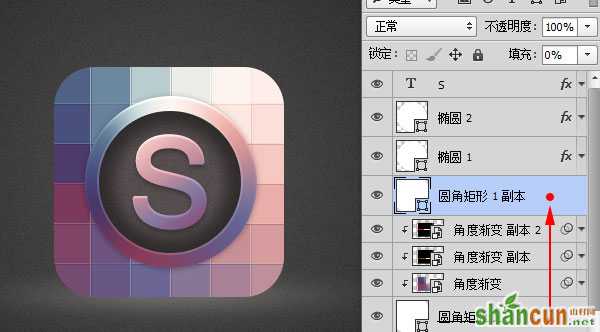
把第4步创建的圆角矩形图层按住Alt键向上拖动复制一份,把填充调为0,这样我们就可以不受这个图层本身颜色的控制了,而可以对图层样式进行为所欲为的调整,嘿嘿。
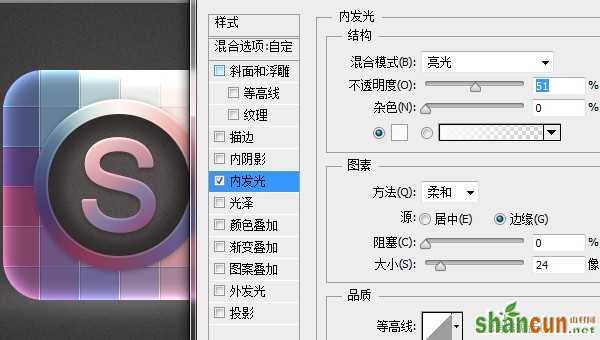
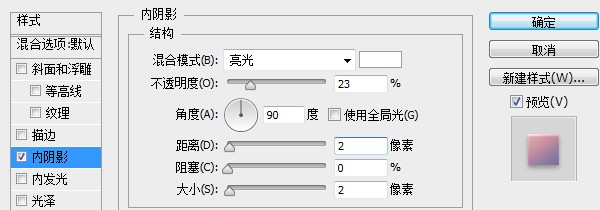
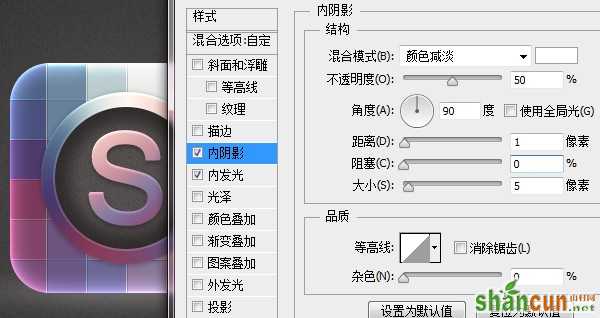
来吧,给它添加内发光!
还有内阴影
来看看效果,怎样样?是不是好看了很多。
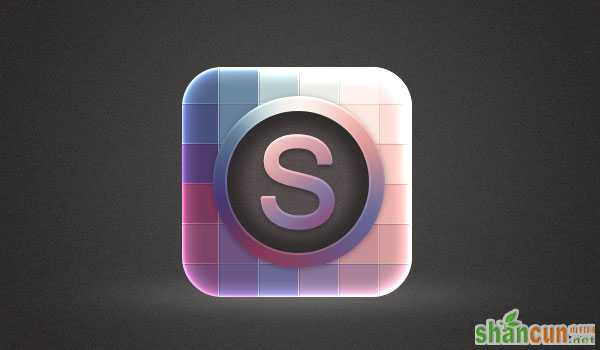
你是不是正要庆祝终于完工了?等等,icon右上角那一片白是怎么回事?木有细节了,亲。
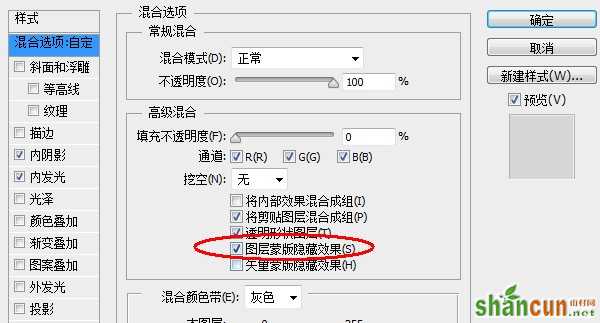
第13步:
好吧,苦逼的设计师,继续调整。
双击图层,打开图层样式面板。在混合选项中,将“图层蒙版隐藏效果”勾选上。
然后为图层添加蒙版,用黑色画笔将细节擦出来。

第14步:
最后添加上倒影。Oh,my god!终于完了!
注:更多精彩教程请关注山村photoshop教程栏目,山村PS群:182958314欢迎你的加入


