
效果图
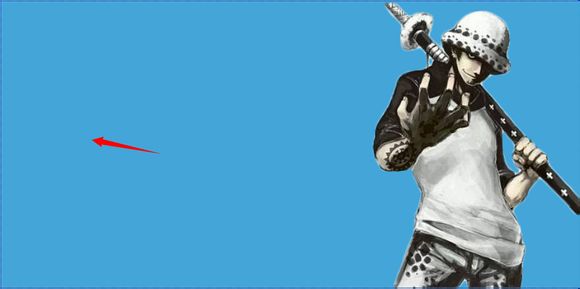
本次教程的素材:

第一步:首先新建一个合适的画布,并填充自己喜欢的背景颜色。我填充的是蓝色:
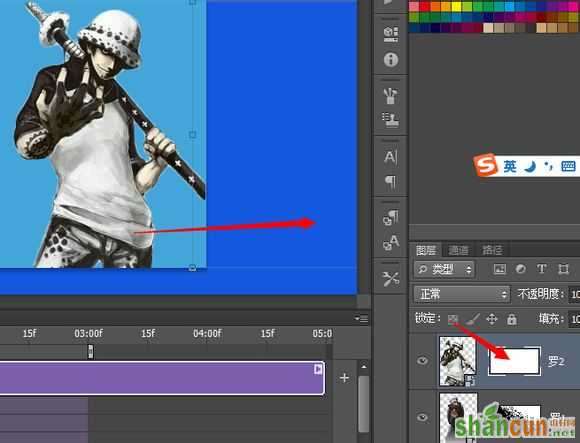
第二步:将喜欢的两个人物放进去,创建智能对象,调整好大小与位置。这里,我选了个人喜爱的罗。素材也已经提供,是我百度找的,而且已经抠好了。
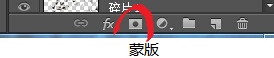
然后将他们命名好后,分别创建蒙版。并且将他们的蒙版与图层的链接点击取消。如图二的位置。
图片来自:泪了阳光的百度相册
第三步:选择直线工具,如图三所示,
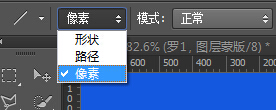
并且选择它的方式为像素。
图片来自:泪了阳光的百度相册选好后,选择罗1的图层蒙版,按住
alt键,点击蒙版,就能只看蒙版了。然后用直线工具从左上角按住,拉到右下角,(颜色为黑)即可画
出一条线。如图

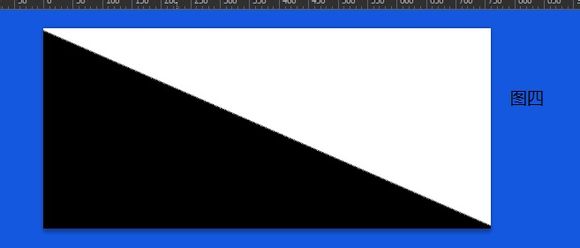
第四步:选择油漆桶工具,(黑色)在蒙版的左下半部分点击填充。如图四。
图片来自:泪了阳光的百度相册
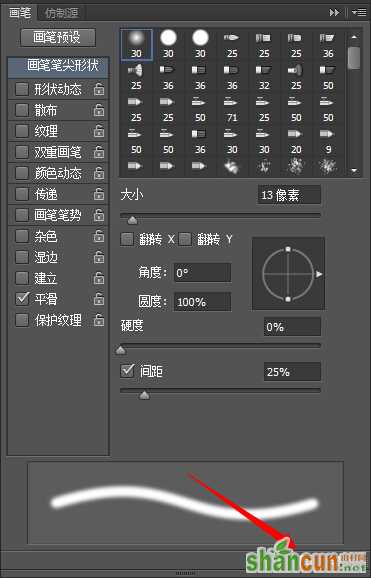
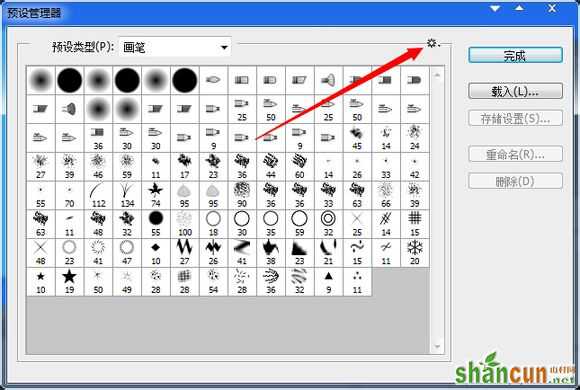
第五步:选择画笔工具,点击它的画笔预设,如图五。
然后再点击预设面板右下角的预设管理器。
图片来自:泪了阳光的百度相册
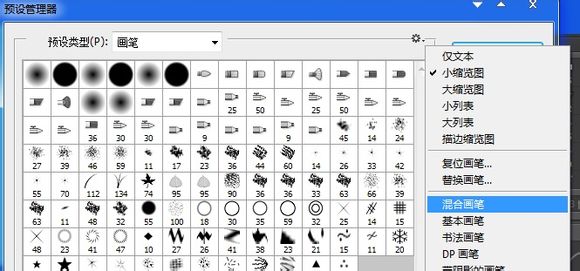
然后选择那个螺丝,如图所示。选择混合画笔,追加。
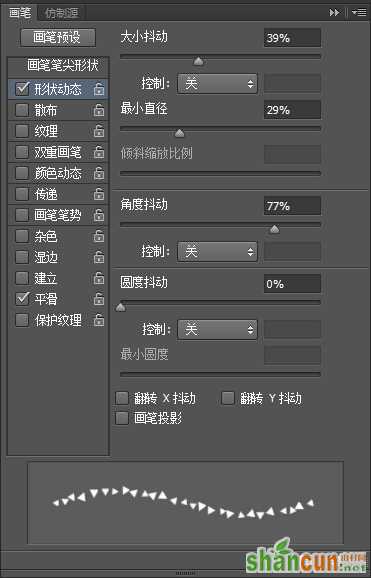
第六步:然后就有了如图六所示的三角形画笔。(选择其他形状画笔也行),个人喜好。
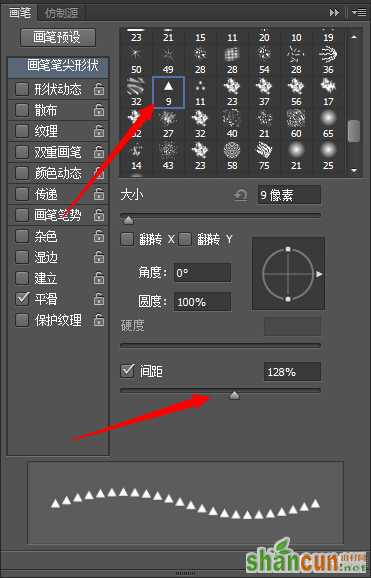
然后拉大间距,100%以上。不要太大。
这个有图六···
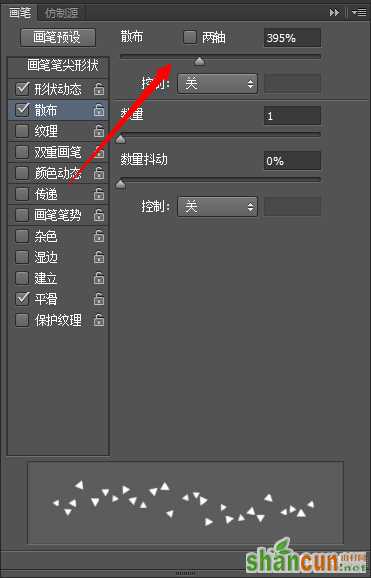
然后选择形状动态,调整大小抖动,最小直径,和角度抖动。再然后选择散布,拉到一定程度,看下面的图示,感觉可以了就行。
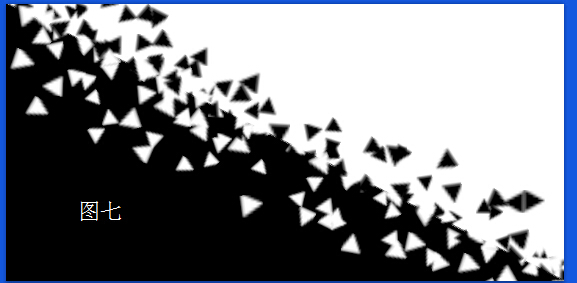
第七步:还是按着alt键,单单看罗1的图层蒙版。在对角线边缘用画笔画,注意,是用黑色和白色交叉画,注意画笔的大小。如图七。
画的差不多了,就换成移动工具,点击蒙版,按着shift键,再按右方向键,向右移动。这时要看罗1的图层,看看罗1是否还看得见。
当然对角线的蒙版还是不能蒙住罗1的。所以要用矩形选框工具,在蒙版里选出一个框来,然后在填充黑色。

这时罗1就看不到了。不好的地方还是要用画笔再蒙版上画一画。如图
然后,按住alt键,用鼠标把罗1的蒙版复制给罗2。
然后选择罗2的蒙版,用移动工具,ctrl+t,将它水平翻转再垂直翻转。如图。
记得用上面的方法再shift+方向键 水平移动移动。
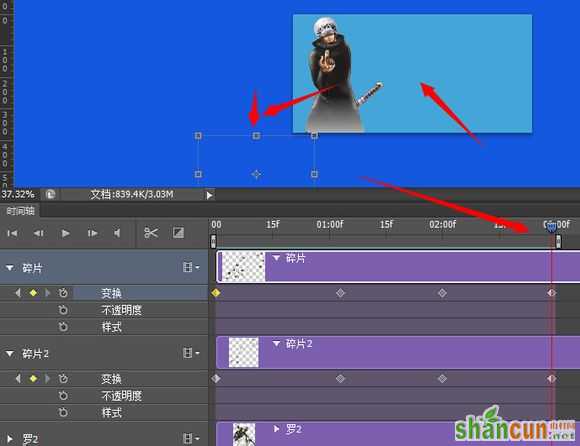
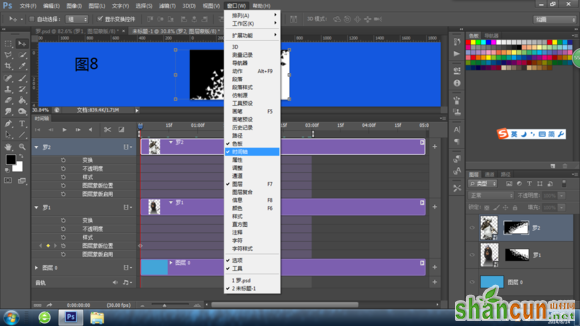
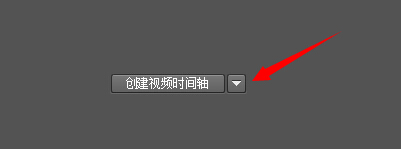
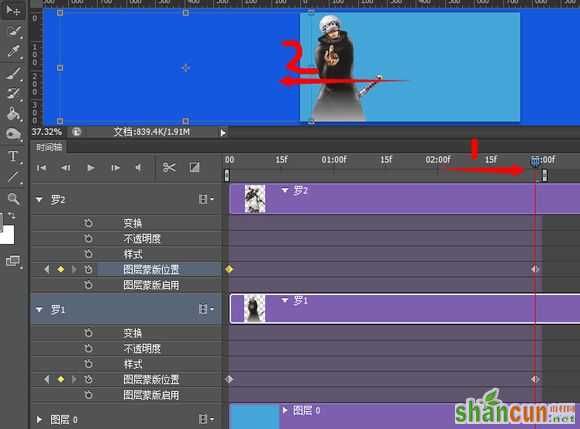
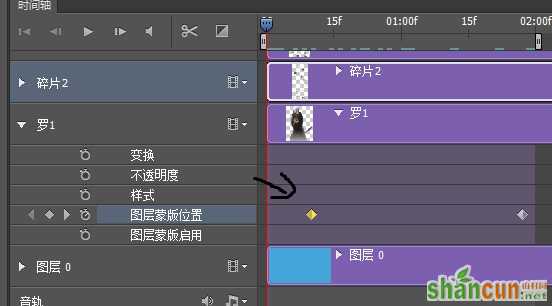
第八步:创建视频时间轴。如图8.当然,一开始也可以直接打开这个视频时间轴了
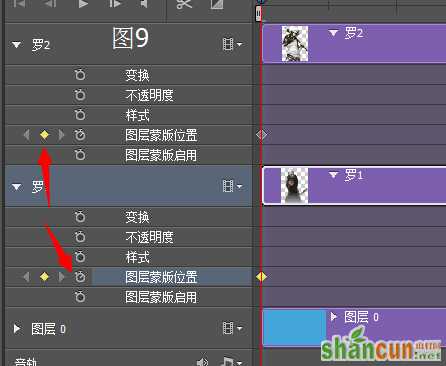
第九步:点击罗1和罗2的图层蒙版位置的码表按钮。如图9.
然后选择罗2的蒙版用移动工具,按住shift键,再按右方向键,移出边缘,使罗2完全看得见,出现就好。
然后将时间轴移动到自己想结束的位置(我这里先设置在了3:00f)。然后再开始分别罗1和罗2的图层蒙版的位置,还是水平平移。如图,都移到左边。罗1出现,使罗2完全消失。记住,先移动时间轴,再移动蒙版
第十步:这时已经可以播放试试,看看效果,是否一个出现,一个消失。
然后如图10.直接复制出罗2的副本,ctrl+j。
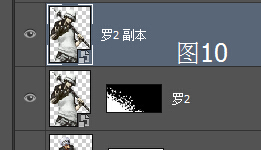
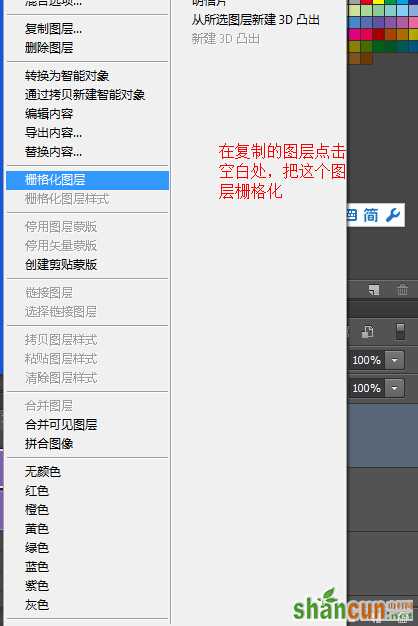
删除它的蒙版。然后鼠标右键,栅格化图层。
然后再为他创建新蒙版,填充黑色。这样就看不到罗2副本了。时间轴要调回起始点哦
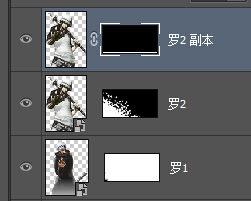
然后用以前设置好的三角形画笔,白色,在罗2副本蒙版上画,这样就有碎片的感觉了。然后把蒙版删除,应用了蒙版内容。
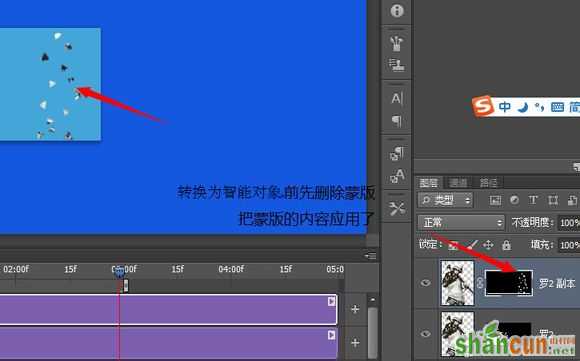
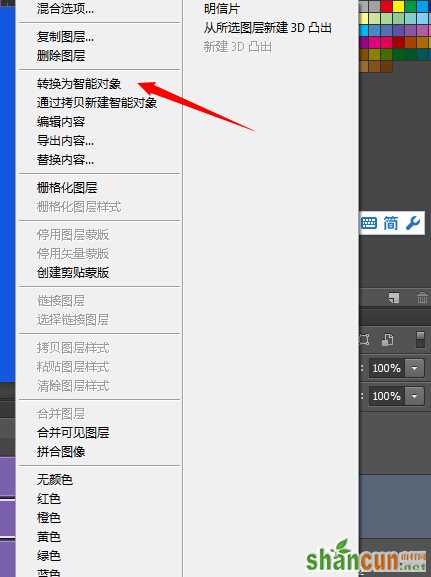
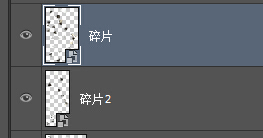
用同样的方法再创建碎片2图层。然后删除碎片的蒙版,并且应用。蒙版删除后,再把它们创建为智能对象。
第十一步:把碎片的时间段移到跟前面的图层一个时间段。然后的步骤和上面的相似,把时间轴拉回起
始点。然后在点击碎片的变换按钮,2个碎片都点,点了后,再把时间轴拉到下一点,在开始用移动工具,变换拉动碎片1.如
图11所示。

先弄碎片1。碎片一调整好后,再弄碎片2。记住,先移动时间轴,在移动碎片,碎片要有变
形收缩等等,怎么好看怎么来。如图。
碎片是个繁琐的活,需要反复调整。然后把罗2整个图层拉到最上面
然后我也调整了罗1的关键帧
,向右移动了一些,这样使衔接的更好。
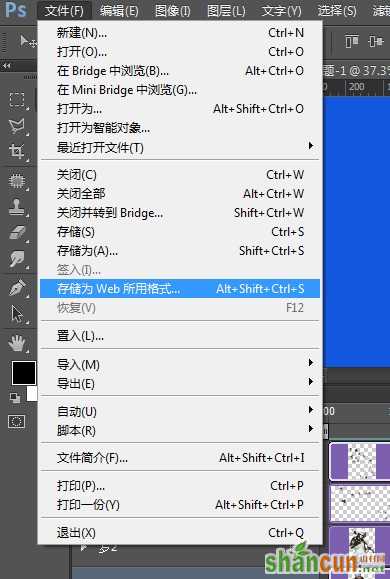
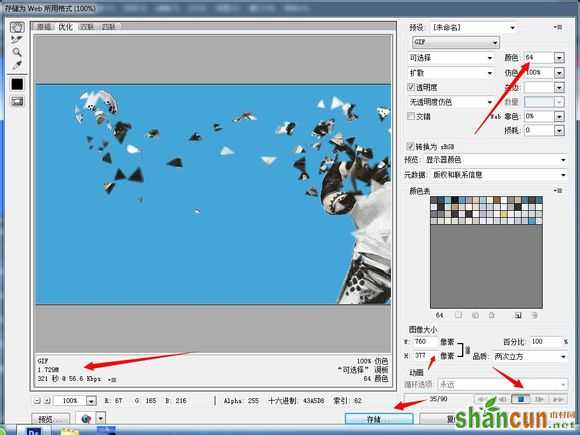
最后,就是存储为web所用格式,并且调整图像大小之类的信息。这样就完成了。
好累的说,有没有人支持支持啊
图片来自:泪了阳光的百度相册
最后声明:想要人物破碎的效果,方法还是很多的,用AE软件的话,效果会更好,难度应该没有那么大。然后如果你也像我一样,用PS的话,效果好就可以能很多的碎片图层,我教程这里比较懒了,只弄了2个,效果要好就可以多弄些,碎片图层的碎片数量不要太多,分多图层效果会更好。还有时间上的把握。


