
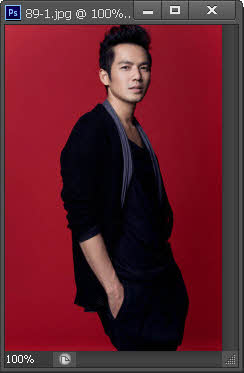
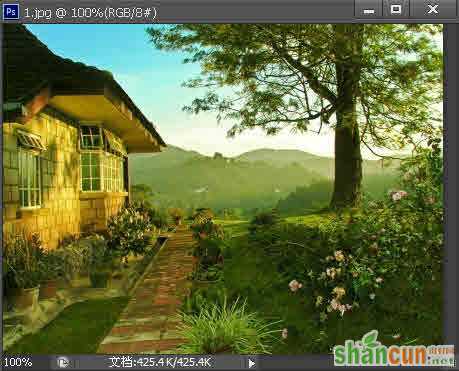
1. 打开一个图像文件。如下图所示:
如果需要,请阅读Photoshop CS6打开文件。
2. 在工具箱中选择“背景橡皮擦工具”
。如下图所示:

如果需要,请阅读Photoshop CS6工具箱。
3. 如果只是使用画笔的默认属性,可以省略这一步,直接操作下一步。
如果需要设置画笔的各种属性,请先阅读背景橡皮擦工具的工具选项栏,然后再操作下一步。
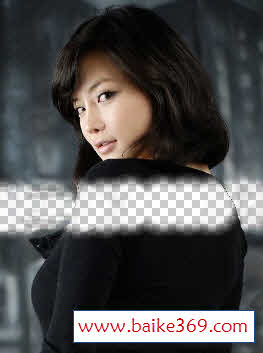
4. 将光标放在背景图像上,光标会变成圆形,圆形中心有一个十字线。如下图所示:
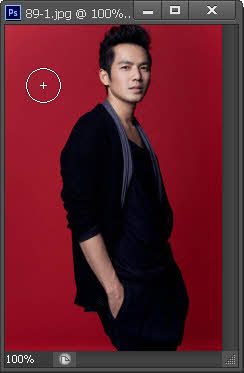
在擦除图像时,Photoshop会采集十字线位置的颜色,并将出现在圆形区域内的类似颜色擦除。
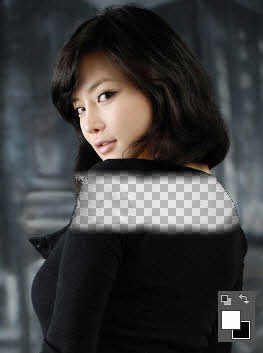
5. 我们单击鼠标左键,然后拖动鼠标即可擦除背景。如下图所示:
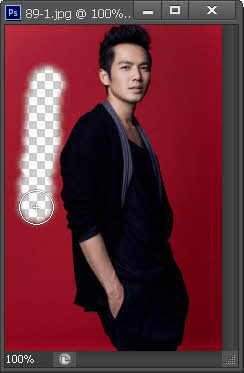
注意:不要让十字线碰到人物,否则也会将其擦除。
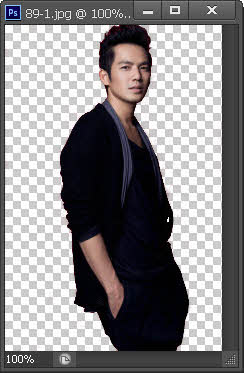
6. 擦除操作完成以后,图像的效果如下所示:
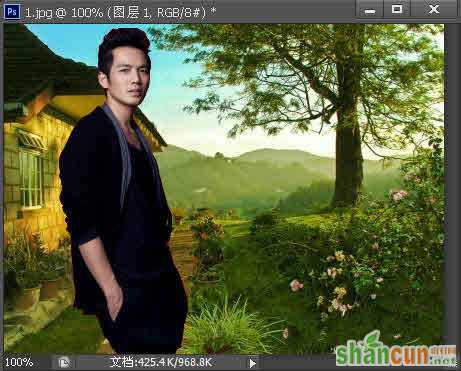
7. 不要关闭上面的效果图,再次打开一个背景文件。如下图所示:
8. 在工具箱中选择“移动工具”
,将去掉背景的人像拖入到该背景文件中。如下图所示:
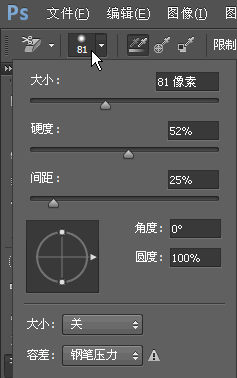
背景橡皮擦工具的工具选项栏
背景橡皮擦工具的工具选项栏如下图所示:
如果需要,请阅读Photoshop CS6工具选项栏。
1. 画笔预设
:在工具选项栏中点击
区域,可以打开“画笔预设”选取器面板。如下图所示:
“画笔预设”选取器面板类似于画笔面板的“画笔笔尖形状”选项,可以参考阅读。
2. 取样
:设置取样的方式。 1)按下“连续”按钮
,在拖动鼠标时可以连续对颜色取样,凡是出现在光标中心十字线内的图像都会被擦除。如下图所示:
2)按下“一次”按钮
,只擦除包含第一次单击点颜色的图像。如下图所示:

3)按下“背景色板”按钮
,只擦除包含背景色的图像。如下图所示:
注意:图像右下角是前景色与背景色图标。
3. 限制
:定义擦除时的限制模式。
选择“不连续”:可以擦除出现在光标下任何位置的样式颜色。
选择“连续”:只擦除包含样式颜色并且互相连接的区域。
选择“查找边缘”:可以擦除包含样式颜色的连接区域,同时更好地保留形状边缘的锐化程度。
4. 容差
:设置颜色的容差范围。该数值越小,则擦除与样本颜色非常相似的颜色就越少;该数值越大,则所擦除的相邻颜色就越多。
5. 保护前景色:选择此项,可以防止擦除与前景色相匹配的区域。
注:更多精彩教程请关注山村photoshop教程栏目,山村PS群:311270890欢迎你的加入


