
平时我们在抠图时都会碰到比较难扣得地方,如头发发丝,这就要用到专业的抠图工具了,那么那种抠图工具比较快捷又抠图效果好呢?这里我推荐大家用抽出滤镜,简单又快捷。废话不多说了,下面给大家分享一下怎么用抽出滤镜抠图。

1
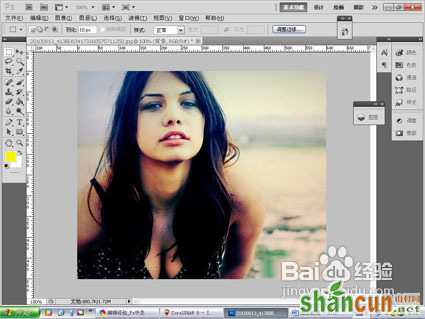
运行PS,执行“文件--打开”命令打开一张你要抠出的图
2
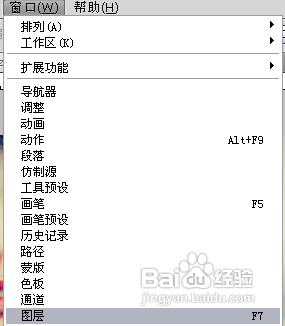
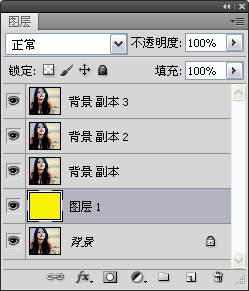
执行“窗口—图层”命令,调出图层面板
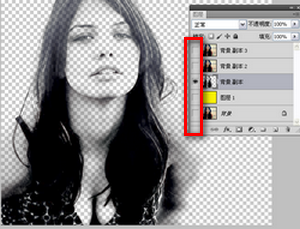
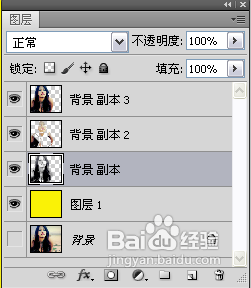
3
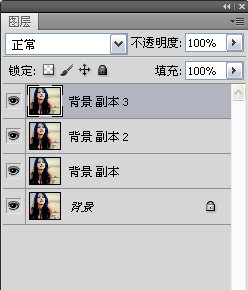
按住ctrl+J复制三个图层,背景副本,背景副本1,背景副本2;
4
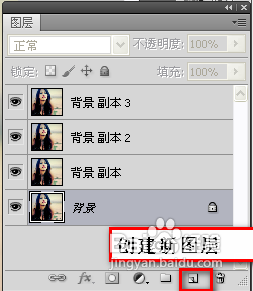
点击图层面板下面的“创建新图层”按钮,在背景和背景副本层新建一图层,填上纯色(与图片发差大的颜色),做一下衬托作用
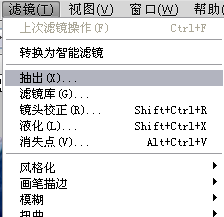
5
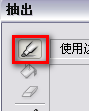
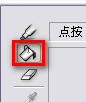
选择第一个图层副本1,然后选择"滤镜"-"抽出"(ctrl+alt+x)菜单命令,打开抽出对话框

6
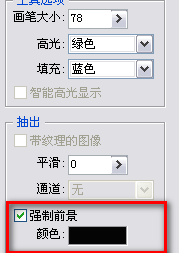
扣取人物身上深色 :
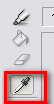
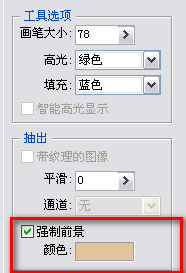
7
在抽出对话框中点击左上角"边缘高光器工具",勾选强制前景色复选框,在颜色框后选择黑色,抠出图片中的黑色
8
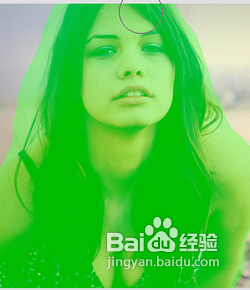
用边缘高光器工具在人物身上拖曳绘制出人物主体,点击确定按钮
9
回到主页面将其他图层前的眼睛都去掉,只留当前图层的眼睛,即可看到效果
10
扣取人物肩膀和脸部肤色:
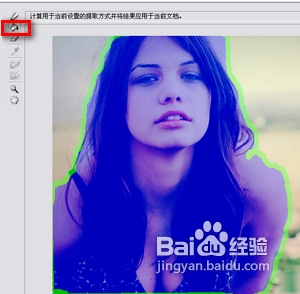
去掉背景副本前的眼睛,点亮背景副本2前的眼睛,选择"滤镜"-"抽出(ctrl+alt+x)菜单命令,打开抽出对话框
点击左上角"边缘高光器工具",勾选强制前景色复选框,用吸管工具在人物肩膀位置吸取一下颜色抠出人物肩膀,点击确定
扣取人物主体:
去掉背景副本2前的眼睛,点亮背景副本3前的眼睛,选择"滤镜"-"抽出(ctrl+alt+x)菜单命令,打开抽出对话框

点击左上角"边缘高光器工具",调整画笔大小为10,在人物外边缘描绘出人物轮廓

点击“填充工具”在绿色框内填上颜色,这里是紫色,此区域内为保留颜色
点击预览按钮看一下效果,多出的区域回到主界面用橡皮擦擦掉即可,点击确定按钮回到主界面
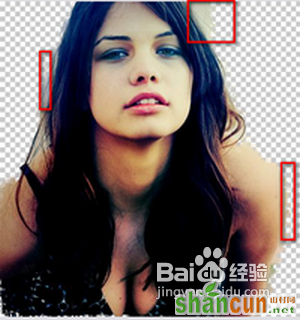
擦完之后效果
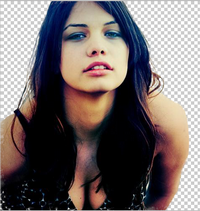
去掉背景层眼睛,其他图层眼睛保留
最后效果


