
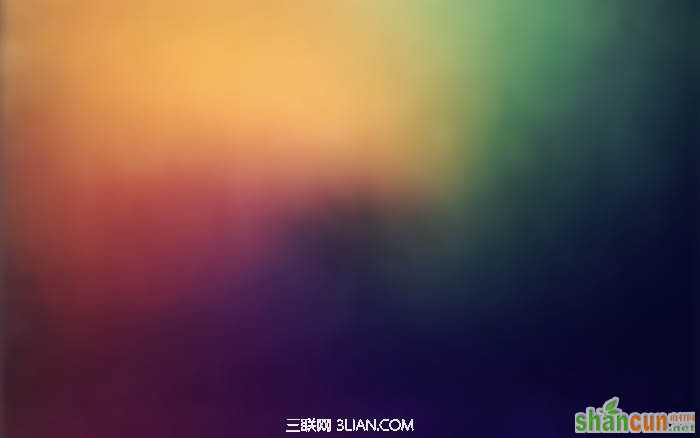
最终效果

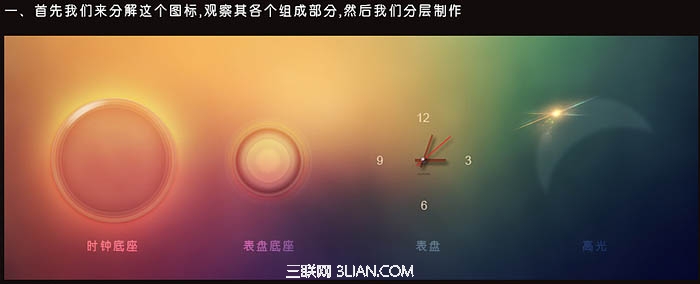
1、首先我们来分解这个图标,观察其各个组成部分,然后我们分层制作。
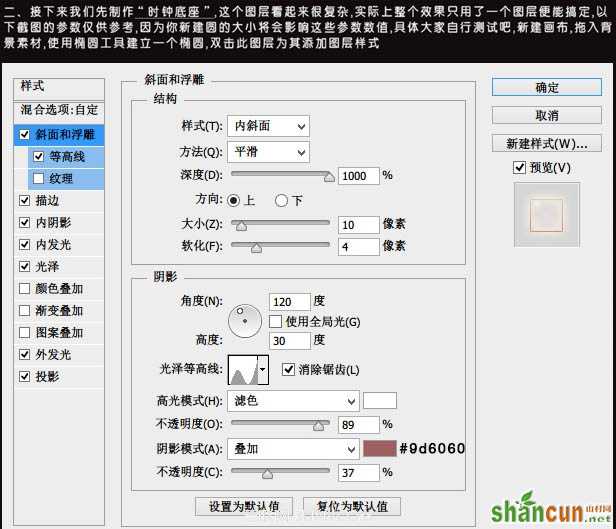
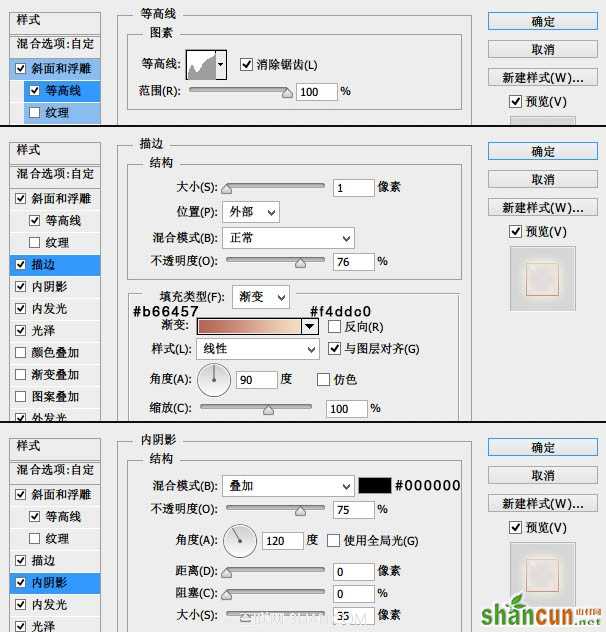
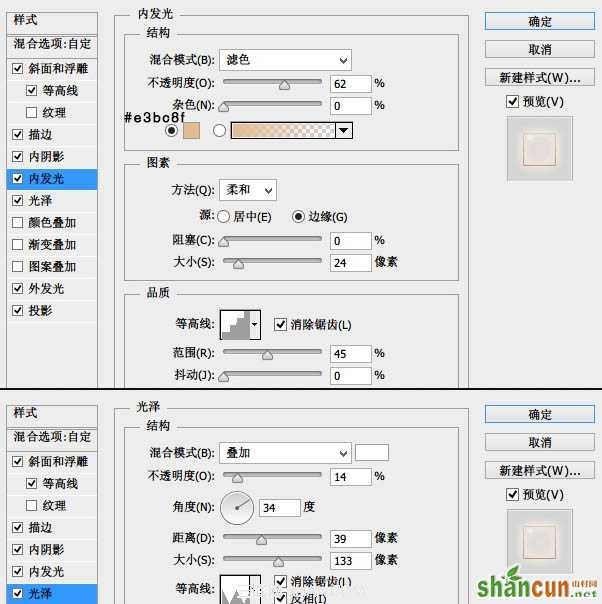
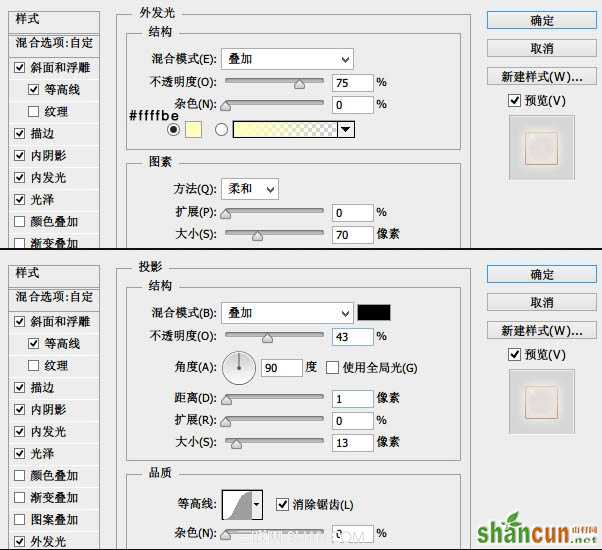
2、接下来我们先制作“时钟底座”,这个图层看起来很复杂,实际上整个效果只用一个图层便能完成。以下截图的参数仅供参考,因为你新建圆的大小将会影响这些参数数值,具体大家自行测试吧。
新建画布,拖入背景素材,使用椭圆工具建立一个椭圆,双击此图层为其添加图层样式。
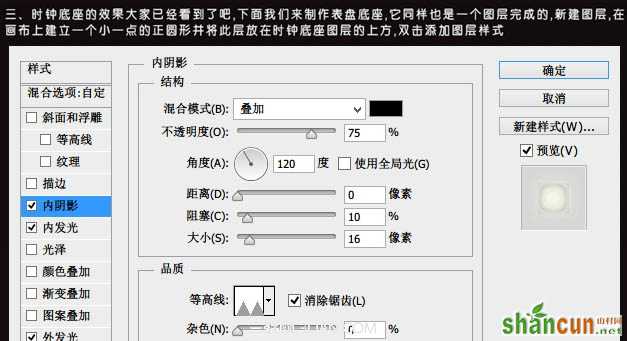
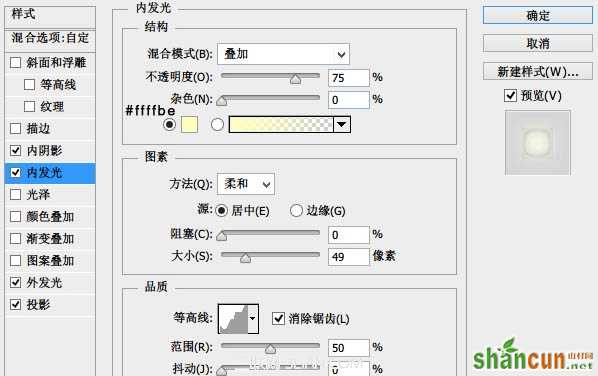
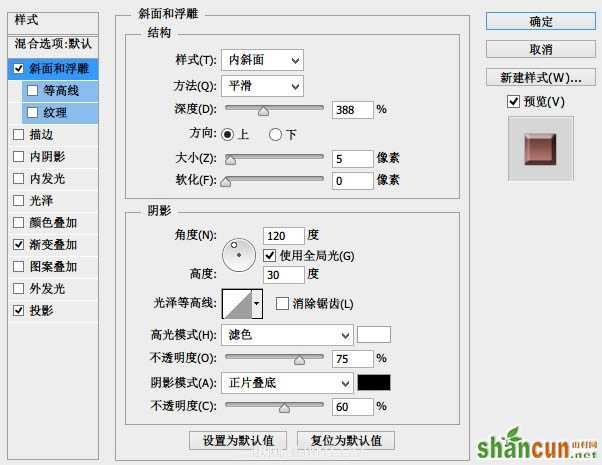
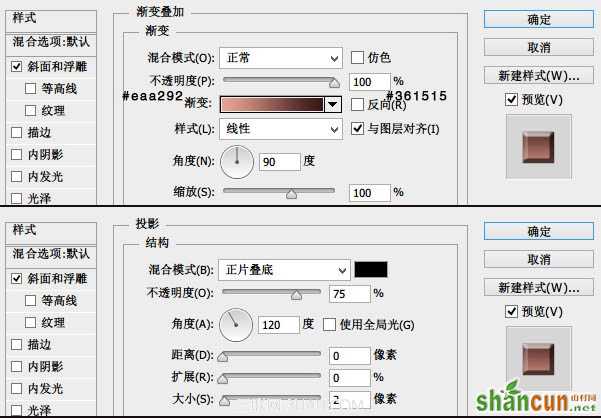
3、时钟底座的效果大家已经看到了,下面我们来制作表盘底座,它同样也是一个图层完成的。新建图层,在画布上建立一个小一点的正圆行,并将此层放在时钟底座图层的上方,双击添加图层样式。

4、表盘的制作:这一步像表盘的数字、时针、分针、秒针这些制作起来很容易。时针的颜色数值为#724042,图层模式为“叠加”,秒针的颜色数值为:#162020。特别注意的是这三个针的阴影方向,光源在左上角。在这里我只贴出金属帽的图层样式,以供大家参考。

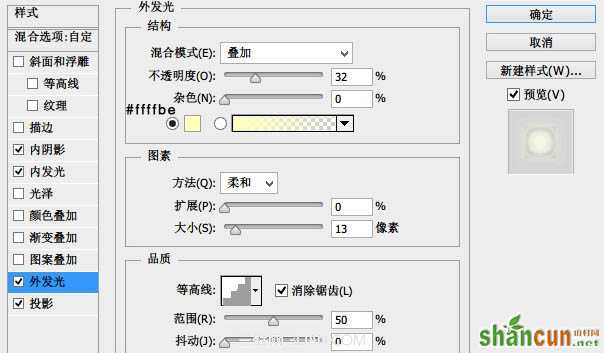
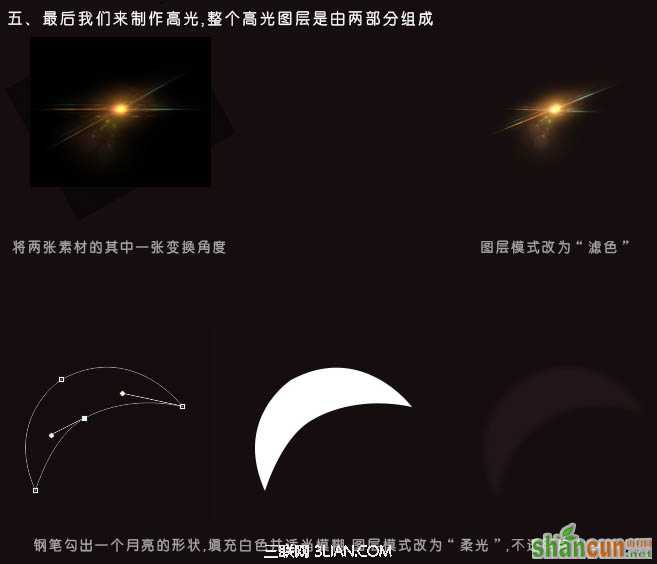
5、最后我们来制作高光,整个高光图层是由两部分组成。
6、剩下的就是在图片下加点文字,然后合并图层稍微锐化一下就大功告成了。
注:更多精彩教程请关注山村photoshop教程栏目,山村PS群:311270890欢迎你的加入


