
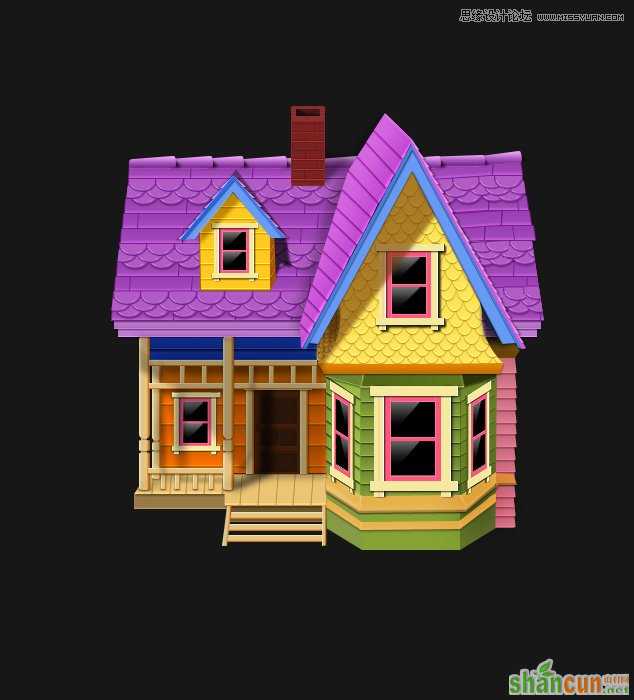
最终效果
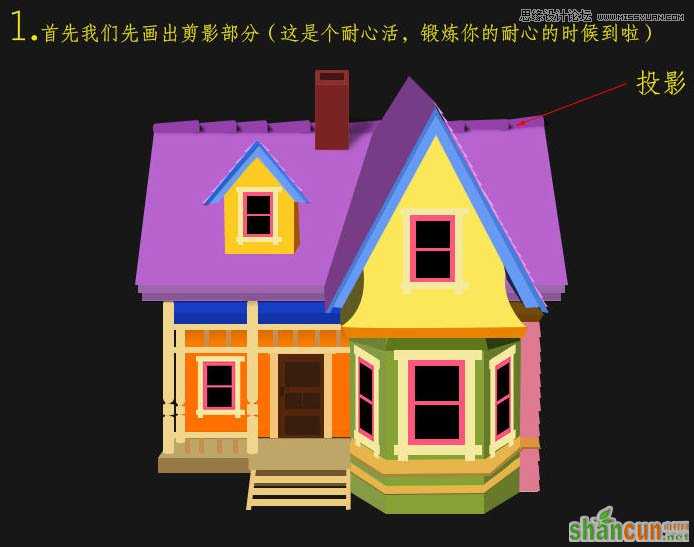
1、首先我们先画出剪影部分,这是个耐心活。
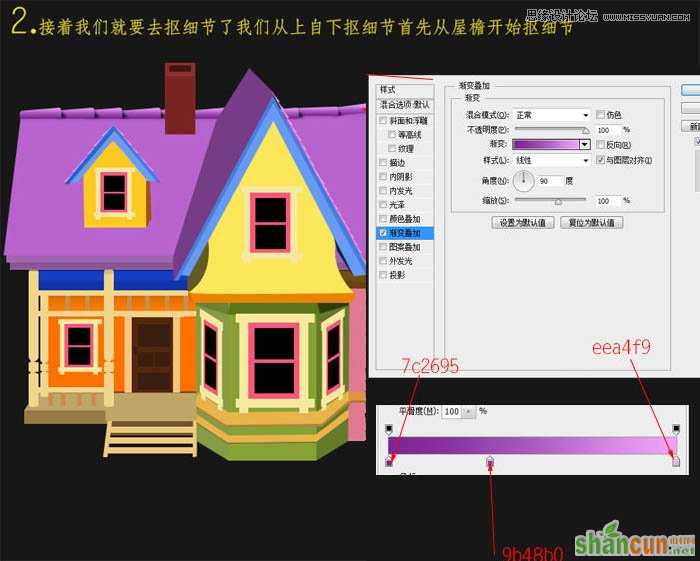
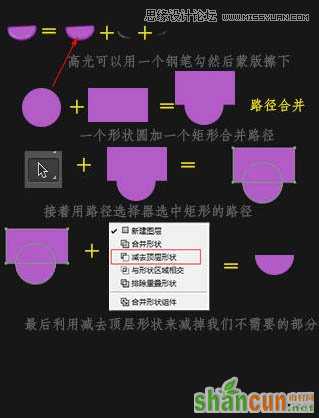
2、接着我们就要去抠细节了,从上自下抠细节。首先从屋檐开始抠细节。
3、然后把烟囱加上砖头,给烟囱加个投影。

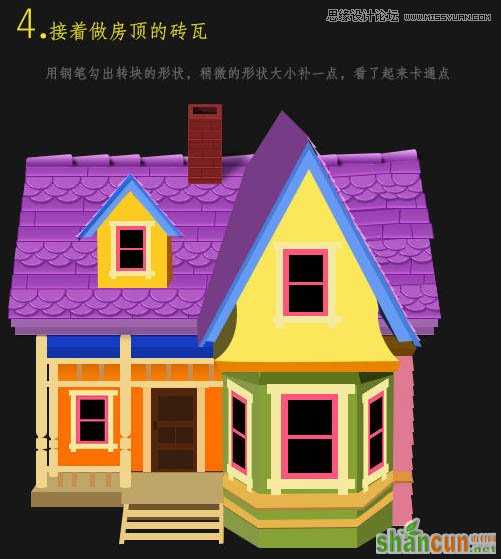
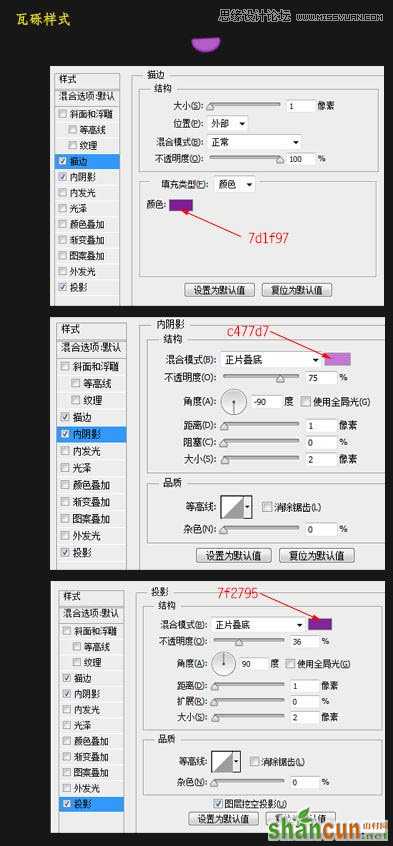
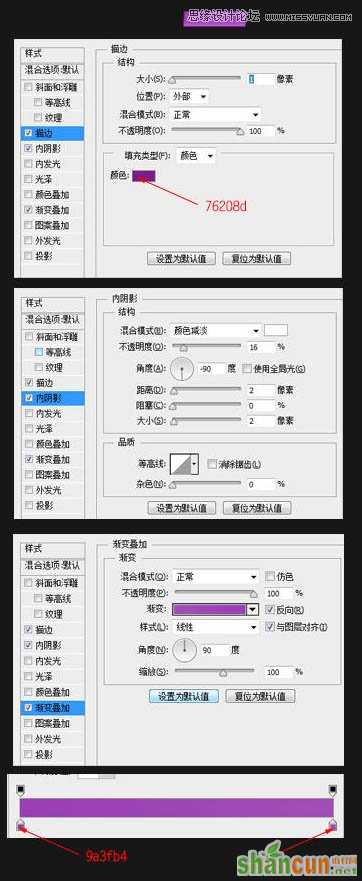
4、做房顶的砖瓦。
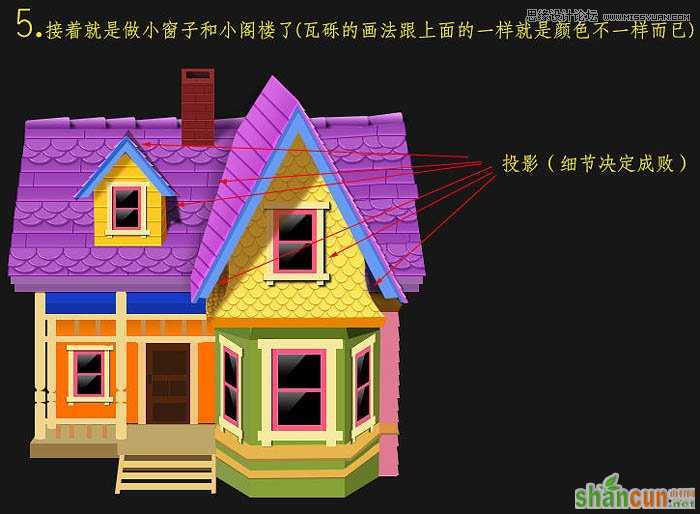
5、接着就是做小窗子和小阁楼了。
6、做房屋走廊上面的顶棚和木板。

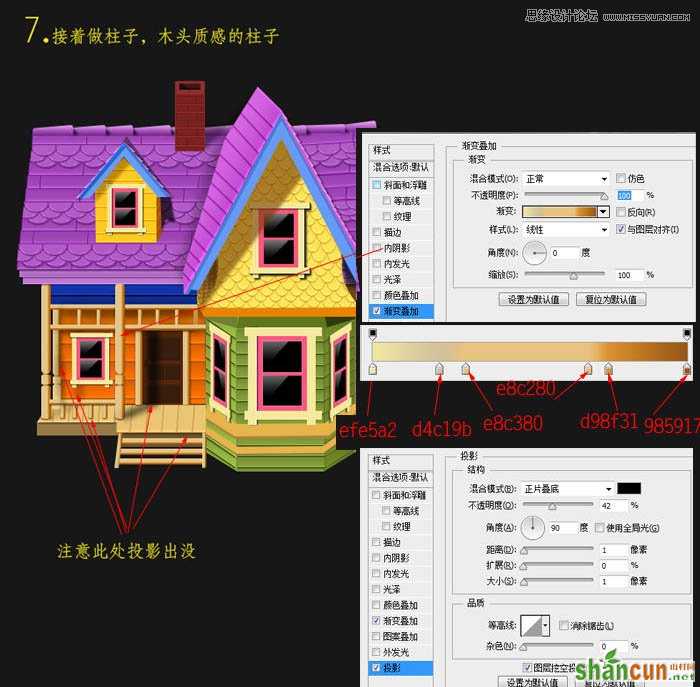
7、做柱子,木头质感的柱子。
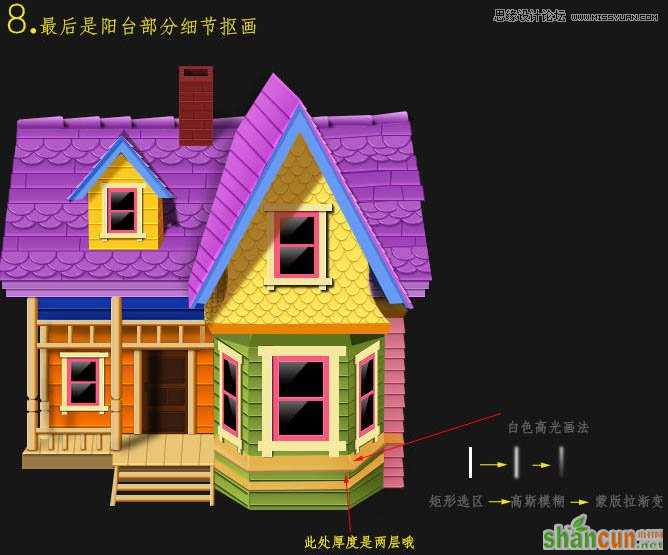
8、最后是阳台部分细节抠画。
最终效果:
最终效果
1、首先我们先画出剪影部分,这是个耐心活。
2、接着我们就要去抠细节了,从上自下抠细节。首先从屋檐开始抠细节。
3、然后把烟囱加上砖头,给烟囱加个投影。
4、做房顶的砖瓦。
5、接着就是做小窗子和小阁楼了。
6、做房屋走廊上面的顶棚和木板。
7、做柱子,木头质感的柱子。
8、最后是阳台部分细节抠画。
最终效果:

手机看新闻


网站客服
法定工作日
8:30-17:30
微信扫描关注


