
教程重点介绍文字部分的制作,过程:先输入想要的文字,简单给文字排版并变形处理,然后用复制的方法给文字加上立体效果,后期再给文字加上纹理,描边等装饰即可。
最终效果

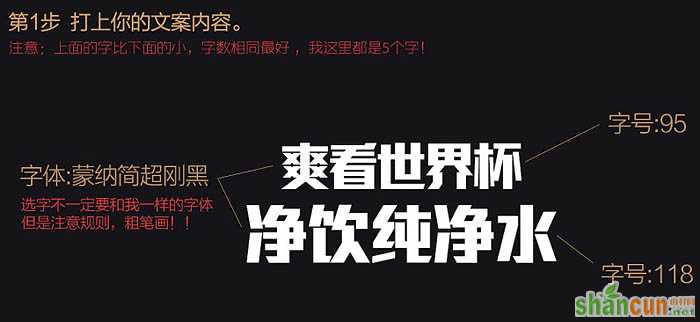
1、打上你的文案内容。
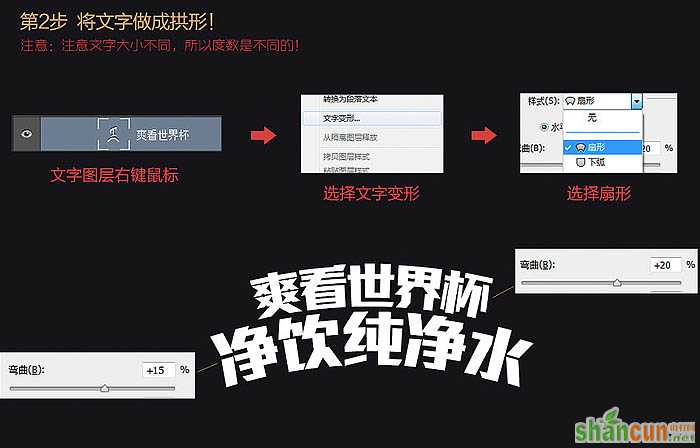
2、将文字做成拱形。主要文字大小不同,所以度数是不同的。
3、做成立体效果。立体字的做法是Alt + 方向键复制,这里就不细讲了。
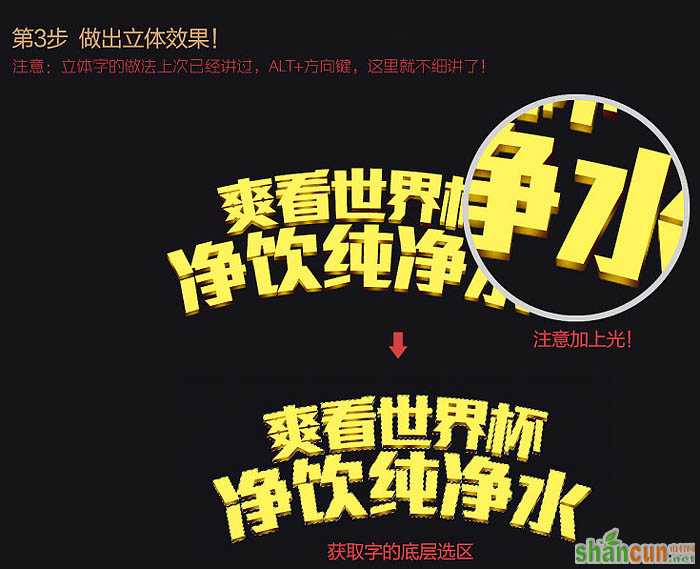
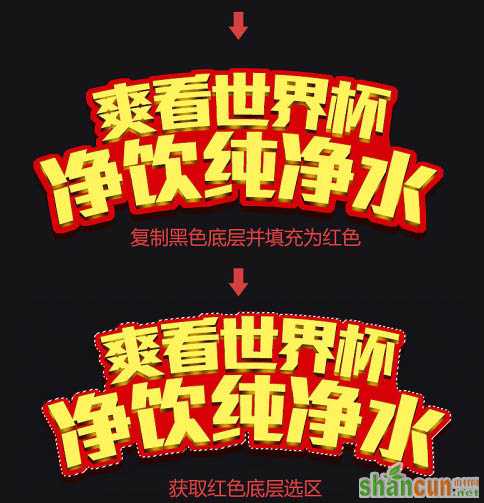
获取字的图层选区,然后扩展8个像素做出黑色底层和暗红色底层厚度。
复制黑色底层并填充红色,获取红色底层的选区。
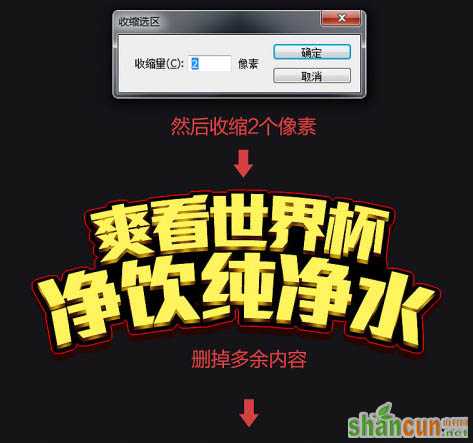
收缩2个像素,删除多余内容。
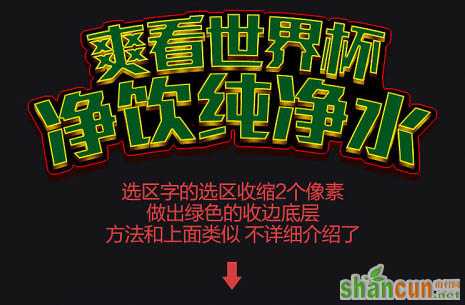
选区字的选区收缩2个像素,做出绿色的收边底层,方法和上面类似,不详细介绍了。
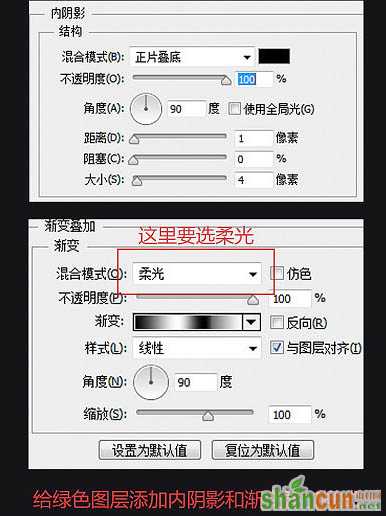
给绿色图层添加内阴影和渐变叠加样式。
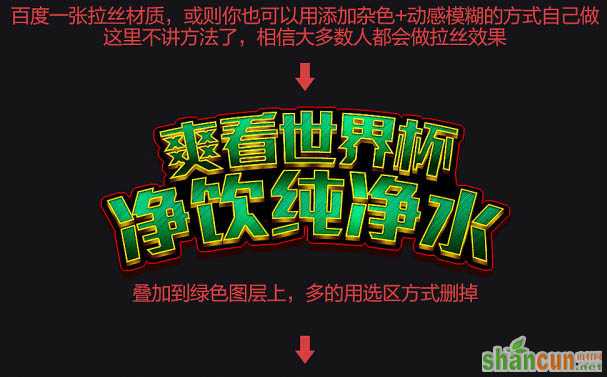
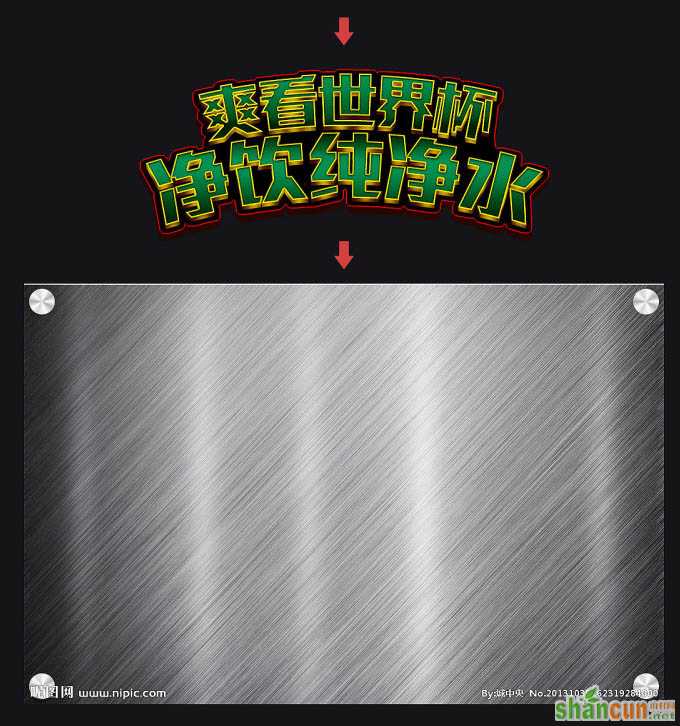
找一张拉丝材质,或者你也可以用添加杂色 + 动感模糊的方法自己做。叠加到绿色图层上,多的用选区方式删掉。
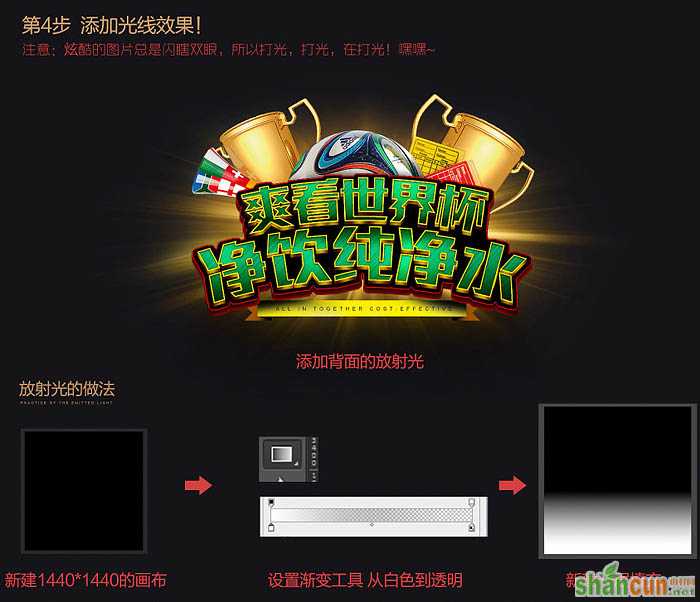
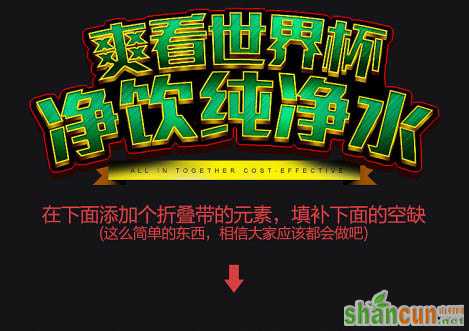
在下面添加个折叠带的元素,填补下面的空缺。
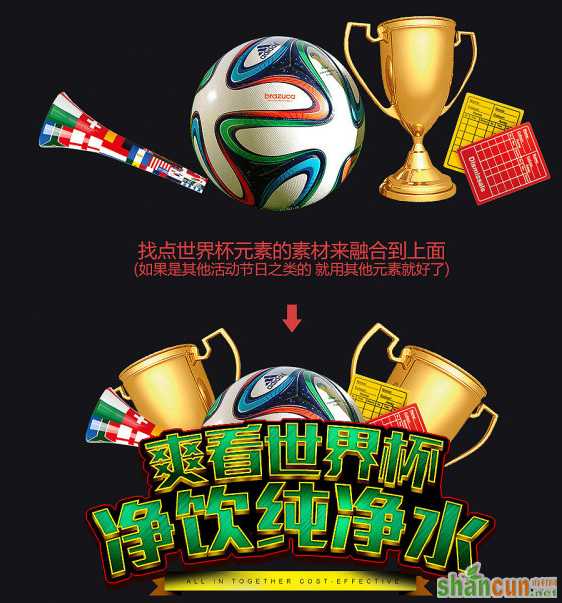
找点世界杯元素的素材来融合到上面。
添加细节的光影变化、反光,阴影等。

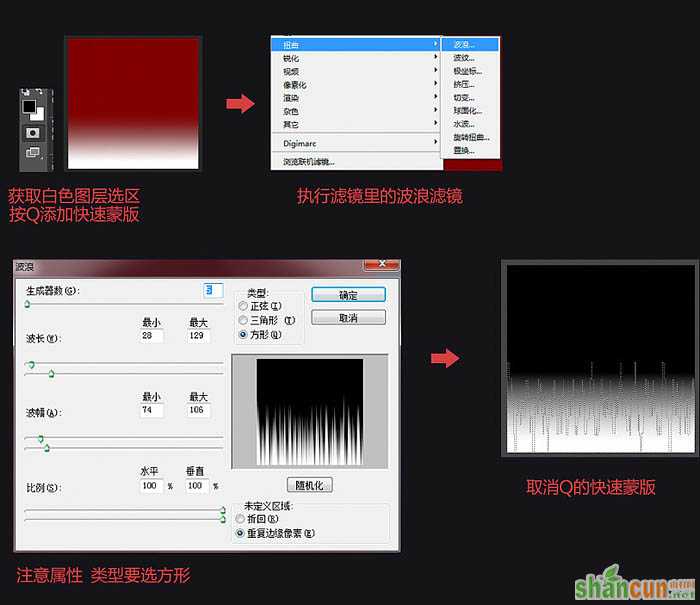
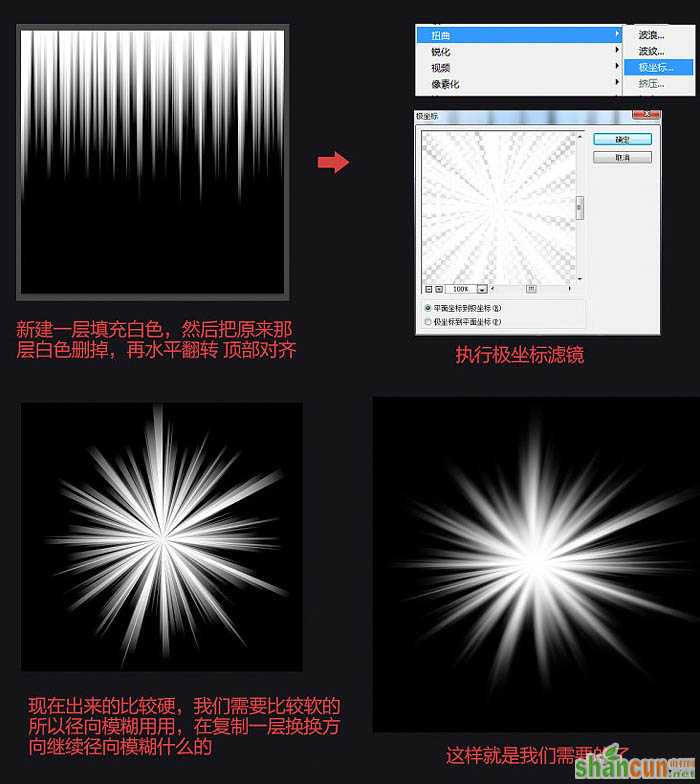
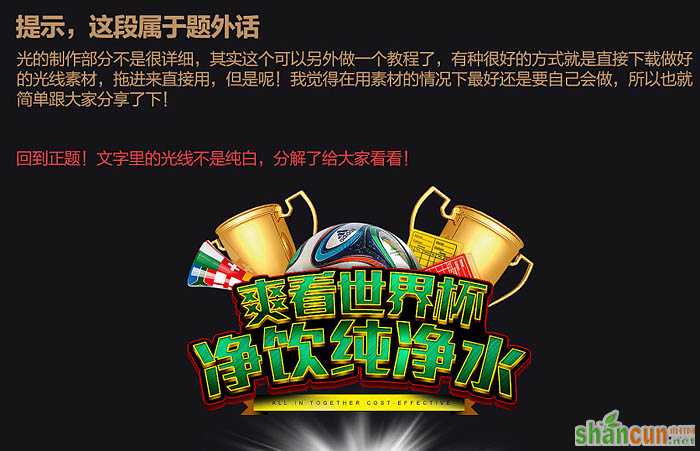
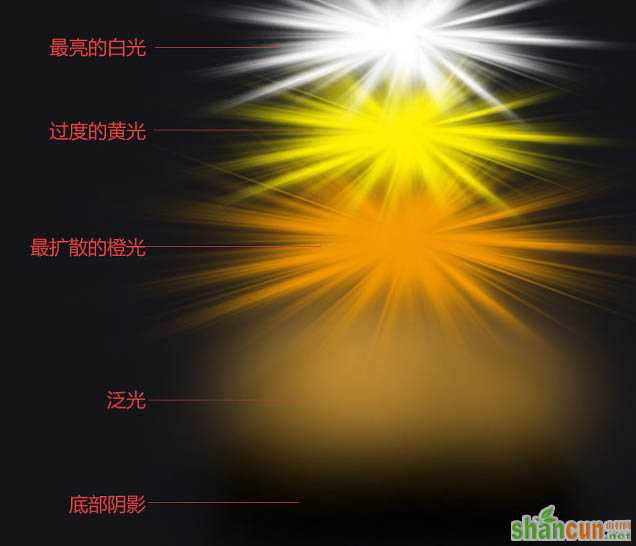
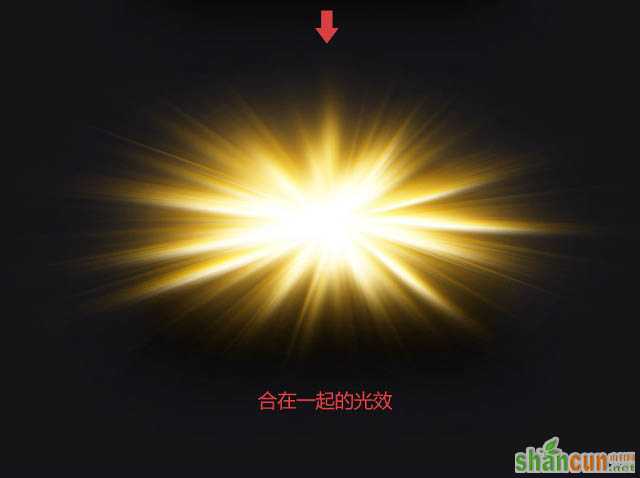
4、添加光线效果。
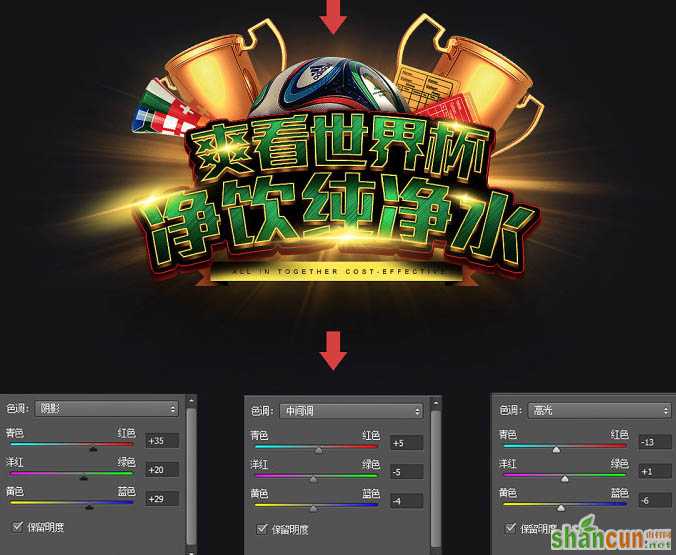
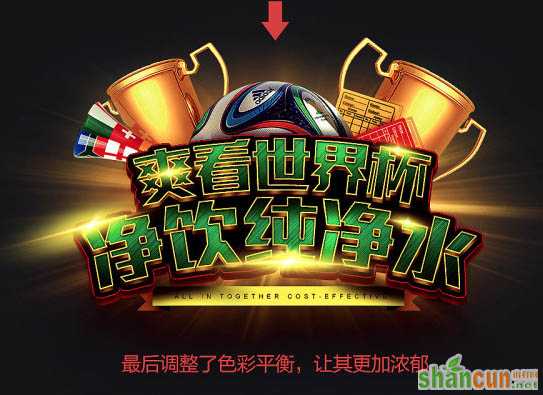
5、后期处理,调整。

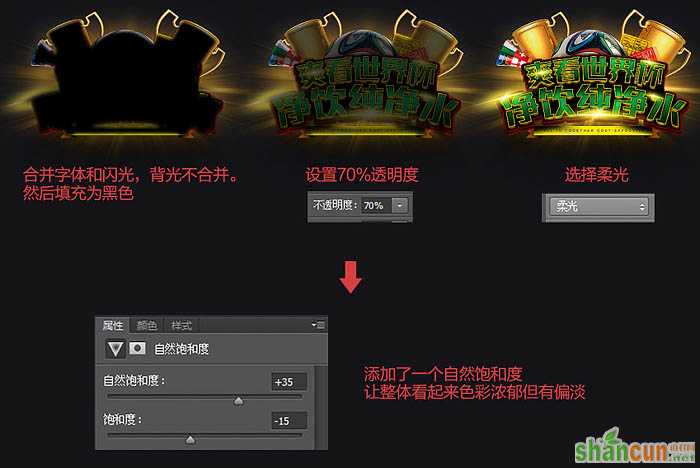
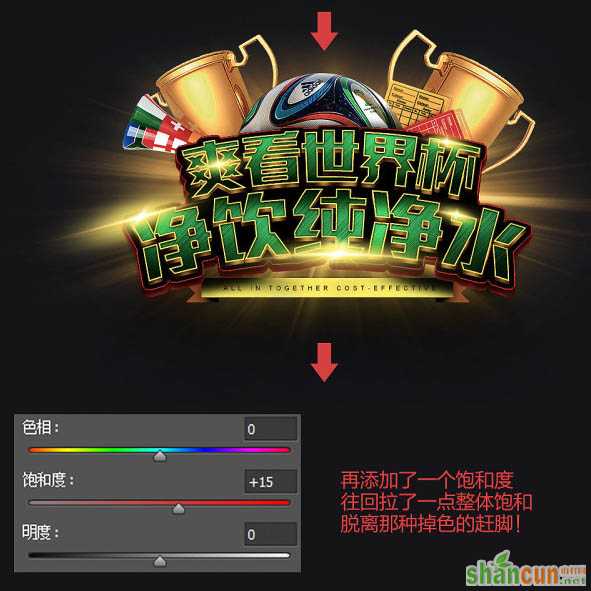
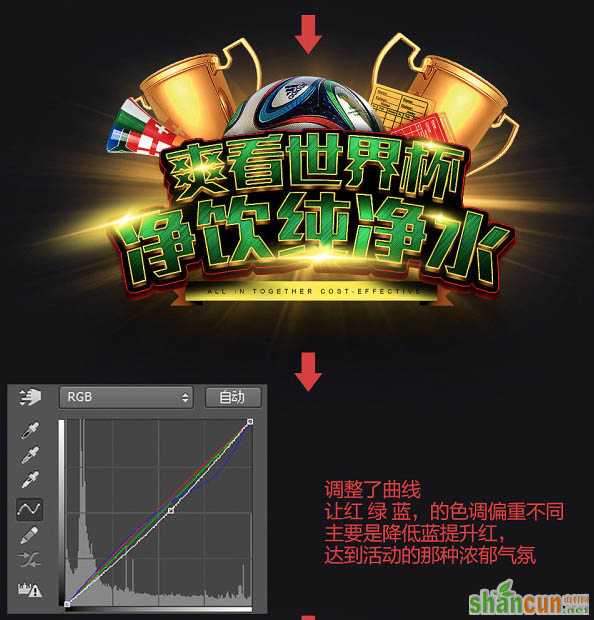
最后调整了色彩平衡,让其更加浓郁。
最终效果:


