
应用软件: Photoshop – CS6
今天给“小伙伴”们带来一个酷炫的《UI设计小教程》,让我们一起来打造一枚流光质感界面吧~。
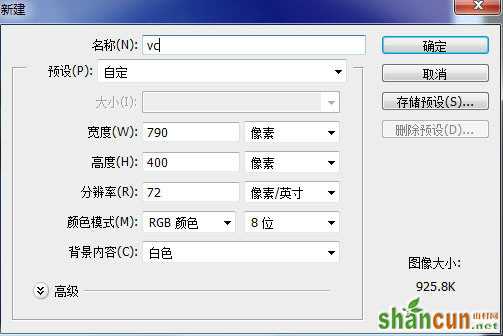
1.创建画布
新建一张790*400的画布(不要忘记文件命名哈~)
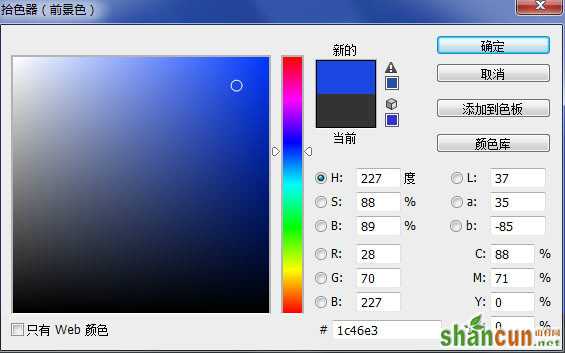
2.制作背景
Alt+Delete 填充背景色为 #1c46e3,并为其添加渐变叠加图层样式 (如下图所示)


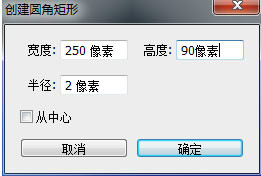
3.创建界面底托
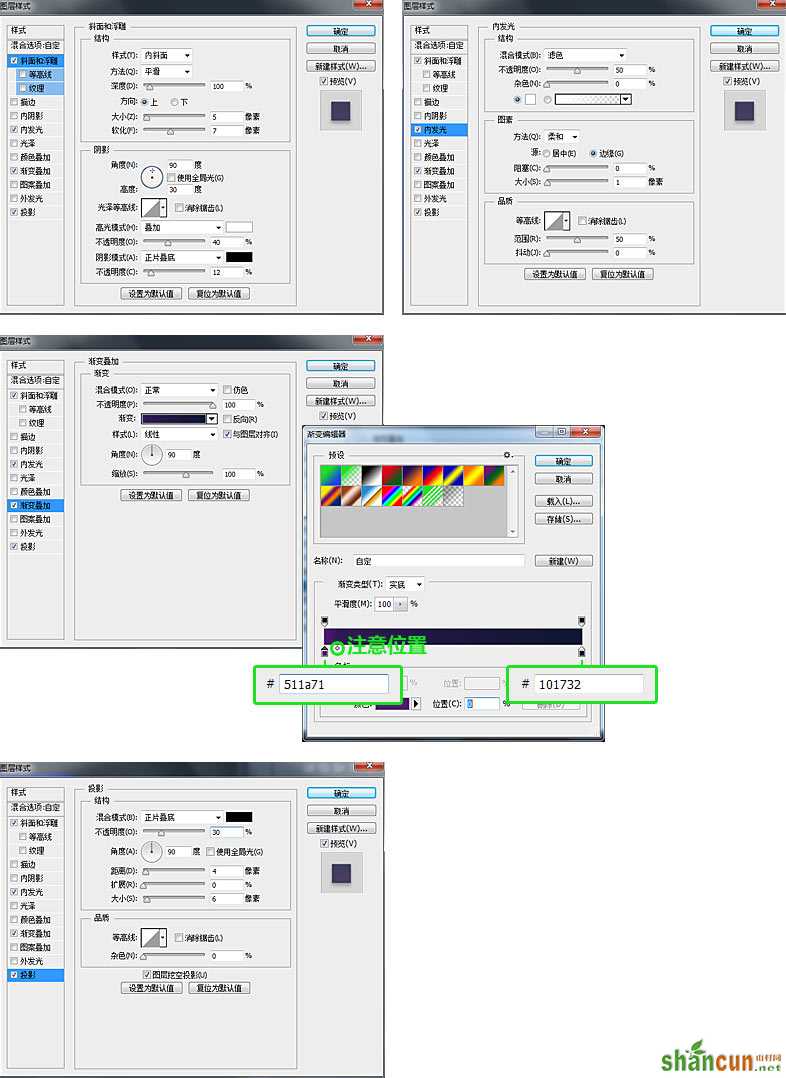
选择圆角矩形工具,创建 250*90圆角半径2像素 的白色圆角矩形,并为其添加 图层样式 (如下图所示)
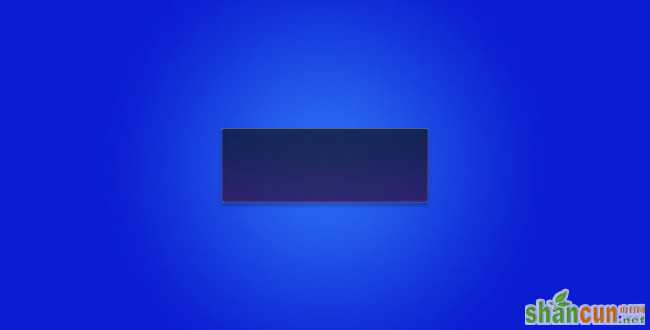
到此为止的效果如下图~(亲,你有跟上节奏吗)
4.为底托添加效果
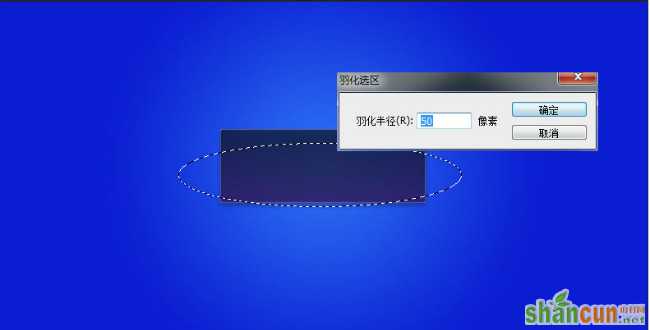
新建图层,选择椭圆选区工具画一个如下图的选区,并进行羽化(50px) ,Alt+Delete填充黑色 (如下图所示)
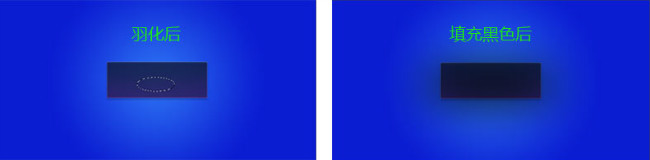
将绘制好的“黑色羽化图形” Ctrl+T 变得扁一些 (如下图所示)

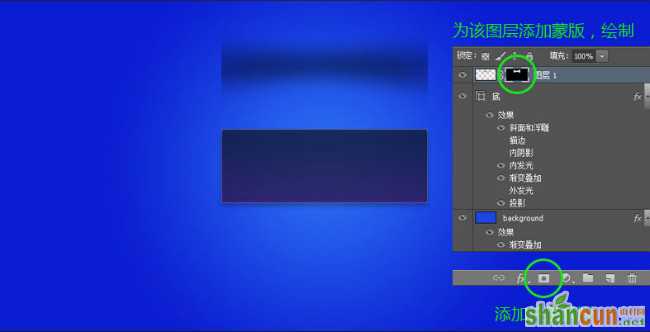
为该图层添加蒙版结合画笔和选区工具制作 (如下图所示)
调整为柔光模式 (如下图所示)
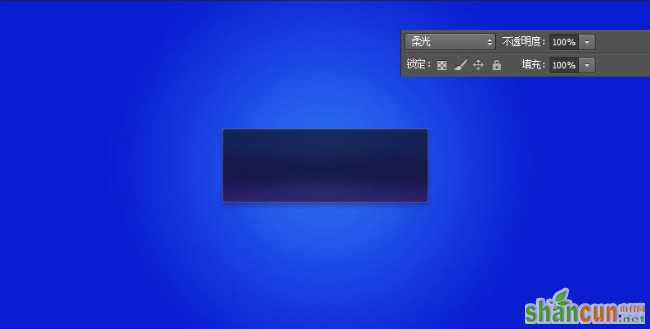
5.制作彩色Loading条
矩形工具绘制288*2的矩形,并为其添加 渐变叠加图层样式 ,在其下绘制1PX黑色直线 (如下图所示)

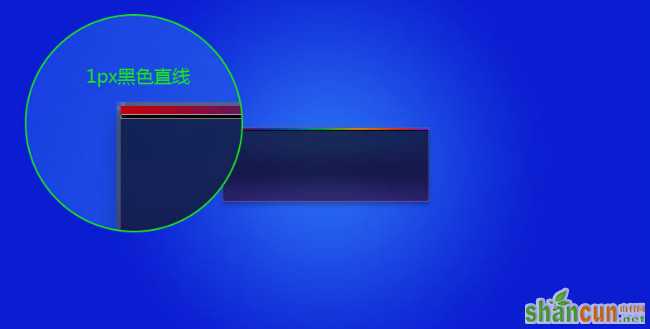
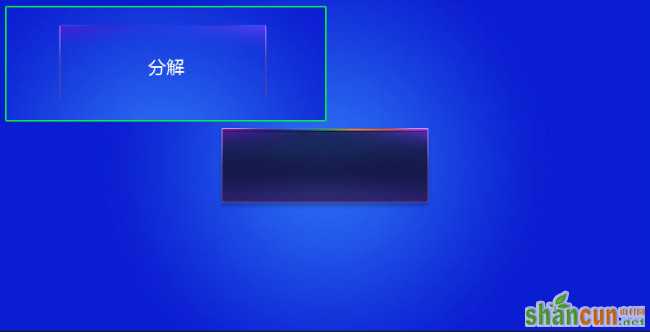
6.现在给整个界面增加细节
这一步主要是通过直线工具和选取工具对界面进行细化 (如下图所示)
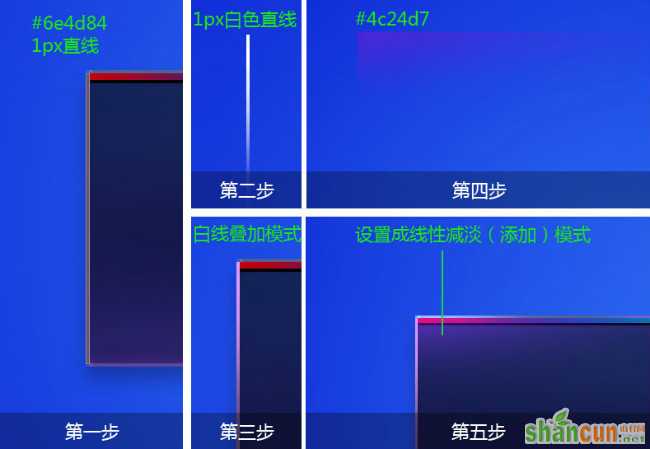
大家可以按照上述方法绘制其余的细节(效果如下图)
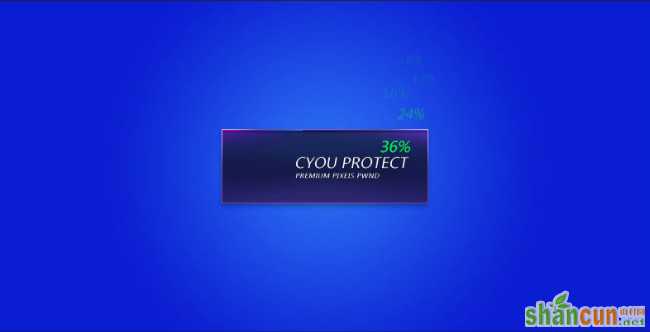
7.为界面添加文字,并将loading修改到36%状态
加入文案,为其添加1px修饰效果,将彩色loading添加图层蒙版,做成36%状态 (如下图所示)
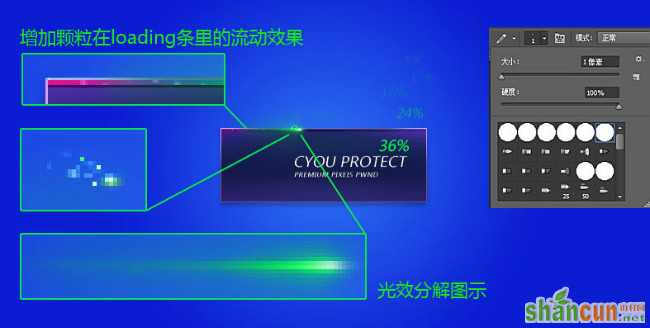
8.为Loading添加加载时的预期动画效果
这里主要是灵活运用选区工具,画笔工具,铅笔工具(铅笔工具作用于绘制1px点)进行仿光效绘制 (如下图所示)
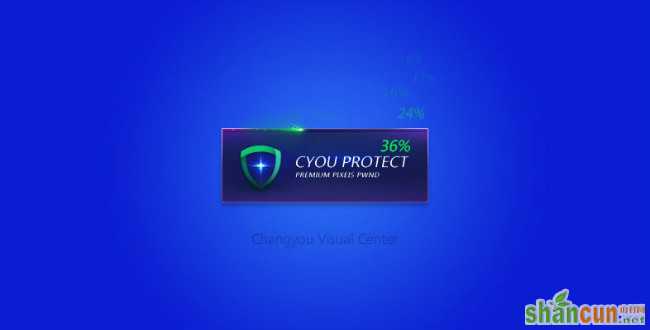
9.放上自己心爱的小icon,做适当修饰~
因为整个界面风格是简约风,所以在选择icon的时候也要选用风格相对一致的哟~ (如下图所示)

10.最后为icon和文字添加光效修饰,再加入属于你自己的印记,大功告成~
光效运用了这里的素材-http://www.zcool.com.cn/gfx/ZMzA1Njgw.html (如下图所示)
/ 小结 /
小伙伴本有木有在观看的过程中发现什么?
……
>没错!
就是那些12px的细节绘制啦!
在你具备了一些初级设计能力之后,细节的处理就成为了,你进阶的重中之重啦!
所以大家一定要记得培养“细节的处理能力”哈!
注:更多精彩教程请关注山村photoshop教程栏目,山村PS群:339853166欢迎你的加入


