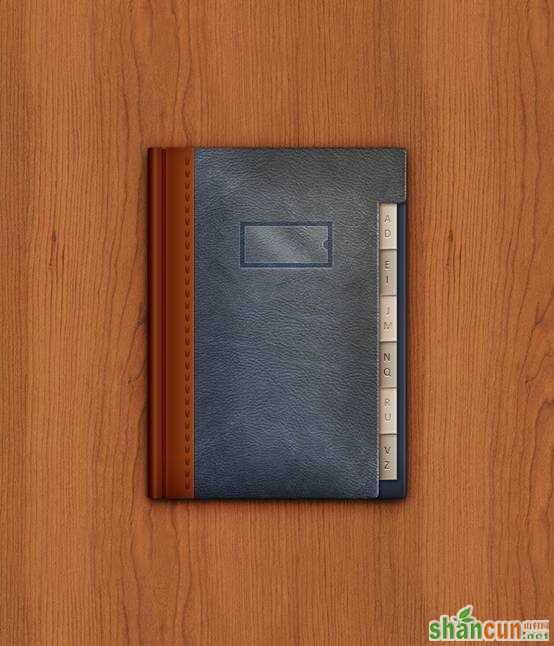
@葶蓂溪畔的幽灵公主 :在这个教程中,我将给大家展示如何用PS打造一个精致的牛皮质感通讯簿图标。教程主要用到三项技巧:首先,充分利用网格和对齐到网格;其次,创建矢量形状,充分利用图层的混合选项;最后,用简单的混合技巧和特效来添加细致的阴影和高光。让我们开始吧!
本次教程需要以下素材。开始之前可以先下载,当然也可以用其他素材代替。
木纹背景
皮质图案
一、新建文件,显示网格
打开PS,Command/Ctrl-N新建一个文件。按照下图设置参数,单击确定。显示网格(视图>显示>网格),然后对齐到网格(视图>对齐到>网格)。刚开始,你需要一个10px的网格,选择编辑>首选项>参考线,网格和切片,设置网格线间隔为10px,子网格为1,网格颜色为#a7a7a7。注:可以用Command/Ctrl-’ 快捷键来显示或隐藏网格。你也可以打开信息面板(窗口>信息)来查看你绘制的形状的大小和位置。

二、创建封面和封底
步骤 1
将前景色设为#aecef5。选择圆角矩形工具,选择形状图层模式,把 半径设为5px。创建一个 240 x 380px 的圆角矩形,使用对齐到网格可以简化工作。

步骤 2
选择矩形工具。按住Alt 键,创建一个40 x 330px的矩形,如下图。

步骤 3
选择圆角矩形工具,按住Shift 键,创建一个50 x 20px 的圆角矩形,如下图。

步骤 4
选择圆角矩形工具,按住Shift 键,创建一个20 x 340px 的圆角矩形,如下图。

步骤 5
选择矩形工具,按住Alt 键,创建一个 10 x 380px的矩形,如下图。

步骤 6
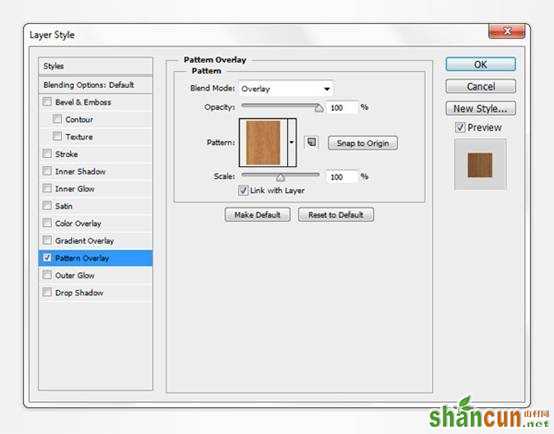
双击矢量形状图层,打开混合选项面板,为矢量形状图层添加斜面和浮雕,等高线,内阴影,光泽, 渐变叠加和图案叠加,具体参数如下图。注意将素材中的皮质图案添加到图案叠加中。


步骤 7
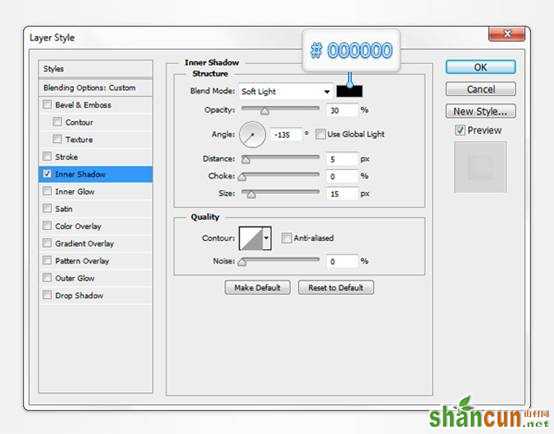
选择你所绘制的矢量形状图层, Command/Ctrl-J 复制图层,单击右键,清除图层样式,把复制图层的填充调整为0% ,打开混合选项窗口。添加内阴影,参数如下。


步骤 8
把前景色设为#384445,选择圆角矩形工具,创建一个40 x 380px 的矢量形状,并按如下位置摆放。选中该形状,将其移动到其他矢量形状图层下方 (Command/Ctrl-Shift-[) ,为该图层添加描边和内阴影,参数如下。


三、创建标签
步骤 1
将前景色设为#c7baac,选择矩形工具,创建一个 20 x50px的矢量形状,位置如下,设置混合选项如下。


步骤 2
将前景色设为#dbcec0,选择矩形工具, 创建一个20 x 50px 的矢量形状,位置如下。设置混合选项如下。


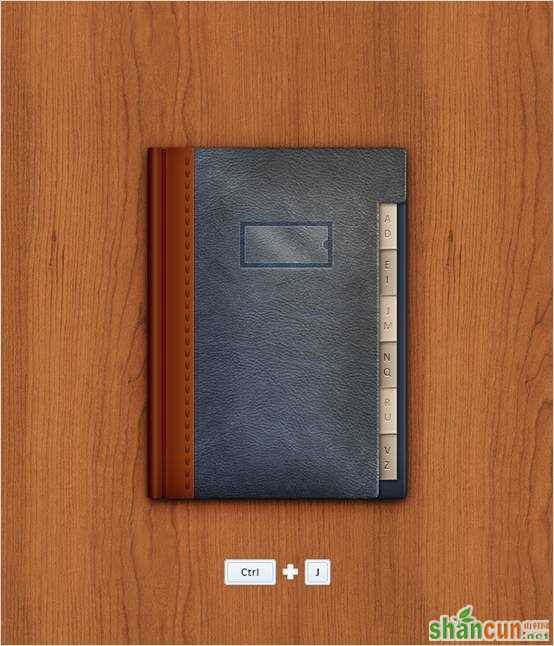
步骤 3
复制这两个标签,(Command/Ctrl-J),如下放置复制的图层。

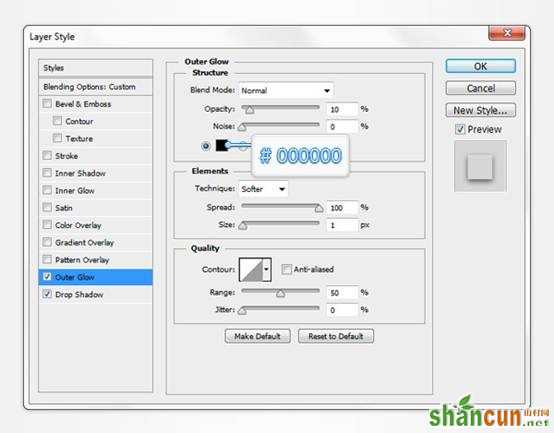
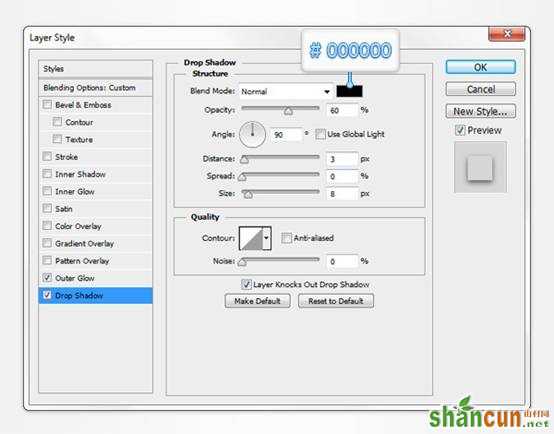
步骤 4
隐藏网格(视图>显示>网格)。选择文字工具(T),在标签上添加一些字母。选择Calibri 字体,大小为12pt,颜色黑色(#000000)。将文字图层的混合模式调整为叠加。为图层添加外阴影,具体参数如下。选择所有标签图层和文字图层,编成一组(Command/Ctrl-G)。将组文件夹移动到封面和封底图层下。


步骤 5
显示网格(视图>显示>网格)。将前景色设为#384445,选择圆角矩形工具,创建一个40 x 380px的矢量形状,如下图。 在图层面板中,按住Command/Ctrl 键,单击封面图层,得到一个选区,保持选区, 选择刚刚绘制的40 x 380px的矢量形状图层,按住Alt 键,单击添加图层蒙版按钮。效果如下。完成后, Command/Ctrl-D 取消选区。

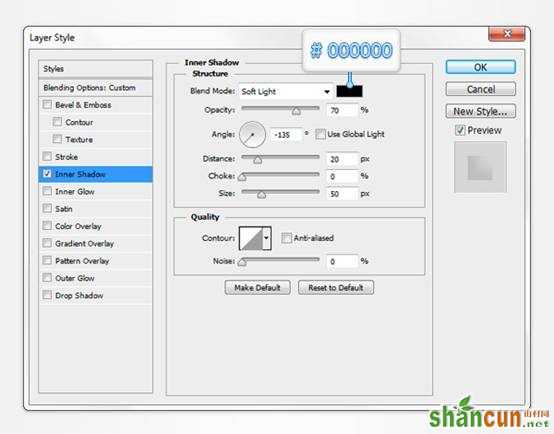
步骤 6
将上一步绘制的图层填充调整为0%,添加内阴影,参数如下。


四、创建连接部和书脊
步骤 1
用矩形工具,创建一个30 x 380px 的矢量形状,位置如下。设置图层混合选项如下。


步骤 2
接下来的步骤你需要5px的网格,所以需要重新设置网格大小,编辑>首选项>参考线,网格和切片,设置网格线间隔为5px。选择圆角矩形工具,将半径设为3px。将前景色设为#d11812, 创建一个25 x 380px 的圆角矩形,位置如下。保持红色圆角矩形为选中状态,选择矩形工具,按住 Alt键,创建一个 10 x 380px 的矢量形状,如下图。为红色形状图层添加渐变叠加,参数如下。


步骤 3
接下来的步骤需要1px的网格,编辑>首选项>参考线,网格和切片,设置网格线间隔为1px。将前景色设为#6c1c07,选择矩形工具,创建一个 5 x 376px 的矢量形状,位置如下。

步骤 4
为上一步的图层添加内阴影,参数如下。


步骤 5
将前景色设为#7c2d0c,选择圆角矩形工具,创建一个2 x 7px 的矢量形状,位置如下。

步骤 6
复制上一步绘制的小圆角矩形(Command/Ctrl-J),把复制的图层向下移动13px。重复这项操作,再添加26个小圆角矩形。完成后,选中这些小圆角矩形,在图层面板中单击右键,合并图层。

步骤 7
为上一步合并后的图层设置如下。


五、创建塑料薄片
步骤 1
将网格线间距调整为10px(编辑>首选项>参考线,网格和切片>网格线间隔 )。将前景色设为白色(#ffffff),选择矩形工具, 创建一个100 x 50px的矢量形状,位置如下。将该图层的填充调整为0%,设置图层混合选项如下。


步骤 2
现在将网格线间距调整为5px。(编辑>首选项>参考线,网格和切片>网格线间隔)。选择矩形工具,创建一个90 x 40px 的矢量形状,位置如下。保持该图层选中状态,选择椭圆工具, 按住Alt键, 创建一个10px 的圆,位置如下。将该图层的填充调整为0%,按下图设置图层混合选项。 注意:渐变叠加中,黄色数据表示透明度,白色数据表示位置百分比。


步骤 3
选择椭圆工具,创建一个10px的圆,位置如下。保持选中状态,选择矩形工具,按住Alt 键,创建一个5 x 10px的形状,如下图。 将该图层的填充调整为0%,设置图层混合选项如下。


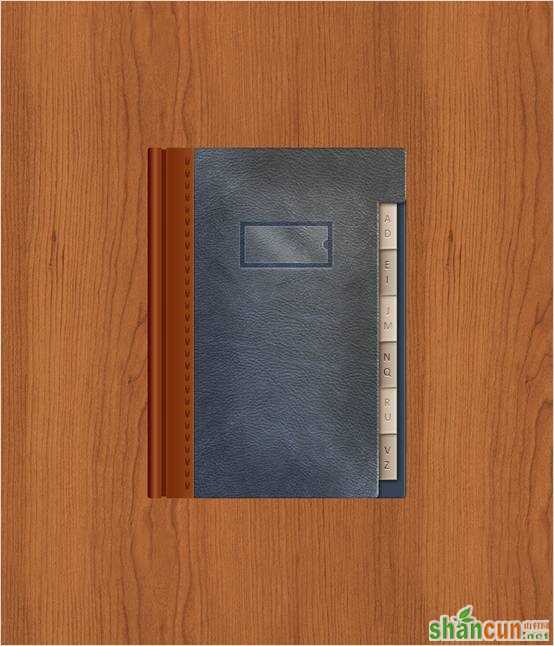
六、添加木纹背景
步骤 1
在图层面板中,选择所有的矢量形状,编成一组。(Command/Ctrl-G)。双击该文件夹,将其命名为通讯簿。按住Alt 键,双击背景图层解锁。将前景色设为#736357,选择油漆桶工具,给背景图层上色,如下图。
步骤 2
为该图层设置如下混合选项。注意:在图案叠加中添加木纹图案。
七、添加阴影和高光
步骤 1
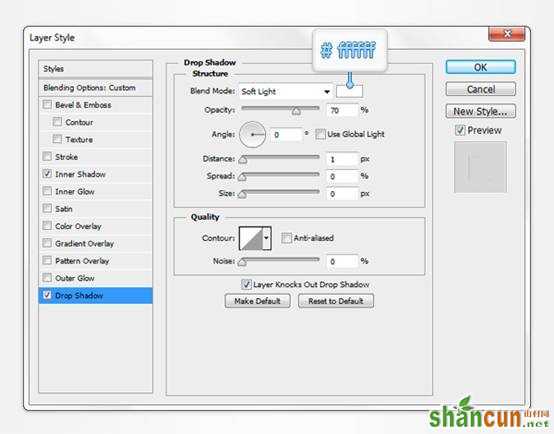
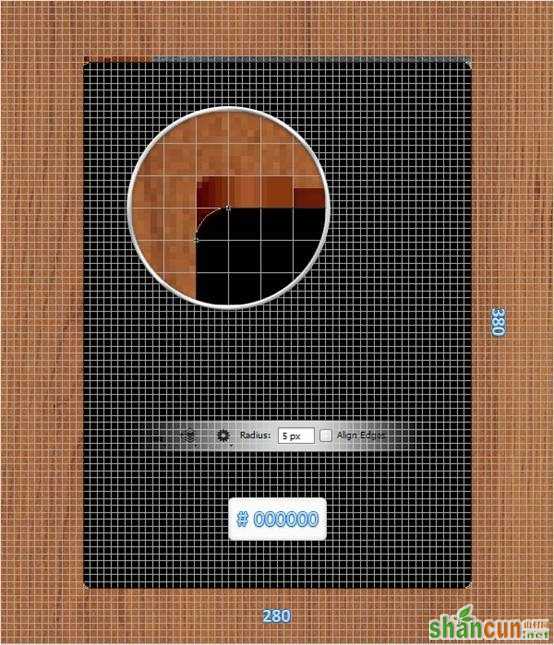
选择圆角矩形工具,将半径设为 5px。将前景色设为黑色 (#000000)创建一个280 x 380px 的圆角矩形,位置如下。
步骤 2
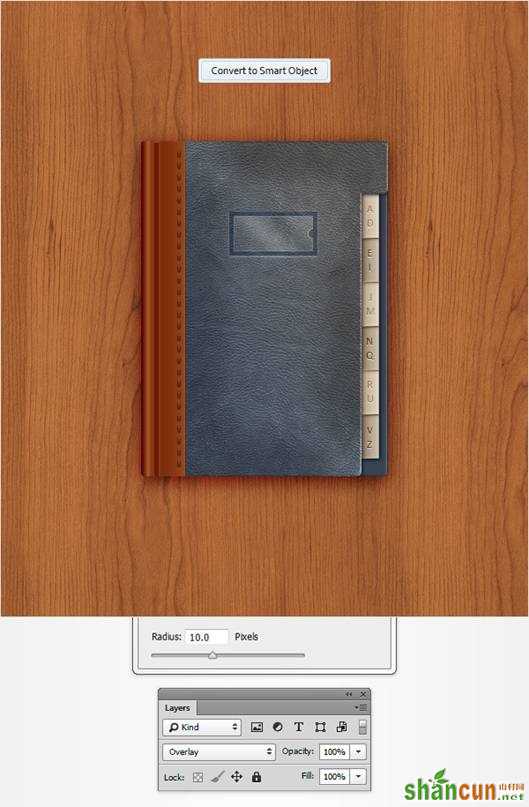
在图层面板中,右键上一步画出的圆角矩形,转化为智能对象。将该图层放置到通讯簿文件夹下方,将混合模式调整为叠加,然后选择 滤镜> 模糊 >高斯模糊,将半径设为 10px,点击确定。
步骤 3
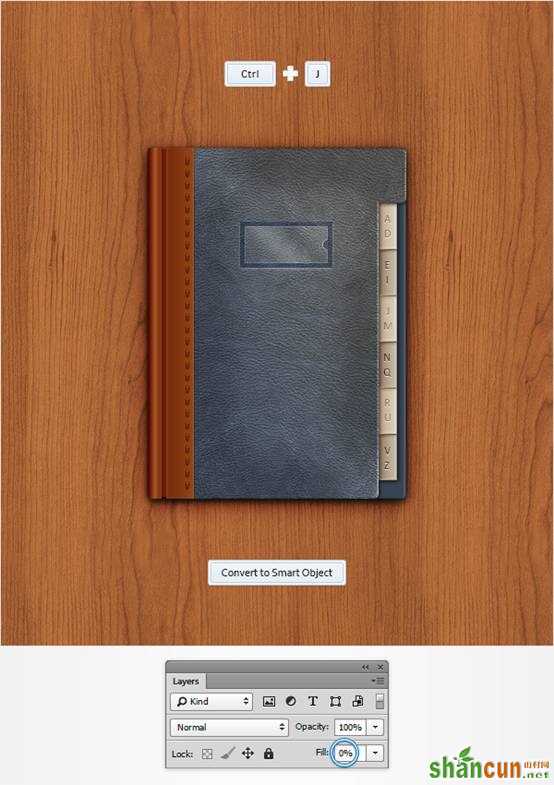
复制通讯簿文件夹,(Command/Ctrl-J)。选择新的文件夹, 转化为智能对象。将新文件夹放置到通讯簿文件夹之下,将其填充调整为 0% ,设置混合选项如下。
步骤 4
再次复制通讯簿文件夹,(Command/Ctrl-J),转化为智能对象,置于原有文件夹上方,把填充设为0%,设置混合选项如下。

步骤 5
复制上一步的智能对象,设置图层混合选项如下。
大功告成!
下图是最终结果。希望你们能享受整个过程,能在具体工作中运用起来!